9
5.8 GHz Digital Wireless Stereo Headphones
www.insigniaproducts.com
Step 2 - Charging the headphones
1
Make sure that the AC adapter is connected to the docking station and
the docking station’s LEDs (red, blue, or green round source button
and/or white source indicators) are active.
2
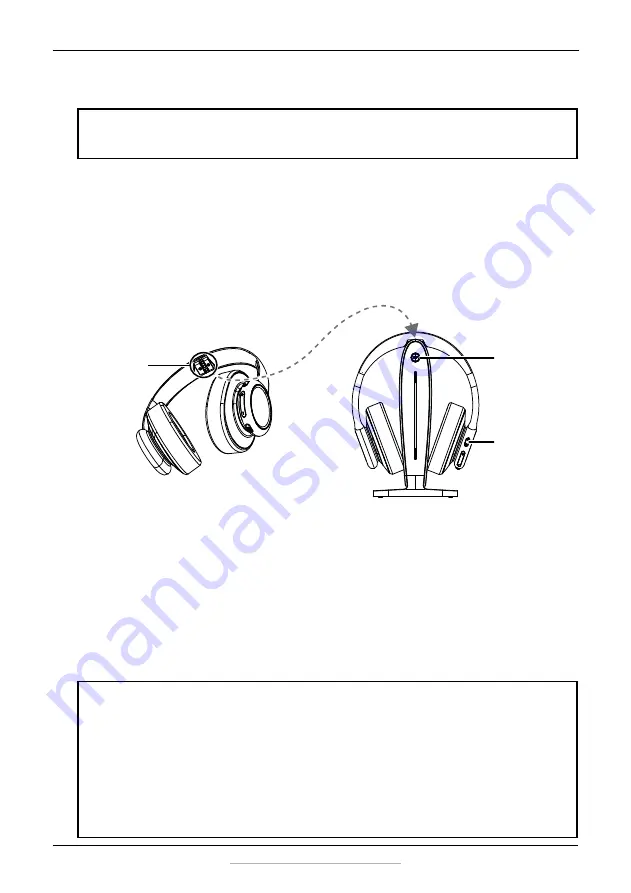
Place the headphones onto the docking station. Make sure that the
headphone charging contacts and the docking station charging pins
make contact by aligning the arrows (as shown below) when you put
the headphones in the charging station.
•
The docking station’s
Charging
indicator turns solid red to indicate
the headphones are charging. The headphones’ power/pairing
indicator also turns red.
•
When the headphones are fully charged (up to two hours), the
docking station’s
Charging
indicator turns solid green. The
headphone LED turns off.
•
When the headphone battery charge is low, the
Power/Pairing
indicator on the headphones blinks red twice every minute. The
Power/Pairing
indicator on the headphones turns solid red 30
minutes prior to the batteries being exhausted.
IMPORTANT:
Before using the wireless headphones for the first time, make sure that
the batteries are fully charged, which can take up to four hours. The docking station’s
Charging
indicator turns solid green when the batteries are fully charged.
NOTES:
• It can take up to two hours to charge the headphone batteries. When fully
charged, the headphone batteries will last up to ten hours with continuous use
(depending on the headphone volume level and distance from the docking
station.
• The headphones cannot be charged when the docking station is turned off.
• If the charge on the headphone batteries is low, the Power/Pairing indicator on the
headphones blinks red. You should charge the headphones.
• The headphones will automatically power off if the battery is not charged after
emitting a low-battery warning.
Charging pins
Charging
indicator
Power/Pairing
indicator


