background image

17

Advanced Operation

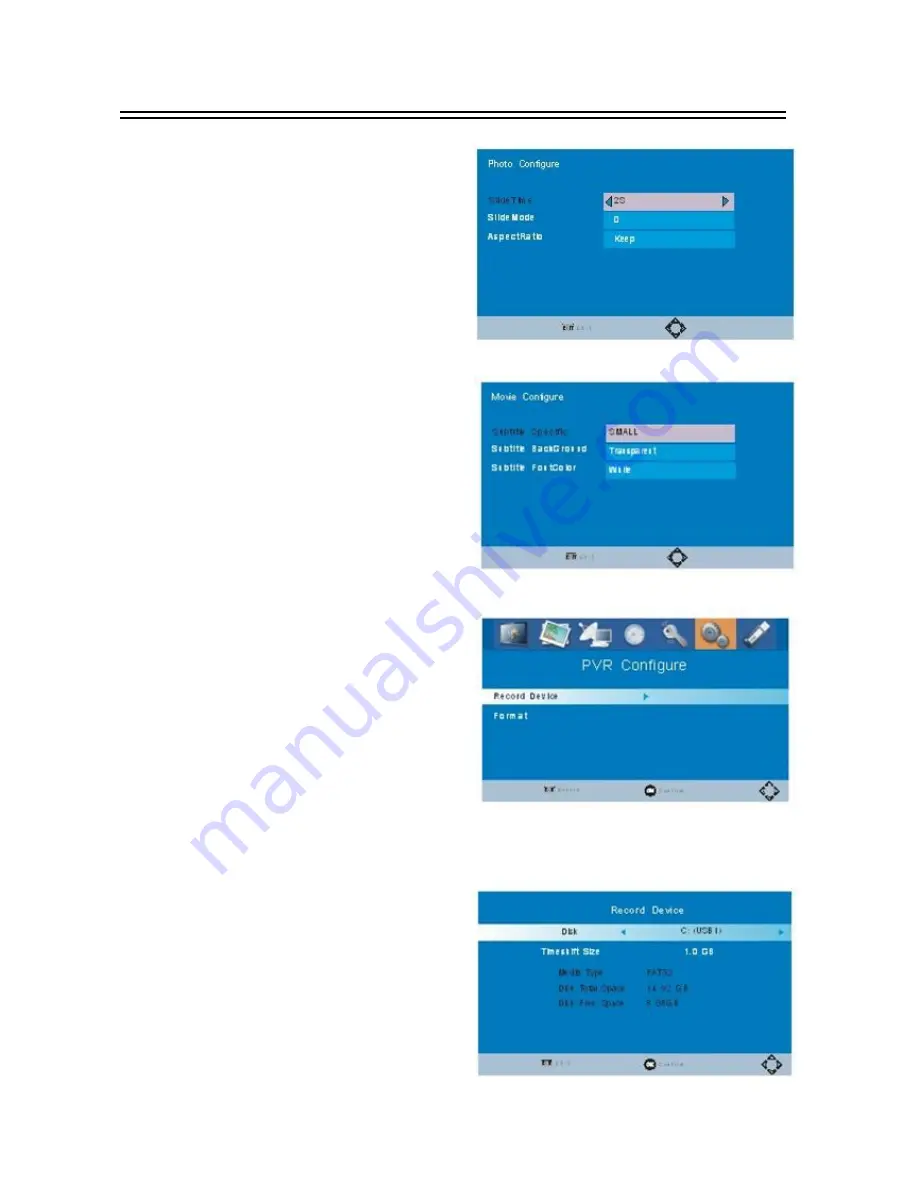
7.2 Photo Configure

Move cursor to “Photo Configure” and press

[OK] button to enter in its setup interface. Press

[EXIT] button to quit.

Slide Time

1-8 Seconds

Slide Mode

Random/0-59

Aspect Ratio

Keep/Discard

7.3 Movie Configure

Move cursor to “Movie Configure” and press

[OK] button to enter in its setup interface. Press

[EXIT] button to quit.

Subtitle Specific

Normal/Big/Small

Subtitle BG

Transparent/Grey/Yellow Green/White

Subtitle Font Color

White/Black/Red/Blue/Green

PVR Configure

Move cursor to “PVR Configure” and press

[OK] button to enter in its setup interface. Press

[EXIT] button to quit.

Record Device

Disk

Format

Format/File System

Summary of Contents for X -2008

Page 1: ...X 2008 DVB T HD Mpeg4 Receiver USER MANUAL Please read this user manual before using or connecting this product And keep it handy for future reference...

Page 2: ...eration Range of Remote Control 7 Basic connections 8 Preparation 8 Connecting TV Set 8 Connecting Amplifier or Decoder 8 Fast Installation 9 Advanced Operation 10 19 Menu Operation 10 Program 10 11 P...

Page 3: ...ic moisture is too low such as basement CLEANING Disconnect the product from the wall outlet before cleaning Do not use any aerosol products to clean the product Dust the outer surface with a cloth li...

Page 4: ...Non use Periods Switch the product to standby status or turn off the power when the product will not be used Unplug the power cord from the AC outlet when the product will be idle for a long period of...

Page 5: ...Standby Indicator 3 IR Receiver Window 4 USB Port Rear Panel 1 RF IN 2 Digital Coaxial Socket 3 HDMI Socket 4 TV SCART Socket 5 AC IN NOTES In order to avoid electric leakage and shock caused by scrat...

Page 6: ...nel list on screen Confirm selection 9 CH Skip to next channel 10 SUB T Subtitle setup 11 TEXT Show teletext information of current channel 12 AUDIO Audio channels setup 13 PREV Skip to previous 14 F...

Page 7: ...use the new and old batteries together Please remove the batteries if the remote control is not going to be used for a long period of time Otherwise it may cause electrolyte leakage and lead malfuncti...

Page 8: ...ll be distorted NOTE Users can choose any proper video output formats according to the TV socket and personal requirements Connecting TV set Figure A 1 Antenna Not including 2 TV Set Not including 3 D...

Page 9: ...auto search has been done Press OK button to display channel list use CH button to select channel and press OK button to enjoy watching If the Installation Guide does not appear 5 Press MENU button m...

Page 10: ...tionality depends on the menu that is active at press moment Please find out according to the screen 1 Program Move cursor to Program and press OK button to enter in its submenu There are 4 options wh...

Page 11: ...hing of programs 1 2 EPG Move to the submenu of EPG and press OK button to open the window of program guide If some programs are available at the moment all the relevant information will appear on the...

Page 12: ...tion PAL 1080i 720P 576P 576i NTSC 1080i 720P 480P 480i 2 3 TV Format PAL NTSC 3 Channel Search Move cursor to Channel Search and press OK button to enter in its submenu There are 4 submenus which are...

Page 13: ...bia Germany Belgium Hungary Danmark Slove nia Luxembourg Norway The default country is England 3 4 Antenna Power On Off The default status is OFF 4 Time Move cursor to Time and press OK button to ente...

Page 14: ...Persian 5 3 Audio Language English Persian 5 4 Digital Audio OFF RAW PCM 6 System Move cursor to System and press OK button to enter in its submenu There are 5 submenus which are listed below Parenta...

Page 15: ...ation Move cursor to Information and press OK button to browse information of the device Model SW Version HW Version 6 5 Software Update Move cursor to Software Update and press OK button to enter in...

Page 16: ...ect song and press OK button to play Use VOL button to adjust the volume level Photo Use CH button to select photo and Press OK button to browse Press EXIT button to quit Movie Use CH button to select...

Page 17: ...3 Movie Configure Move cursor to Movie Configure and press OK button to enter in its setup interface Press EXIT button to quit Subtitle Specific Normal Big Small Subtitle BG Transparent Grey Yellow G...

Page 18: ...ect ration Auto 4 3 Full 4 3 Pan Scan 4 3 Letter Box 16 9 Wide Screen Resolution 480i 480P 576i 576P 720P 1080i TV Format PAL NTSC Channel Search Auto Search Manual Search Country Antenna Power ON OFF...

Page 19: ...Set Password Input Old Password Input New Password Confirm Password Restore Factory Default OK EXIT Information USB Multimedia Music Photo Movie PVR Photo Configure Slide Time 1S 8S Slide Mode Random...

Page 20: ...T Terrestrial MPEG The abbreviation of Motion Picture Experts Group MPEG 2 The MPEG 2 standards are mainly used in digital TV signals Subtitles The words appear at the bottom of the screen They are u...

Page 21: ...ulation QPSK QAM16 QAM64 Transmission Mode 2K 8K Guard interval 1 4 1 8 1 16 1 32 Code rate 1 2 2 3 3 4 5 6 7 8 Video Audio Decoding Video decoding ISO IEC13818 2 MPEG2 MP ML MPEG 4 AVS H 264 Compatib...

Page 22: ...t mode of the unit is different from the mode of monitor Reset the mode No Color The video output system of the unit is different from the mode of monitor Reset the color system Image distortion at ch...

Page 23: ...or 809 West Tower Coastal City Hai De 3 road Nanshan Area Shenzhen City Guangdong Province China 809 Tel 86 755 216 79069 Mob 86 159 893 964 29 Email inpax inpax com cn Inpax china inpax com cn Web ww...

Reviews: