


B573 User Manual
Revision 1.2, Issued 5/15/08
277 · West Main Street· Niantic, CT · USA · 860-739-4468 · www.inncom.com
7
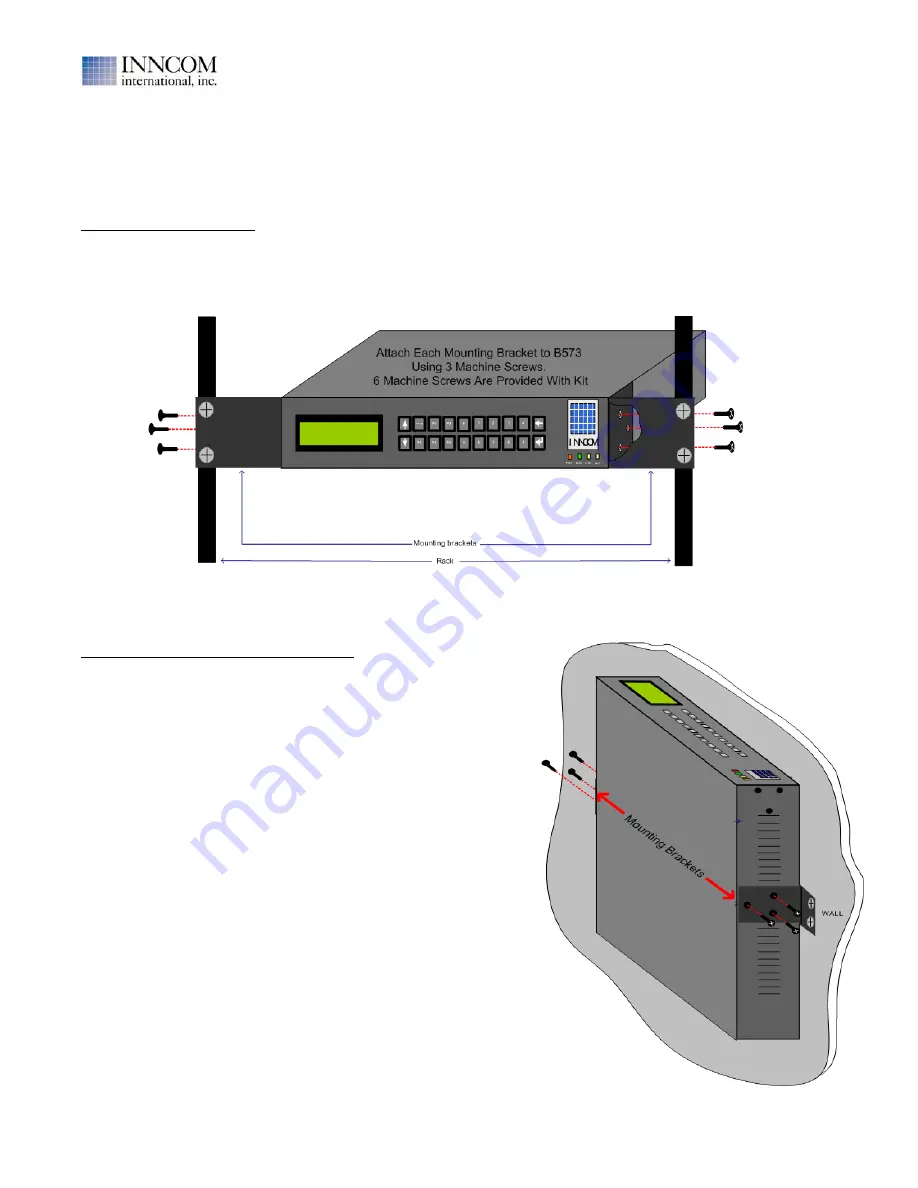
1.1 Mount the B573:
The B573 is packaged in a 1U rack mount configuration, designed for a 19" server rack. It is shipped with 2
removable mounting brackets and 6 machine screws to attach the brackets to the B573 body. The brackets
enable the installer to rack-mount or wall-mount the B573. Figure 1 shows rack-mounting the B573 and Figure 2
shows a wall-mounting the B573.
To Rack Mount the B573:
•
Attach the mounting brackets to the B573 body using the provided machine screws as shown in Figure 1.
Three tapped holes are on the left and right sides of the B573 near the front of the B573 to accept the
machine screws.
•
Insert the B573 into the Rack and attach using the mounting screws/bolts provided with the rack.
To Surface Mount (To a Wall) the B573
:
•
Attach the mounting brackets to the sides of the B573 body
using the provided machine screws as shown in Figure 2.
Three tapped holes are on the left and right sides of the B573
near the middle to accept the machine screws to attach the
mounting brackets to the B573.
•
Mount the B573 to the wall/surface using appropriate anchors
and screws.
Figure 1. B573 Rack-Mounted, Front View
Figure 2. B573 Wall-Mounted, Side View