background image


Port 

a DC12V JACK port   
a RJ45 network port 
two USB A HOST port supporting USB2.0 
a USB B DEVICE port supporting USB2.0 

Power   

Every USB HOST output:    5.0VDC 0.5A   
Charge output:    5.0VDC 2.0A 
Power adapter: input 100-240V AC, 50/60Hz; output 12V DC 3.33A   

Size and Weight 

Size

193.8mmx89mmx38.6mm 

Net Weight

0.20kg 

Gross Weight

0.70kg 


2.2 Environmental Conditions   

Environmental conditions for running, storing and delivering the product


Temperature 

Running   

0

℃~

40


Storage and Delivery 

-20

℃~

70


Humidity 

Running 

10

%~

90


Storage and Delivery 

5

%~

90

%(

40

℃)


Atmospheric pressure 

86kPa

106 k Pa; Below 2000 meters above sea 

level 


2.3 Product Functions 

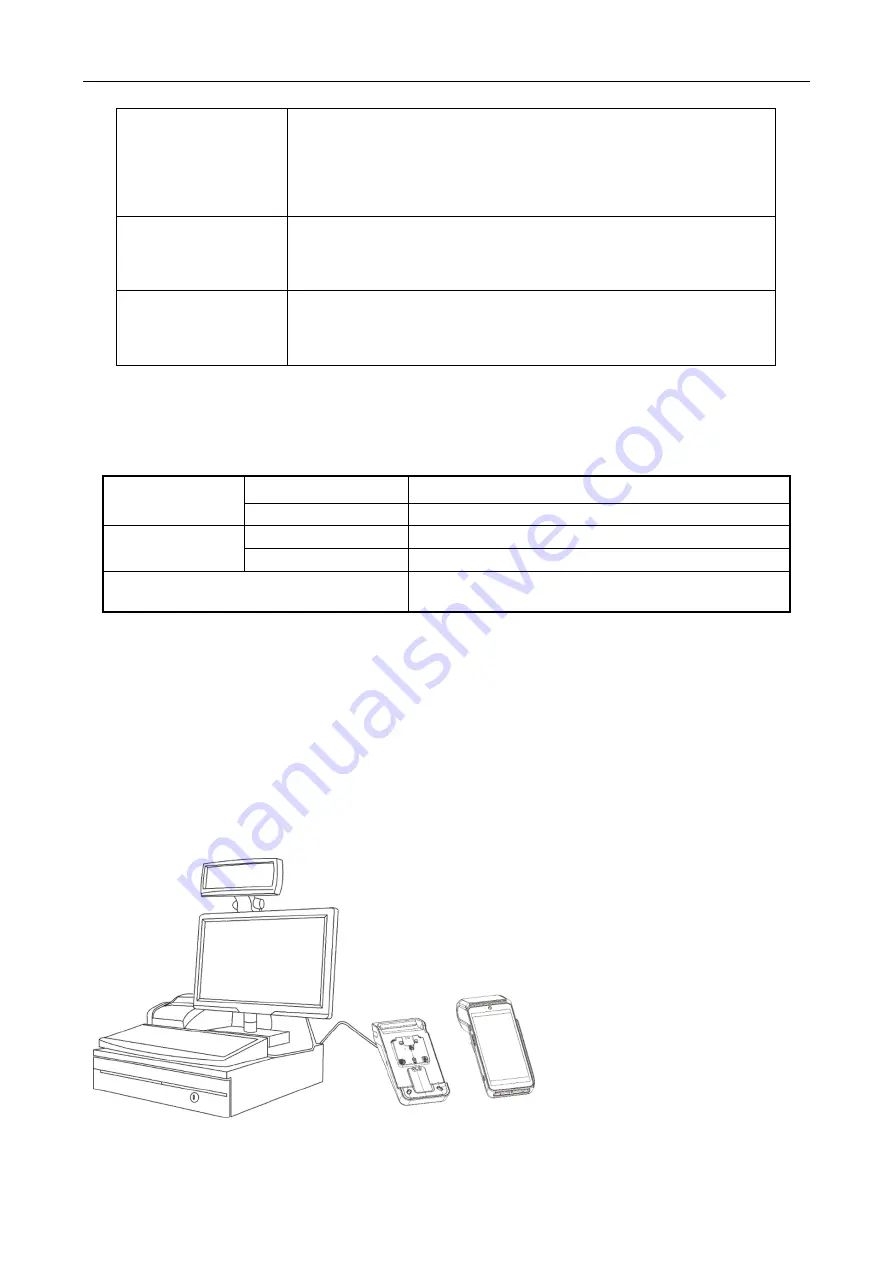
The base has three main functions as below: 


DX8000 charging

Connect the base with the power adapter, then place DX8000 on the base to get 

charged. 


Serves as extended communication ports of DX8000: Network port, USB port, etc.   


Typical  applications:  Enables  DX8000  to  communicate  with  host  computer  via  USB  port,  and  get 
Ethernet through Network port. 


Summary of Contents for AXIUM DX8000-BASE-W2

Page 1: ... ingenico com 28 32 boulevard de Grenelle 75015 Paris France T 33 0 1 58 01 80 00 F 33 0 1 58 01 91 35 Ingenico SA au capital de 47 656 332 317 218 758 RCS Nanterre 1 Model AXIUM DX8000 BASE W2 User Guide ...

Page 2: ...unctions 5 3 WiFi connection 6 3 1 Connect DX8000 to the base WiFi 6 3 2 Web Setting of base 6 3 3 Restore factory Setting 9 4 Pairing connection 9 4 1 Prepare for Base Pairing 9 4 2 Pair method 10 4 3 Unpair method 10 4 4 Ethernet Parameter Setting 11 4 5 WLAN Parameter Setting 11 4 6 Advanced Setting 12 4 7 Management Setting 12 5 Fixing of the base 13 6 FAQs 15 7 Notes 16 8 Delivery and Storage...

Page 3: ...ctual product configuration Base host Product instruction 12V 3 33A power adapter AC power cable 3 Save the transportation package and packing material for second use 1 2 Device Introduction 1 RJ45 Network Interface 2 USB TYPE A 3 USB TYPE A 4 USB TYPE B 5 Reset Button 6 DC12v JACK Power Interface 7 Network LED link active 8 Two color Indicator lights 9 Pairing Button 10 DX8000 Charging Contact 1 ...

Page 4: ... Product Technology Features 2 1 Product Technology Specifications Sequence RJ45 Signal 1 ETH_TX 2 ETH_TX 3 ETH_RX 4 NC 5 NC 6 ETH_RX 7 NC 8 NC Sequence USB TYPE A Signal 1 VBUS 5 0V 2 D 3 D 4 GND Sequence USB TYPE B Signal 1 Not connect 2 D 3 D 4 GND ...

Page 5: ...for running storing and delivering the product Temperature Running 0 40 Storage and Delivery 20 70 Humidity Running 10 90 Storage and Delivery 5 90 40 Atmospheric pressure 86kPa 106 k Pa Below 2000 meters above sea level 2 3 Product Functions The base has three main functions as below DX8000 charging Connect the base with the power adapter then place DX8000 on the base to get charged Serves as ext...

Page 6: ...rk and Internet enter Wi Fi and select the base SSID to connect step 1 4 After that DX8000 can use the RJ45 network of the base Step1 Step2 Step3 Step4 3 2 Web Setting of base The base can be set from the web Use a computer to connect the base via WiFi The web setting IP of base is 192 168 47 1 Login name is Admin Password is DX8000BASE User can get the status of base on the status page ...

Page 7: ...7 User can get and change the Ethernet parameter on the Network page User can get and change the WLAN parameter on the WLAN page ...

Page 8: ...8 User can change the operating mode enable DMZ or set static DHCP on the Advanced page User can update the firmware of base save and reload the settings change the password on the Manage page ...

Page 9: ...he base 4 1 Prepare for Base Pairing Only one DX8000 can use the USB ports of the base at the same time If the red indicator light is on it indicates the base is available for pairing If the green indicator light is on it indicates the base is successfully paired If the base is to be paired with another DX8000 long press on the Pairing button to clear the pairing record When the red indicator ligh...

Page 10: ... base via chapter 3 1 Click Settings menu on DX8000 and then click Base input the web password Step1 Click the grey button beside the SSID ING2 4G_XXXXXXX to pair Step2 After pairing we can check the ports of base in the menu Step3 Step1 Step2 Step3 4 3 Unpair method Only the paired DX8000 could be unpaired with the base When DX8000 unpairs the base the base will change its conditions to unpaired ...

Page 11: ...he WAN parameter Enter LAN Setting to get and set the LAN parameter Step 1 Step 2 4 5 WLAN Parameter Setting Enter WLAN menu Step1 AXIUM DX8000 BASE W2 has 2 4G WLAN and 5G WLAN so we can click 2 4GHz WLAN to set 2 4G parameter and click 5GHz WLAN to set 5GHz WLAN Step2 We can set channel RF power band width and get WLAN MAC on the menu Step3 4 ...

Page 12: ... base Chart 1 In operating mode we can set the base work in different mode Chart 2 We can set DMZ Chart 3 and add static DHCP Chart 4 Chart 1 Chart 2 Chart 3 Chart 4 4 7 Management Setting In management menu we can upgrade the firmware of base First we use software manager to install the wifidockfirmware apk in DX8000 as follow ...

Page 13: ...base In some scenes we want to fix the base and the DX8000 to the table The fixing structure is not standard configuration We need to buy it from the agent Installation procedures as below First fix the space block on the table with screws Second fix the Base Fixing structure on the space block with three screws Third put the base on the structure to lock it Fourth fix the Base Fixing structure on...

Page 14: ...14 If we want to unfix the base and DX8000 we can use screwdriver to push the area of the structure to unfix them ...

Page 15: ...d to the base Solution Only one DX8000 can be paired to the base at the same time The paired DX8000 may not be this one We can pair this DX8000 to the base according to Q4 Q3 Device plugged in USB port cannot be recognized Cause The USB port only supports for products of company such as the scanning gun e g BR200 B scanning box e g DCS20 E830MIS and USB devices of serial ports such as CH34x PL230 ...

Page 16: ... heat source cold source window or air inlet 9 Power Adapter The base can only be connected to the adapter which is provided with AXIUM DX8000 BASE W2 WARNING The power adapter provided is specially designed for ingenico AXIUM DX8000 BASE W2 Do not use any other power supply The use of a power supply with apparently similar voltage current characteristics may damage your terminal ATTENTION L adapt...

Page 17: ...ur in a particular installation If this equipment does cause harmful interference to radio or television reception which can be determined by turning the equipment off and on the user is encouraged to try to correct the interference by one or more of the following measures Reorient or relocate the receiving antenna Increase the separation between the equipment and receiver Connect the equipment in...

Page 18: ...ith minimum distance 20cm between the radiator your body This transmitter must not be co located or operating in conjunction with any other antenna or transmitter Le rayonnement de la classe b repecte ISED fixaient un environnement non contrôlés Installation et mise en œuvre de ce matériel devrait avec échangeur distance minimale entre 20 cm ton corps Lanceurs ou ne peuvent pas coexister cette ant...

Page 19: ... information contained therein is held responsible to ingenico for the confidentiality of that information Care has been taken to ensure that the content of this document is as accurate as possible ingenico however declines any responsibility for inaccurate incomplete or outdated information The contents of this document may change from time to time without prior notice and do not create specify m...

Reviews: