


1B
MFD PARTS AND HARDWARE
3B
PARTS
4B
WHITE / PLATINUM FRAME PARTS
Loop
Upright
Stabilizer
Base
Tube
Top Beam
L/H Corner Bracket (2)
R/H Corner Bracket (2)
Upper Pulley Bracket
L/H Pivot Arm
R/H Pivot Arm
L/H
Arm
Seat
Support
Back
Support
R/H Arm
Plate (2 hole)
8B
BLACK FRAME PARTS
L/H Cam
R/H Cam
9B
CABLES AND PULLEYS
MFD Cable
4 ½” Pulleys (3)
10B
MISCELLANEOUS
Guide Rods (2)
Lube
Weight Stack Cushions (2)
Seat
Pad
Back
Pad
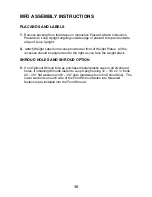
Instruction
Placard
Weight
Labels Manual Top
Weight
5-5# Weight Plates
10-10# Weight Plates
5-15# Weight Plates
Weight Selector Stem
3/4” Threaded Shaft (2)
Weight Pin with Lanyard
Flange Bearings (4)
3