background image

Configuration


Page 5 of 20
Multi Connectivity Box | EN

Placing QR codes on your devices

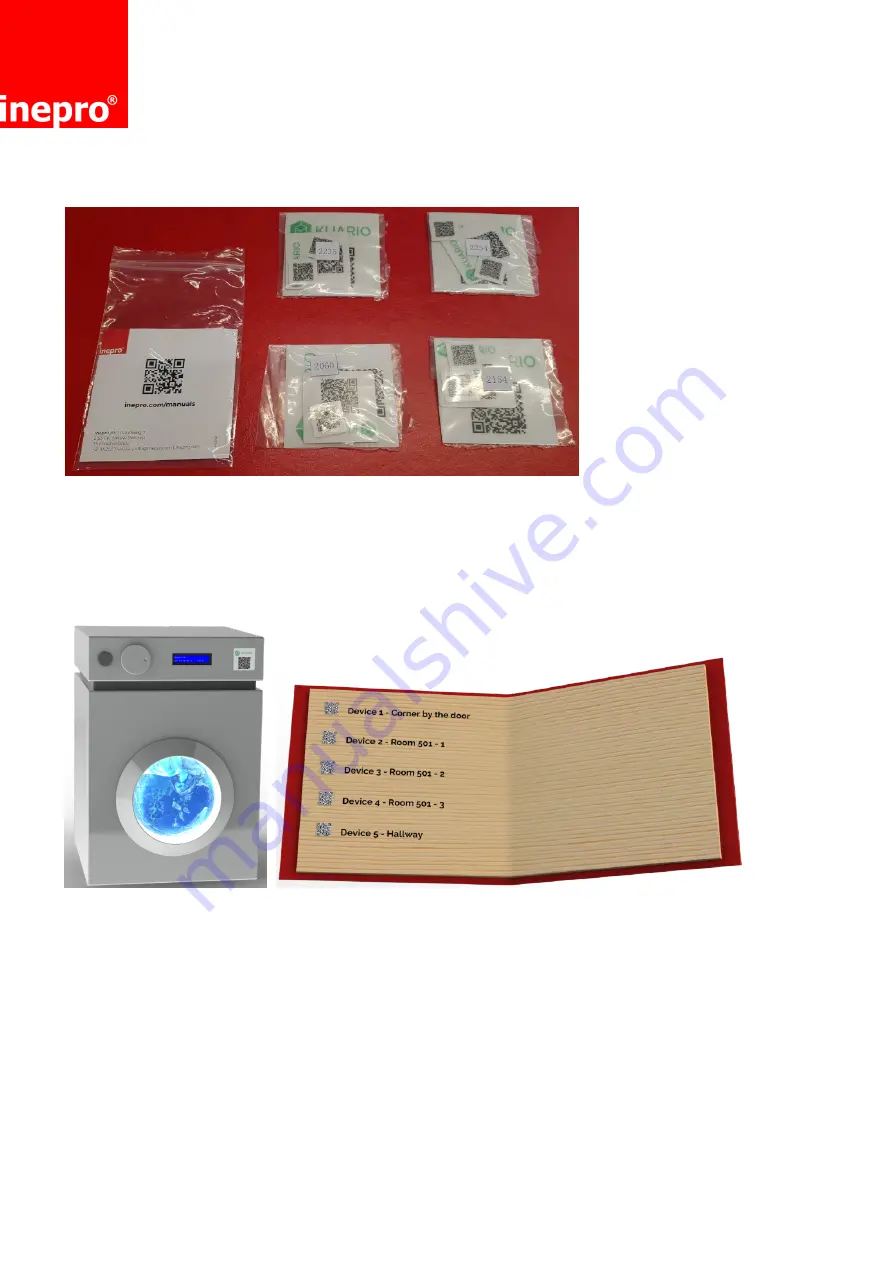
For each of the devices (maximum 4 per MCB) that you want to connect with the MCB (Multi
Connectivity Box) take a foil (a hard plastic sticker) set, and place a suitable foil on the device. The image
below shows a foil on a washing machine. One of the smaller foils can be used in a folder or such to
always have the QR of the devices at hand at a location that not necessarily is the location of the device.
Devices may differ in type, brand or functionality.


Summary of Contents for Multi Connectivity Box

Page 1: ...n on how to do that please read it carefully Due to continuous product improvements this manual is subject to changes without notice We strongly recommend you read the license agreement to fully under...

Page 2: ...in the preparation of this document the publisher and the author assume no responsibility for errors or omissions or for damages resulting from the use of information contained in this document or fr...

Page 3: ...ulti Connectivity Box Table of Contents Introduction 1 Installation 2 1 2 Hardware Configuration 4 Appendices 14 1 14 Appendix I Connection to I O 2 0 Appendix II Prices 3 0 Appendix III Basic Templat...

Page 4: ...This device is in conformity with the EMC directive and low voltage directive End of life directives Inepro is paying a lot of attention to environmentally friendly production Your new device contain...

Page 5: ...and check the status of up to four devices Not only that it will also enable you using KUARIO to make those devices or their services authenticable and payable So consider to leave those key and or c...

Page 6: ...ce will also have the possibility to connect an optional input wire that is used as a signal that the device is busy In these examples the yellow and green wires are used for this input aka busy signa...

Page 7: ...here with a black cable has the network cable In use function The input green yellow wire can be used you must short the two wires to indicate to the SmartConnector that the device for example the was...

Page 8: ...re information about becoming a KUARIO manager refer to KUARIO manuals online Requirements nKUARIO account with rights to create an KUARIO Outlet at your KUARIO Site nKUARIO product template with prod...

Page 9: ...ulti Connectivity Box take a foil a hard plastic sticker set and place a suitable foil on the device The image below shows a foil on a washing machine One of the smaller foils can be used in a folder...

Page 10: ...ed to that device As said in the requirements these products must be available before you start this process You can add them right now if this has not been done yet Furthermore the must be linked to...

Page 11: ...f this KUARIO Outlet 7 Give it a recognisable name preferably the same name as you gave the Outlet in step 1 Click Next 8 Select the correct KUARIO Product Template with products for the devices linke...

Page 12: ...is now listed under you site s Outlets Is my KUARIO MCB Outlet linked or not yet linked to an MCB MCB Outlet not yet linked A linked MCB Outlet Link your devices to the MCB Outlet Configure the setti...

Page 13: ...ervice tab if you do not have the service tab you might not have the correct rights contact our support 3 Make sure you have the correct Site selected under Sites and then proceed to Outlets 4 Click o...

Page 14: ...EN 5 In the MCB Outlet go to MCB Settings 6 Go to the device that you want to link and select the number of that device from the list Refer to the image above to see which device is which 7 Click Add...

Page 15: ...is process for all your devices maximum four per MCB Outlet Link products to the MCB Outlet If you are using our KUARIO activation Service letting KUARIO execute the configuration process and have no...

Page 16: ...o a KUARIO product Template which in turn must be linked to the KUARIO MCB Outlet If these steps have been omitted you will get no items in the process below 1 Open the KUARIO Manager and log in 2 Go...

Page 17: ...ur devices configured Each device should have a Connection and a Item 6 Click Back to leave this menu 7 If you run into any trouble during this process please contact our support Your devices should n...

Page 18: ...signment Input 1 through 4 Sauro CTF0800T Pin 1 input 1 Pin 2 input 1 Pin 3 input 2 Pin 4 input 2 Pin 5 input 3 Pin 6 input 3 Pin 7 input 4 Pin 8 input 4 Power Sauro CTF02008 Pin 1 12 36 V DC Pin 2 0...

Page 19: ...puts By short circuiting the input 1 with the input 1 the status of input 1 has been changed The input triggers when the current is or exceeds 0 6 mA The maximum current can be 1 5 mA The maximum resi...

Page 20: ...onnectivity Box EN Outputs The connections on the relay outputs The relays will short circuit the output when the relay is closed The relays are set to give a pulse not a signal that is the relay will...

Reviews: