


ADC-A12C31 Operator’s Handbook Rev. A
P. 25
USB Device Drivers
A USB type B port has been included on the rear cover of the clock to provide a means of configuring
the clock via software and to allow for firmware upgrades for either firmware corrections or future
product enhancements.
To utilize the USB port, connect a USB type A to USB type B cable from the computer to the clock.
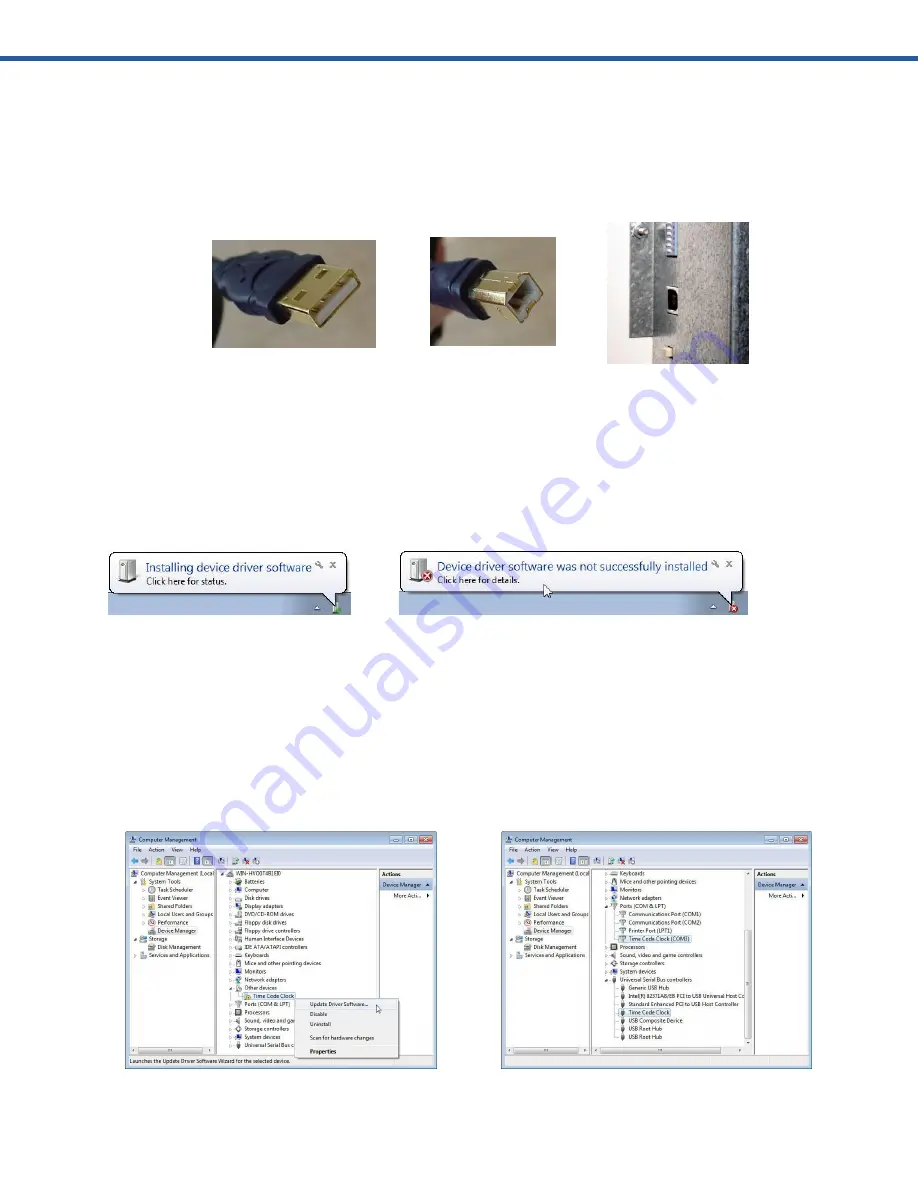
USB A cable end
(to computer)
USB B cable end
(to clock)
USB B port on clock
Installing the Device Driver
First, power-on the ADC-A12C31. Next, use a USB cable (not supplied) and connect to the PC.
The Windows Plug and Play manager will detect a new USB device and request device drivers. If
Windows is unable to install the USB device drivers, the system will send an alert.
Open “Device Manager” and locate “Time Code Display” listed under “Other devices”.
Right click the device and click on “Update Driver Software”. This will need to be
performed for both USB device drivers (i.e. COM and BUS).
There are two locations for the USB Device Driver:
1.
C:\ Program Files\Imagine Communications Corporation\ ADC-A12C31\Drivers\
2.
CD labeled, “Clock Products” X:\ADC-A12C31\Drivers\
Note: “X” is the CD/DVD drive letter of your Windows PC.
Device Manager
Device Manager with correct USB Device Driver
Summary of Contents for ADC-A12C31
Page 5: ...ADC A12C31 Operator s Handbook Rev A P 4 This page intentionally left blank...
Page 14: ...ADC A12C31 Operator s Handbook Rev A P 13 This page intentionally left blank...
Page 18: ...ADC A12C31 Operator s Handbook Rev A P 17 This page intentionally left blank...
Page 32: ...ADC A12C31 Operator s Handbook Rev A P 31 This page intentionally left blank...