10
4.2 Receiver settings
With the
Main Menu
on the screen, use the
▲
/
▼
buttons to highlight the
DTT
option. Press OK. The
DTT
menu will appear :
▲▲▲▲▲
Receiving DTT
- Channel searching
- Channel list
- Configuration
- Factory settings
- Receiver version
- Software update
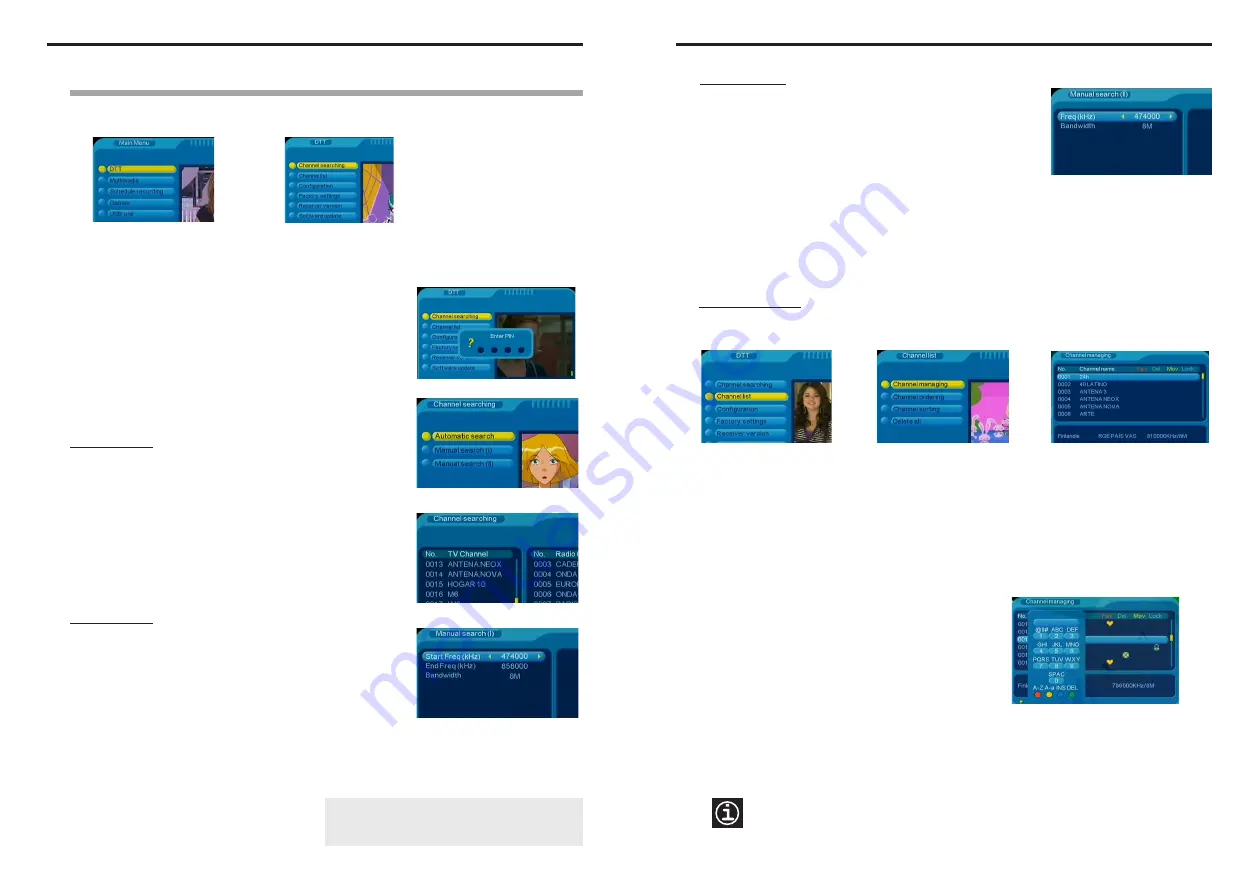
4.2.1 Channel searching
In the
DTT
menu, highlight
Channel searching
and press OK. You will
be asked to enter the PIN number; enter it using the number buttons
on the remote control (by default, the PIN number is "0000", and you
can change it via the
PIN number
option in the
Configuration
menu,
see page 17). The
Channel searching
menu appears, which will help
you to create the list of channels. There are 3 ways to proceed:
1) Automatic search
2) Manual search (I)
3) Manual search (II)
Manual search (I)
This option as well the next one –Manual search (II)– are intended for
expert users of DTT. Use the
▲
/
▼
buttons to highlight the
Manual
search (I)
option and press OK. The 'Manual search (I)' page will
appear; it allows to search the channels by frequency bands. Most
countries broadcast DTT only in UHF band. Before starting the
search, you should enter, if they have not already been entered, the
following values :
This option can be used when, for whatever reason, all of the channels have been deleted from the channel list
or when you wish to add an additional channel to the current list.
Automatic search
The
SMARTmini
receiver makes an intelligent search for all the DTT
channels broadcasted over the country where you are installing it (the
country you selected in the "Start installation" screen). Use the
▲
/
▼
buttons to highlight the
Automatic search
option and press OK. The
'Channel searching' page will appear, and at once the search starts –if
you want to stop it at any moment press EXIT–. The receiver will detect
all the multiplex (digital channels) received via the antenna and will
automatically create the channel list. When the search ends, the screen
returns to the
Channel searching
menu. Press EXIT to return to the
DTT menu. To go to the Main Menu, press EXIT again.
Start Frequency : 474000
End Frequency :
858000
Bandwidth :
8M
Start Frequency :
177500
End Frequency :
226500
Bandwidth :
7M
Start Frequency :
529500
End Frequency :
816500
Bandwidth :
7M
ONLY FOR AUSTRALIA
Press OK to start the search. The receiver will detect all the multiplex
(digital channels) existing in the selected band and will automatically
create the channel list. When the search ends, the screen returns to
the
Channel searching
menu.
If another band must be scanned, carry out a new
search by entering the corresponding frequency
values. Then press EXIT to return to the DTT menu.
To go to the Main Menu, press EXIT again.
11
Settings
Manual search (II)
This type of search is indicated to add a new multiplex to the current
channel list. Open the ‘Manual search (II)’ page as explained for the
Manual search (I). Here you must enter the frequency and the
bandwidth of the multiplex you wish to search for, and then press the
OK button. Afterwards, the screen returns to the
Channel searching
menu each time, ready to search for another multiplex.
4.2.2 Channel list
In the DTT menu, highlight the
Channel list
option and press the OK button. The screen will change to the
Channel list
menu. This menu allows you to
a)
manage,
b)
order,
c)
sort and
d)
delete the channels found
in the search. You can change from television channels to radio channels by pressing the TV/Radio button
on the remote control.
a) Channel managing
Using the
▲
/
▼
buttons, highlight the
Channel managing
option and press OK. The ‘Channel managing’
screen will appear, showing the list of channels found in the search :
Press the OK button for the marks or actions carried out to
take effect.
Press the EXIT button to leave the ‘Channel managing’ screen and return to the
Channel list
menu. If any
channel was marked as "deleted", a confirmation message will appear. Use the buttons to select
"Yes" or "No" and press OK to finish. Press EXIT to return to the DTT menu. To go to the Main Menu, press
EXIT again.
▲▲▲▲▲
The page offers five options:
Favourite channel
(Fav),
Delete channel
(Del),
Move channel
(Mov),
Lock
channel
(Lock) and
Rename channel
. Using the
▲
/
▼
buttons, select the channel in question and then
press the corresponding remote control button :
- press the button to
rename
the channel. A virtual
keyboard will open on the screen. Use the number and
coloured buttons to enter the new channel name. The
editing functions that the coloured buttons carry out are
indicated at the bottom of said keyboard.
▲
The abbreviations Fav, Del, Mov and Lock at the top of the ‘Channel managing’ page are the same colours
as the buttons that are used to carry out the actions represented by these abbreviations. This information is
also available in the window that opens when the INFO button is pressed. Press EXIT to close this window.
- press the red button to mark the channel as a
favourite
;
- press the green button to mark the channel as
deleted
;
- press the yellow button to
move
the channel to another position on the list. Use the
▲
/
▼
buttons to
move it to the desired position and then press OK;
- press the blue button to mark the channel as locked (
parental lock
). You will be asked for the PIN
number ("0000" by default);
/
▲
▲
▲▲▲▲▲


