ENGLISH
INPUT
AUTO
MENU
Vol
Down / Up
POWER
Top
CONTROLS AND CONNECTORS
Top
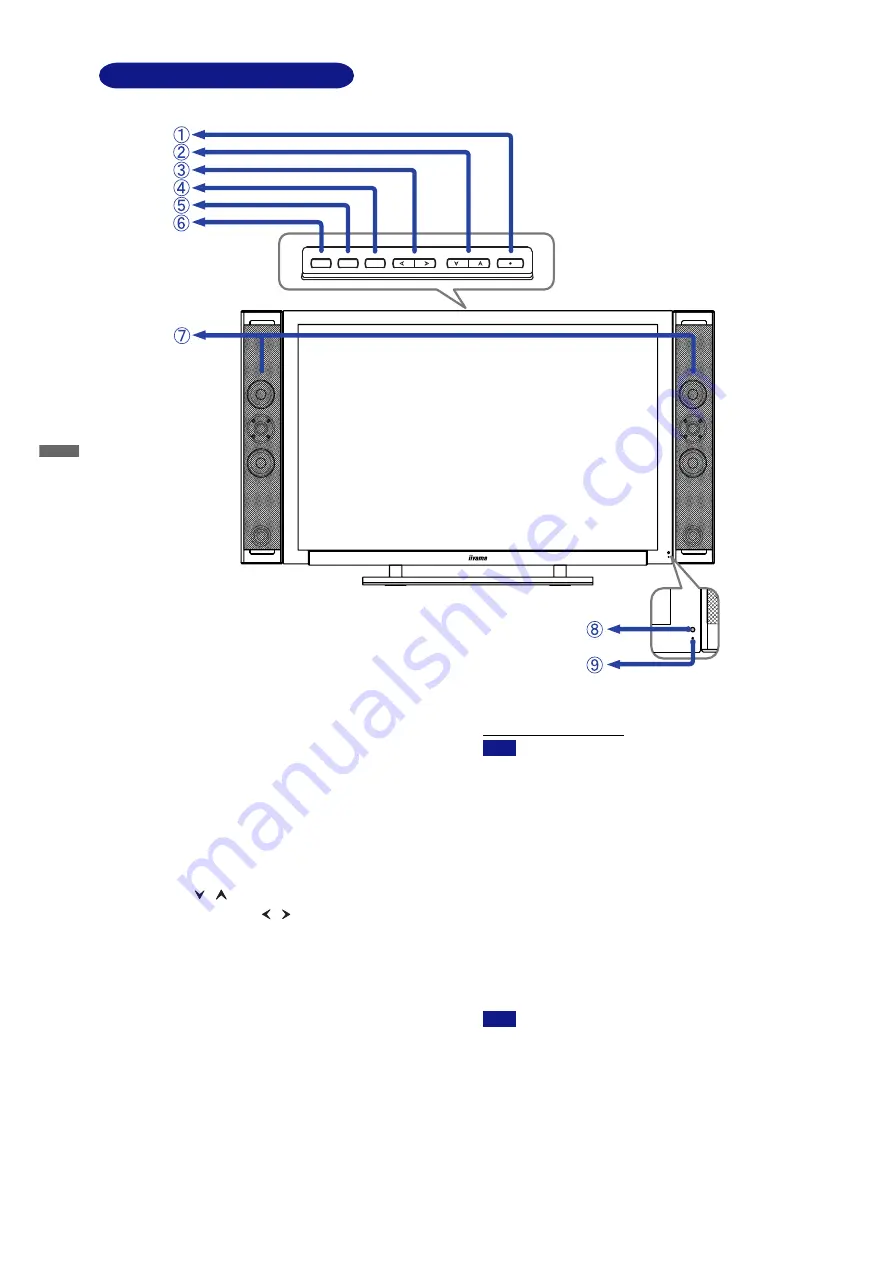
A
Power Switch
The monitor saves the power ON / OFF setting before the
Power Cable is disconnected.
If the monitor is OFF when connecting the Power Cable,
press the Power Switch to turn ON the monitor. The Power
Indicator turns to blue.
If the monitor is ON when connecting the Power Cable,
the Power Indicator turns to blue. Press the Power Switch
again to turn OFF the monitor.
B
Select Button ( /
)
C
Vol: Volume Control Button ( / )
D
Menu Button
The menu page appears or disappears on successive presses
of the Menu Button.
E
Auto Button (Auto Set-up)
*
/ Return Button
Adjust H Position, V Position, Clock and Phase automatically by
pressing for one second or more when the menu page is not
displayed.
Front
G
Speakers
H
Power Indicator
Blue:
Normal operation
Orange: Power Management
The monitor enters into power management
mode which reduces the power consumption
to less than 5W when receiving no horizontal
and/or vertical sync signal.
I
Remote Sensor
Front
4 BEFORE YOU OPERATE THE MONITOR
n
For best results, use the Auto Set-up in conjunction
with the adjustment pattern. (See page 12 for SCREEN
ADJUSTMENTS.)
n
The screen becomes dark for a while during the
adjustment.
n
Go back to the previous screen when the menu page
is displayed on the screen.
F
Input Button (Input Signal Select)
Switch PC Analog or PC Digital input.
NOTE
*
Available for PC Analog input only.
Auto Button / Return Button
NOTE
All manuals and user guides at all-guides.com
all-guides.com


