background image

2

3

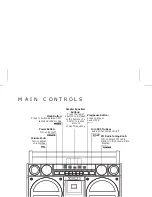
M A I N   C O N T R O L S

Power Button: 

Turn unit on/off

Play/pause Button: 

Press to play or

pause iPod

FM Radio Tuning Knob: 

Turn to select FM  radio

station; in iPod mode, dims

 display

Graphic Equalizer

 Buttons: 

 Press the top of

 a button to increase, 

or the bottom of a

  button to reduce

 amount

 of each frequency.

Volume knob:

Turn to adjust

volume level

Turn SRS TruBass

 audio enhancement on/off

Mode Button:

Press to switch between FM 

radio and iPod modes

Dock

T H E   D I S P L A Y    

By default, the display shows the five bands of the graphic equalizer as 
the frequencies change during audio playback.


The display will change to show changes in volume, EQ, mode, FM 
tuning, etc. 

EQ display

FM display

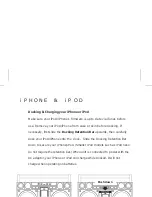
Docking retention bar

For battery operation, place unit upside down to access the battery 
compartment. Press down directly on arrow with thumb and slide the 
battery compartment cover to release it. If replacing existing batteries, 
remove and dispose of properly. Insert 6 fresh “D” alkaline batteries with 
polarity (+ or –) as shown. Replace battery compartment door.
Note: unit will not charge iPod/iPhone while operating on batteries.

Installing and adjusting the carry strap
Insert the folded end of the strap under the strap pin and pull up, then 
thread this end through the strap adjuster slide. Pull on strap adjuster to 
adjust for proper fit and comfort.
Make sure the strap is securely fastened. Repeat on opposite end of 
unit.

USA-Nov 11, 2011

Summary of Contents for IP 4 SRS TRUBASS

Page 1: ...iP4 IB US English Booklet style 12 pages Size 102 x 150 mm Mat l 128gsm matte finish paper Color Black text on white background Nov 8 2011 updated the battery drawing WARRANTY ...

Page 2: ...is and other iHome products please visit www ihomeaudio com G E T T I N G S T A R T E D This unit can be operated using the included AC adaptor or with 6 D batteries for portable use not included For AC operation place unit on a stable surface Plug the power adaptor into the AC jack on back of the unit and the other end into a wall socket The unit will charge docked iPhone or iPod while connected ...

Page 3: ...de the battery compartment cover to release it If replacing existing batteries remove and dispose of properly Insert 6 fresh D alkaline batteries with polarity or as shown Replace battery compartment door Note unit will not charge iPod iPhone while operating on batteries Installing and adjusting the carry strap USA Nov 11 2011 ...

Page 4: ...urn to select FM radio station in iPod mode dims display Graphic Equalizer Buttons Press the top of a button to increase or the bottom of a button to reduce amount of each frequency Volume knob Turn to adjust volume level Turn SRS TruBass audio enhancement on off Mode Button Press to switch between FM radio and iPod modes ...

Page 5: ...ecessary first slide the Docking Retention Bar upwards then carefully dock your iPod iPhone onto the dock Slide the Docking Retention Bar down to secure your iPhone iPod Smaller iPod models such as iPod nano do not require the retention bar When unit is connected to power with the AC adaptor your iPhone or iPod will charge while docked It will not charge when operating on batteries Push down ...

Page 6: ...on on the unit to turn it on Press and release the Mode Button as needed to access iPod mode Turn the aux device on and press play Adjust volume on your audio device and the unit as needed Do not play a line in audio device and a docked iPhone or iPod at the same time or you will hear both sources F M R A D I O Press and release the Mode Button as needed to access FM Radio mode Turn the FM Radio T...

Page 7: ...unit The remote comes with one CR2032 battery already installed Remove the battery tab to use the remote Play Pause Button Switches iPhone or iPod in dock between Play and Pause modes Power Button Turns unit ON or OFF Lower Raise Volume Raises or lowers volume of the unit Mode Button Cycle through modes iPod and FM radio ...

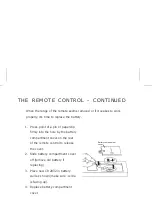
Page 8: ...ttery 1 Press point of a pin or paperclip firmly into the hole by the battery compartment cover on the rear of the remote control to release the cover 2 Slide battery compartment cover off remove old battery if replacing 3 Place new CR2032 in battery well as shown make sure side is facing up 4 Replace battery compartment cover Battery compartment cover ...

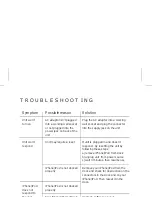
Page 9: ... docked properly iPhone iPod is not docked properly Plug the AC adaptor into a working wall socket and plug the connector into the supply jack on the unit If unit is plugged in and doesn t respond try resetting the unit by following these steps a remove iPhone iPod from dock b unplug unit from power source c wait 3 minutes then resume use Remove your iPhone iPod from the dock and check for obstruc...

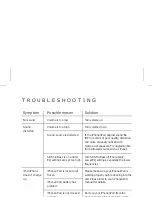
Page 10: ...iPhone iPod is not docked Turn volume up Turn volume down If the iPhone iPod original sound file MP3 is old or of poor quality distortion and noise are easily noticed with high power speakers Try upgrading file from a trusted source such as iTunes Turn SRS TruBass off if necessary Lower EQ settings especially the lower frequencies Please make sure your iPhone iPod is working properly before dockin...

Page 11: ... unit should be situated away from heat sources such as radiators heat registers stoves or other appliances including amplifiers that produce heat 4 Power Sources The unit should be connected to a power supply only of the type described in the operating instructions or as marked on the appliance 5 Power Cable Protection Power supply cables should be routed so that they are not likely to be walked ...

Page 12: ... distance between the equipment and the radio or TV Use outlets on different electrical circuits for the equipment and the radio or TV Consult your dealer or an experienced radio television technician if the problem still exists Modifying or tampering with your system s internal components can cause a malfunction and might invalidate the system s warranty and void your FCC authorization to operate...

Page 13: ... defect or malfunction upon delivery of this product to the Factory Service Center listed below The product must include proof of purchase including date of purchase The fee for service without proof of purchase is 75 00 Before returning this product for service please first replace the batteries if applicable with fresh ones as exhausted or defective batteries are the most common cause of problem...

Reviews: