background image

7

OPERATING INSTRUCTIONS

First Use

Before first use it is suggested having the appliance without bread operated with the control knob set to 
grade 3 and the lever in down position to remove the heating element protection finish. At this time, the 
appliance will smoke. This is normal. It is recommended to have a good ventilation of air. After the first 

heating, let it cool down naturally before being used again.
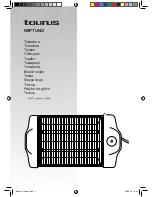
Using Your Toaster

Note:

 Make sure the crumb tray is completely positioned in place before using the toaster.

1.  Place the toaster upright on a flat, stable, heat-resistant surface. Ensure that the toaster is not 


  touching or near anything that can be damaged by heat.

2.  Plug the toaster into the power socket.

3.  Turn the Timer Set Browning Control dial to the desired browning level. 

Grades

Bread Type

1-3

Thin Bread Slice

3-5

General Bread

5

Frozen Bread

4.  Put the bread into the toasting slots and press the bread carriage lever fully down. The indicator of 
Cancel will be illuminated and toasting will begin. 

Note: The lever won’t stay down unless the toaster is connected to the electricity supply.

5.  When the toaster has finished the toasting cycle, the bread carriage lever will pop up allowing you 


  to remove the bread from the toaster. 

6.  The toasting cycle can be stopped any time before it has finished by pressing the Cancel Button.

Frozen Bread

This function allows you to toast frozen bread easily as the time is automatically altered to give you the 
same degree of browning you would get with unfrozen bread.
1.  Leave the Timer Browning Control at your usual setting. 
2.  Insert the bread slices into the slots. 
3.  Press the bread carriage lever down and then press the Defrost Button. The light of the defrost  
  button will light up to show the toasting time has been altered.

4.  When the toaster has finished the toasting cycle, the bread carriage lever will pop up allowing you 


  to remove the bread from the toaster.

IMPORTANT: Do not try to defrost frozen bread in the toaster on a low heat setting as this will 

cause water to drip into the toaster. Toasting frozen bread changes the ice into steam which escapes out 
of the slots.

Summary of Contents for IG3003

Page 1: ...SliceToaster Batch code Please read these instructions carefully before use and retain for future reference Before switching on your appliance Always check for any damage which may have been caused in...

Page 2: ...portant safety instructions 3 5 Specification 6 Appliance Overview 6 Operating Instructions 7 8 Cleaning and Maintenance 8 Troubleshooting guide 9 Fuse Replacement 10 Disposal Information 10 Igenix Wa...

Page 3: ...r and invalidate the warranty Check the voltage of the appliance matches the household voltage which is located on the rating label This appliance can be used by children aged from 8 years and above i...

Page 4: ...with wet hands as this could cause a short circuit or electric shock The use of accessory attachments not recommended or sold by the appliance manufacturer may cause injuries DO NOT use outdoors THIS...

Page 5: ...f the pad comes in contact with electrical parts DO NOT cook warm or toast rice cakes fired breads or non bread items Warning Empty the crumb tray frequently Crumbs will accumulate in the crumb tray a...

Page 6: ...CATION Product 2 Slice Toaster Voltage 220 240V Frequency 50 60 Hz Wattage Power 800 W Settings 5 Browning Levels 6 5 2 1 4 3 1 Timer Browning Control 2 Stop Button 3 Carriage Lever 4 Defrost Button 5...

Page 7: ...ncel will be illuminated and toasting will begin Note The lever won t stay down unless the toaster is connected to the electricity supply 5 When the toaster has finished the toasting cycle the bread c...

Page 8: ...to achieve uniform color we recommend that you should wait minimum 30 seconds between each toasting so that color control can reset automatically When toasting more than one slice of bread use slices...

Page 9: ...able to resolve the issue using the guide please ring our Customer Service Department on 01473 271 272 Please have the model code batch number and purchase information available The toaster is not bro...

Page 10: ...uman health and the environment The crossed out wheeled bin symbol on the product reminds you of your obligation that when you dispose of the appliance it must be separately collected Consumers should...

Page 11: ...11...

Page 12: ...12...

Page 13: ...13...

Page 14: ...over accessories or consumable parts that require replacement under normal use This includes shelving dials filters belts and trays etc In the unlikely event of a breakdown please refer to the Trouble...

Page 15: ...ble on our website www igenix co uk To register your product please complete all sections of the form below and return to us at the following address lgenix 38 Bluestem Road Ransomes Europark Ipswich...

Page 16: ...claimer Igenix operate a policy of continual improvement and development We therefore reserve the right to change alter the specification and appearance of our appliances without prior notice All diag...

Reviews: