


SAILORPC-12A Panel PC
Page 16
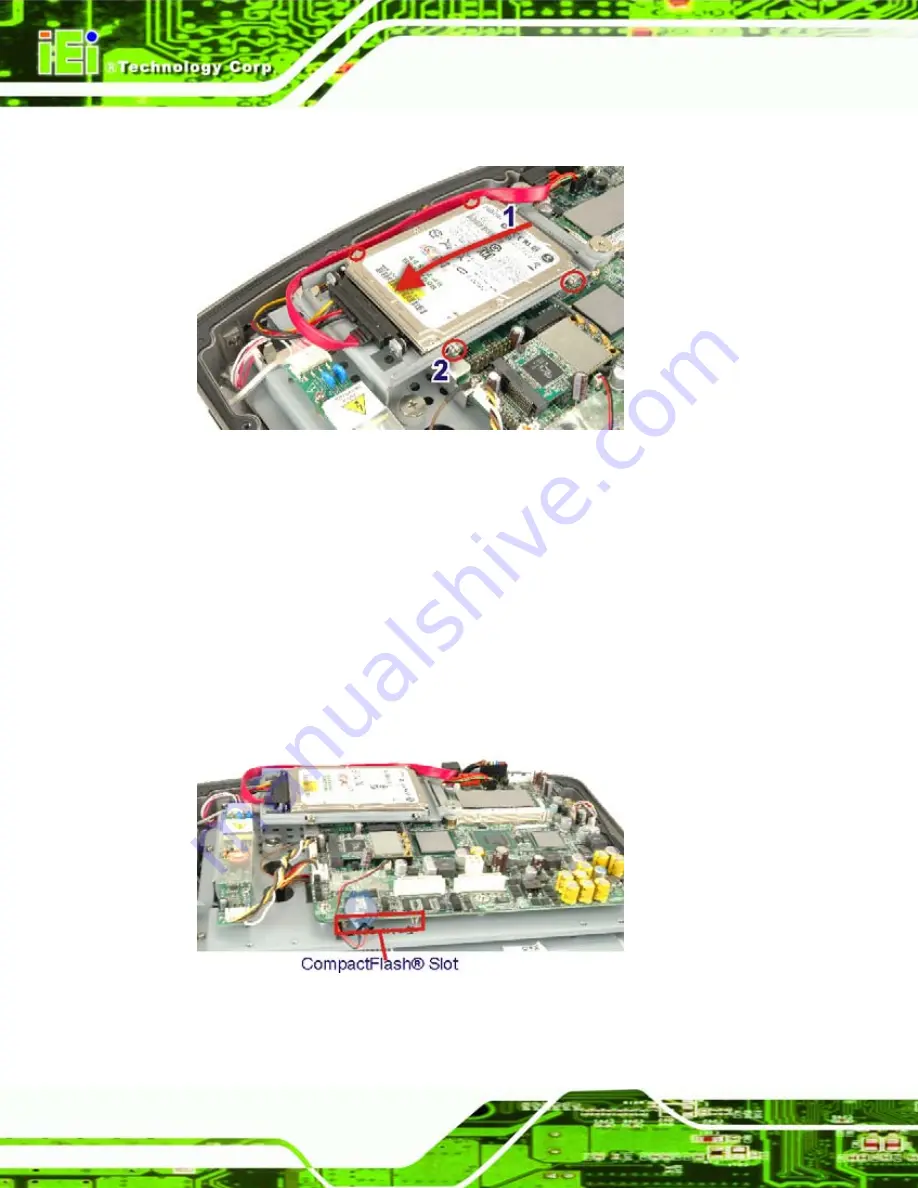
Step 3:
Slide the SATA hard drive into the slot indicated below.
Figure 3–3: HDD Installation
Step 4:
Fasten the screws.
Step 5:
Make sure the outer seal is seated properly, then replace the cover.
S
te
p
0
:
3.3 CompactFlash® Installation
This section covers the installation of the CompactFlash® card.
Step 1:
Remove the back cover as shown in the hard drive installation above.
Step 2:
Install the CompactFlash® card in the slot indicated below.
Figure 3–4: CompactFlash® Install
Step 3:
Replace the cover and fasten the screws.
Summary of Contents for SAILORPC-12A
Page 10: ......
Page 11: ...SAILORPC 12A Panel PC Page 1 Chapter 1 1 Introduction ...
Page 17: ...SAILORPC 12A Panel PC Page 7 1 7 Dimensions Figure 1 5 Dimensions units in mm ...
Page 18: ...SAILORPC 12A Panel PC Page 8 Chapter 2 2 Unpacking ...
Page 23: ...SAILORPC 12A Panel PC Page 13 Chapter 3 3 Installation ...
Page 39: ...SAILORPC 12A Panel PC Page 29 Chapter 4 4 OSD ...
Page 42: ...SAILORPC 12A Panel PC Page 32 Chapter 5 5 BIOS Setup ...
Page 86: ...SAILORPC 12A Panel PC Page 76 Chapter 6 6 System Maintenance ...
Page 92: ...SAILORPC 12A Panel PC Page 82 Appendix A A Safety Precautions ...
Page 96: ...SAILORPC 12A Panel PC Page 86 Appendix B B BIOS Options ...
Page 100: ...SAILORPC 12A Panel PC Page 90 Appendix C C Terminology ...
Page 104: ...SAILORPC 12A Panel PC Page 94 Appendix D D Watchdog Timer ...
Page 107: ...SAILORPC 12A Panel PC Page 97 Appendix E E Hazardous Materials Disclosure ...


