background image

P/N E055-71520302 and P/N E055-71520305

Table Of Contents

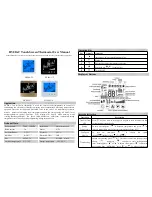
FRONT PANEL
DISPLAY
QUICK START  

Set the clock and go

BASIC OPERATION

PROGRAMMING  

Occupied / Unoccupied

OVERRIDING THE DAILY
SCHEDULE

ADVANCED SETUP
ABOUT ADVANCED FEATURES
& OPERATION

WARRANTY

2
3
6

11

12

18

24

33

Page 1

13

CAUTION

WARNING

SELECTING THE HEAT
OR COOL MODE

7

Follow  Installation  Instructions
carefully.    Disconnect  Power 
to  the  Heater/Air  Conditioner
before removing the old therm-
ostat  and  installing  the  new 
thermostat.

Copyright 2007, International

Environmental Corp.  All Rights Reserved

Summary of Contents for E055-71520302

Page 1: ...ad Override capable Meets California Title 24 OWNER S MANUAL P N E055 71520302 P N E055 71520305 Auto Changeover is available in 4 pipe systems in 2 pipe systems with Electric Heat or when used with G100 71520306 accessory auto changeover sensor 72 74 70 Am COOL HEAT AUTO Mo I2 00 FAN COIL PROGRAMMABLE DIGITAL THERMOSTAT Copyright 2007 International Environmental Corp All Rights Reserved ...

Page 2: ...LY SCHEDULE ADVANCED SETUP ABOUT ADVANCED FEATURES OPERATION WARRANTY 2 3 6 11 12 18 24 33 Page 1 13 CAUTION WARNING SELECTING THE HEAT OR COOL MODE 7 Follow Installation Instructions carefully Disconnect Power to the Heater Air Conditioner before removing the old therm ostat and installing the new thermostat Copyright 2007 International Environmental Corp All Rights Reserved ...

Page 3: ...2 74 70 Am COOL HEAT AUTO Mo I2 00 Front Panel Page 2 Liquid Crystal Display with Thermoglow Up Down Buttons Mode Button Fan Override Button Heat or Cool Indicator Heat Red Cool Green 1 1 2 3 4 5 2 3 4 5 ...

Page 4: ...geover between heat and cool modes as the temperature varies PROGRAM ON Indicates the time period program is enabled to run OFF Indicates heating and cooling are turned off Clock with Day of the Week Page 6 Indicates the current time and day This clock is also used to program the time period schedules Room Temperature Display Indicates current room temperature Desired Set Temperature Page 11 Indic...

Page 5: ...den for up to six hours Occupied Unoccupied icons Pages 13 16 Indicates the program number Occupied 1 2 3 or Unoccupied Setup icon Pages 18 22 Indicates the thermostat is in the advanced setup mode Fan icon Page 11 Indicates fan operation Fan low speed Fan medium speed Fan high speed When only the Fan icon is displayed the fan is in the Auto mode and will run only when necessary to heat or cool 5 ...

Page 6: ...88 COOL HEAT Override Locked AUTO OUTSIDE Start Stop icons Pages 14 16 Appear when programming occupied time periods Locked icon Page 30 Indicates keypad has been locked Outside icon Pages 21 31 Indicates the temperature displayed is from the optional outside sensor 9 10 11 9 10 11 ...

Page 7: ... same time for two seconds to enter Setup screens Quick Start Set the Clock and Go Press MODE Setting the Clock Setting the Day Am Setup I2 00 Setup Mo MODE FAN MODE FAN Press the MODE and FAN buttons at the same time t o r e t u r n t o normal operation Page 6 To adjust the Clock or Day use buttons During Setup and Programming Pressing the UP or DOWN button will modify the flashing selection Tip ...

Page 8: ...ly The COOL setting indicates the temperature the room has to reach before the cooling source will turn on to cool the room Cooling Only OFF indicates both heating and cooling are turned off Off AUTO will automatically select heat or cool based on room temperature demand Heating or Cooling Time Schedule for Heating or Cooling Program On will activate the stored timer operation for the heating and ...

Page 9: ...or Cool Mode 2 Pipe Operation The HEAT setting indicates the temperature the room has to reach before the heating source will turn on to heat the room Heating Only Time Schedule for Heating or Cooling Program On will activate the stored timer operation for the heating and cooling setpoints occupied or unoccupied periods OFF indicates both heating and cooling are turned off Off Page 8 ...

Page 10: ...or Cool Mode 2 Pipe Operation The COOL setting indicates the temperature the room has to reach before the cooling source will turn on to cool the room Cooling Only OFF indicates both heating and cooling are turned off Off Time Schedule for Heating or Cooling Program On will activate the stored timer operation for the heating and cooling setpoints occupied or unoccupied periods Page 9 ...

Page 11: ...ure is changed during the year the ther mostat will then automatically lock out the incorrect mode Heating and or Cooling Step 6 3 in Advanced Setup page 19 and the accessory changeover sensor G100 71520306 is used Step 6 4 or 5 in Advanced Setup page 19 Operation is the same as a 4 pipe system page 7 Selecting the Heat or Cool Mode 2 Pipe Operation Program On will activate the stored timer operat...

Page 12: ...red set temperature with the Fan Operation Press FAN Press FAN Press FAN Press FAN Press FAN Low Speed Medium Speed High Speed Auto Fan Pressing the FAN button will run the fan in low medium or high speed continuously see below and page 28 When only the Fan icon is displayed the fan is in the Auto mode and will run only when necessary to heat or cool see below and page 28 Note If the thermostat is...

Page 13: ...ogrammed unoccupied periods pressing and holding the FAN button for 5 seconds will temporarily force the thermostat into Occupied 1 comfort settings for one to six hours step 13 page 21 The Override icon will be illuminated during this time If you press and hold the FAN button while the thermostat is currently overriding the daily schedule this will reset the timer returning the thermostat to the ...

Page 14: ...ODE press the UP button for two seconds to enter time peri od programming MODE Select the maximum of occupied periods to be used on any one day Typically most installations use only Occupied 1 1 2 or 3 Adjust the cooling setpoint for Occupied 1 35 99 OF Adjust the heating setpoint for Occupied 1 OF 35 99 occupied occupied Adjust the cooling setpoint for unoccupied periods 35 99 OF Page 13 ...

Page 15: ...Mo Mo Pm Stop 1 6 00 Mo ON 1 Off On Mo Select day of the week for Occupied 1 Mo Su Adjust the start time for Occupied 1 Adjust the stop time for Occupied 1 Select Occupied 1 to run on this day On or not to run on this day Off occupied occupied occupied occupied Page 14 Adjust the heating set point for Unoccupied periods OF 35 99 Continued ...

Page 16: ...e this routine will repeat until Saturday is copied to Sunday After Saturday is copied to Sunday the copy command is unavailable The copy command becomes available after the maximum of occupied periods are programmed in a day This example uses 1 as the maximum occupied periods ever programmed in one day Yes No MODE MODE MODE Co Py Tu occupied Tu 1 occupied Am Start Tu 1 9 00 Tu Mo Select day of th...

Page 17: ...pied to Sunday the copy command is unavailable If no is selected as in previous steps flashing prompts for input will appear for start and stop times for Occupied 1 If more than one occupied period was selected on page 13 then cool heat setpoints and start stop times for additional occupied periods will be prompted Select Yes or No to copy the previous day s program to this day Yes No Press MODE M...

Page 18: ... on and 2 the current time is outside a preset occupied period For this reason start and stop times aren t necessary for unoccupied If the same start and stop times are programmed in for an occupied period then it will run 24 hours If one occupied period starts and stops within another occupied period the lower occupied has priority example If Occupied 3 is programmed to be on 24 hours and Occupie...

Page 19: ...day Tip To change hours quickly press and hold the FAN button and press the UP or DOWN buttons NOTE Each step is located at the top right corner of the display for easy reference Press the MODE and FAN buttons at the same time for 10 seconds to enter Advanced Setup screens Advanced Setup MODE FAN 2 Setup Mo I Am Setup I2 00 3 ON Setup Press MODE Continued Page 18 ...

Page 20: ... Electric Heat Note 3 4 require accessory changeover sensor 4 5 Setup Press MODE Press MODE Press MODE Continued I 6 Setup Page 19 Select Display operation 1 Single Setpoint 2 Dual Setpoint See Page 32 setpoint will always be displayed To display the room temperature press and hold the MODE button for two seconds The degree icon will blink when the large number is displaying room temperature and w...

Page 21: ... Press MODE Continued Setup I0 Step 9 will not appear if step 6 1 or 2 Page 20 2 8 Setup Adjust the deadband for the 1st stage 1 6 See Page 25 On Off See Page 28 Note 2 Select operation when fan is in the Auto mode On continuous low speed fan Off only energize during a heating or cooling cycle 7 AUTO Adjust the minimum difference between cooling heating setpoints 0 6 ...

Page 22: ... r i n g t h e unoccupied time period 0 6 hours Press MODE Press MODE Override 2 00 I3 Setup See Page 26 Page 21 Press MODE Continued Select sensor operation On sensor Off control to Duct sensor read only Duct Setup I2 72 On Off Sensor Reading OUTSIDE Press MODE C F Setup I i Select thermostat operation in degrees Fahrenheit or Celsius ...

Page 23: ...up screens If no buttons are pressed the display will leave the setup screens after 30 seconds occupied Setup 85 I6 55 unoccupied Press MODE Page 22 Unoccupied the thermostat will enter the Unoccupied mode when the Dry Contact is closed Occupied the thermo stat will enter the Occup ied mode when the Dry Contact Contact is closed Off when the Dry Contact is closed the thermostat will turn off Unocc...

Page 24: ...ime of Day Day of the Week Display Blanking Single or Dual Setpoint 2 or 4 Pipe System 2 Pipe System Operation Fan Auto Operation Deadband Temp Swing 1st Stage Minimum Heat Cool Differential Thermoglow Backlight Fahrenheit or Celsius Read Only Duct Sensor Override Timer Length Dry Contact Polarity Dry Contact Operation Dry Contact Setpoints Step Description 1 2 3 4 5 6 7 8 9 10 11 12 13 14 15 16 A...

Page 25: ...the following procedure Place the thermostat in the OFF mode Press the MODE button once The thermostat temperature will be displayed and may be calibrated using the UP or DOWN button After calibration is complete press the MODE button once to save your changes and return to normal operation 72 Pm OFF Mo I2 00 Press button While holding the MODE button press and hold the DOWN button for 5 seconds A...

Page 26: ...int plus the 1st stage deadband step 8 page 20 plus the 2nd stage dead band This 2nd stage deadband is fixed at one degree and is not adjustable The low speed fan for heat or cool is turned on when The temperature spread from the setpoint is equal to or greater than the setpoint plus the 1st stage dead band step 8 page 20 This 1st stage deadband is adjustable from 1 6 degrees and the default is tw...

Page 27: ...mostat will be forced into Occupied 1 setpoints and the Occupied 1 icon will blink Note The thermostat must be in Program On mode for this feature to have any effect Connect wires to a time clock or other device to force the thermostat into Occupied 1 or Unoccu pied Important Note For control of multiple thermostats by 1 source refer to the enclosed yellow document P N 88 175 Potential Phasing Pro...

Page 28: ...se the MODE and DOWN buttons Then press and hold the FAN button for 5 seconds After the letters Fd appear on the display Factory Default release the FAN button Press the MODE button twice to return to normal operation Page 27 Place the thermostat in the OFF mode 72 Pm OFF Mo I2 00 Press button While holding the MODE button press and hold the DOWN button for 5 seconds All icons will appear on the d...

Page 29: ...laced in the Off mode or an unoccupied time period see page 26 1 If a Duct sensor is connected to this thermostat then the fan should be programmed for continuous operation step 7 page 20 This will provide airflow over the Duct sensor and provide more accurate temperature readings 2 If the fan is programmed for continuous operation step 7 page 20 the low speed fan will run contin uously when the f...

Page 30: ...ge 28 This feature auto 70 unoccupied Pm Mo I2 00 76 68 COOL HEAT Note The fan will not de energize during an Un occupied time period if it has been programmed for continuous operation step 7 page 20 Page 29 Note To increase the spread between the heating and cooling setpoints in the Auto changeover mode press the MODE button until only the heat setpoint is display ed adjust to the desired setpoin...

Page 31: ...elease the buttons To unlock the keypad press and hold the MODE button While holding the MODE button press the UP and DOWN buttons together The LOCKED icon will disapp ear from the display then release the buttons Press all three buttons in the order outlined above for keypad lockout MODE 72 76 68 occupied Program Fan On Pm COOL HEAT Locked Mo 1 I2 00 Page 30 LOCKING COVER w Tamper Proof Screws G1...

Page 32: ...asures temperature with a range of 32 to 99 F The Duct Sensor should be con nected to the thermostat using solid conductor CAT 5 CAT 5e or CAT 6 type network communication cable This is an unshielded cable with four twisted pairs of 24 gauge solid wire DO NOT use stranded cable The cable length should not exceed 250 feet If less than 75 feet of cable is required to connect the thermostat to the Du...

Page 33: ...ture and will remain solid when dis playing the heating or cooling setpoint In the Auto and Program On modes the deadband is enforced both above and below the setpoint To avoid short cycling a deadband of at least two degrees is recommended step 8 page 20 To display the room temperature press and hold the MODE button for two seconds Release the MODE button to return to the normal display Page 32 ...

Page 34: ...HIN THE ACKNOWLEDGED SHIPPING DATE WHICH SHALL NOT EXCEED SIX 6 MONTHS FROM THE DATE OF PURCHASER S OFFER TO PURCHASE IF PURCHASER DOES NOT MEET THE TERMS AND CONDITIONS OF THIS PARAGRAPH THE PRICES ARE SUBJECT TO ESCALATION TO THOSE PRICES IN EFFECT AT TIME OF SHIPMENT WITHOUT NOTICE TO PURCHASER 4 ALL PRICES ARE F O B IEC S FACTORY WITH FULL FREIGHT ALLOWED UNLESS NOTED OTHERWISE BY IEC TITLE TO...

Page 35: ...R OR REPLACE THE GOODS IS THE PURCHASER S EXCLUSIVE REMEDY IEC SHALL NOT IN ANY MANNER WHATSOEVER BE LIABLE FOR ANY INCIDENTAL OR CONSEQUENTIAL DAMAGES LOSS OF PROFITS OR EXPENSES FOR BREACH OF WARRANTY OR FOR NEGLIGENCE ON THE PART OF IEC d ALL PARTS SHALL BE RETURNED TO IEC S FACTORY IN OKLAHOMA CITY OKLAHOMA OR OTHER AUTHORIZED SERVICE STATION DESIGNATED BY IEC FREIGHT PREPAID IF IEC DETERMINES...

Page 36: ... DATE AND SHALL HAVE NO LIABILITY OR OTHER OBLIGATION FOR FAILURE TO SHIP ON SUCH DATE REGARDLESS OF CAUSE 12 PAYMENT TERMS ARE NET THIRTY 30 DAYS FROM DATE OF INVOICE ON APPROVED CREDIT ONE AND ONE HALF PERCENT 1 1 2 PER MONTH 18 ANNUAL RATE MAY BE CHARGED ON PAST DUE ACCOUNTS WHERE PERMITTED BY APPLICABLE LAW IN THE EVENT ACCOUNT MUST BE PLACED FOR COLLECTION PURCHASER SHALL BE RESPONSIBLE FOR A...

Page 37: ...UTSIDE THESE TERMS AND CONDITIONS UNLESS SPECIFICALLY SET FORTH IN WRITING AND ACCEPTED BY SIGNATURE OF AN AUTHORIZED REPRESENTATIVE OF IEC IN OKLAHOMACITY OKLAHOMA P N 88 569 Rev 2 P O Box 2598 Oklahoma City OK 73101 2598 405 605 5000 phone 405 605 5001 fax www iec okc com 2007 International Environmental Corporation IEC IEC is a subsidiary of LSB Industries Inc AMEX symbol LXU www lsb okc com I1...

Reviews: