background image

Part 2 - Configuration

30

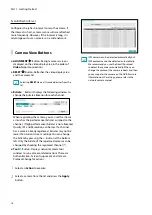
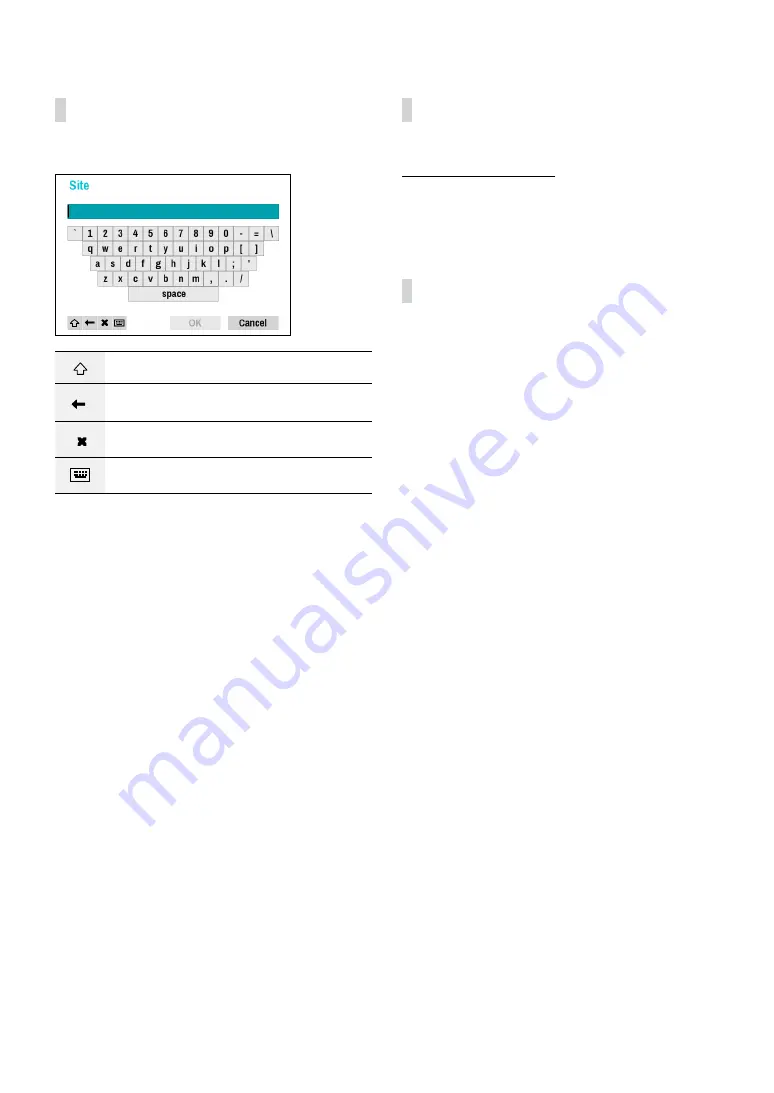
Text Input via Virtual Keyboard

Click on the key using the mouse.

Toggle case.

Deletes the character to the left of the cursor.

Deletes the character to the right of the 
cursor.

Converts keyboard.

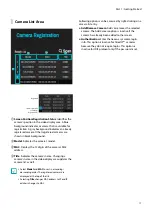
Batch Assignment

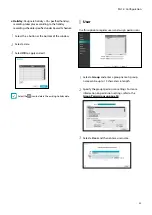
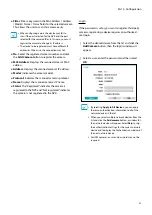
Certain table-format menus such as the shown in the 

Camera Setup on page 40

 allow you to change 

the title value. In this case, changing the title value 
simultaneously changes all other entry values on the 
same row.

Mouse

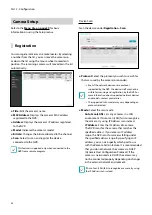
Using a mouse makes it easier to configure the settings. 
A mouse lets you make selections faster and use its 
wheel to scroll through long menus. You can also use 
the mouse wheel to increase/decrease numerical values.

Summary of Contents for DR-1508P

Page 1: ...Powered by Network Video Recorder Operation Manual DR 1504P DR 1504P A DR 1508P DR 1508P A...

Page 2: ...and use If you need to disassemble the product for functionality expansion or repair purposes you must contact your retailer and seek professional assistance Both retailers and users should be aware...

Page 3: ...per adjustment of other controls may result in damage and will often require extensive work by a qualified technician to restore the equipment to its normal operation E If the equipment has been dropp...

Page 4: ...INTERFERENCE AT THEIR OWN EXPENSE WARNING CHANGES OR MODIFICATIONS NOT EXPRESSLY APPROVED BY THE PARTY RESPONSIBLE FOR COMPLIANCE COULD VOID THE USER S AUTHORITY TO OPERATE THE EQUIPMENT THIS CLASS O...

Page 5: ...We are not responsible for any problems resulting from the use thereof The information contained herein is subject to change without notice Revisions or new editions to this publication may be issued...

Page 6: ...uttons 19 Diagnosis Process 19 Camera Registration Mode 20 Login 20 Live Menu 22 Zoom 24 PTZ Control 24 Event Monitoring 26 Covert Camera 26 Context Menu Access 26 Edit Group 27 Video Recording 27 Pan...

Page 7: ...Schedule 53 Pre Event 55 Event Setup 55 System_Event 55 Camera System 56 Camera System_Video Loss 57 Camera System_Recording Fail 57 Camera System_PIR 58 Video Analytics 59 Video Analytics_Motion 59 V...

Page 8: ...OSD 73 Main Monitor 74 Status Setup 74 Camera 74 Device 75 System 75 Storage 76 Network 77 Part 3 Search 79 Time Lapse Search 79 Search Menu 79 Context Menu 80 Clip Copy 81 Event Log Search 82 Overla...

Page 9: ...he question mark button on the bottom left corner and refer to the instruction on setting up a password An email address and UPR files are required to find the password Otherwise you may not be able t...

Page 10: ...settings refer to the Date Time section under System Setup on page 31 3 Choose the desired Recording Method and click Next 4 Choose the desired Recording Quality and click Next Higher recording qualit...

Page 11: ...Continuous Profile 1 Motion Profile 3 Continuous Profile 2 Motion Profile 4 Continuous Profile 3 Motion Continuous Profile 1 Profile 2 Profile 4 5 Choose the desired codec and click Next 6 Click Fini...

Page 12: ...e router s UPnP function refer to the router s operation manual 4 Enter in the Device Name field the NVR name to be registered on the FEN server and then click Check to check its availability The devi...

Page 13: ...mouse and select Camera Registration to run the Camera Registration mode It allows you to scan for the cameras connected to the NVR 1 2 3 4 5 1 Camera Scan Button 2 Camera View Menus 3 Camera List Are...

Page 14: ...mera try using IP Address Scan instead IP Address Scan Enter the IP address of a camera The NVR scans for the camera matching the specified address If you enter IP address s range the NVR scans for ca...

Page 15: ...area Camera list By using the camera information file csv the user can register the cameras easily Export Button Exports the list of camera information on USB as a csv file Import Button Imports a ca...

Page 16: ...performance bitrate is not allocated Quailty IPS and Resolution can be low If a channel has a camera already registered bitrates may not be lower than current stream settings You can change the bitrat...

Page 17: ...camera s name Changing a camera s name in the video display area updates the camera list as well Select Model and MAC to sort in ascending descending order The registered cameras are displayed at the...

Page 18: ...sition Registration Info icon is shown with a black background Screen Position Registration Info icon for cameras registered to another NVR is shown with a steady orange background on top of a gray sc...

Page 19: ...n mode without applying the changes It is not possible to register a camera that has already been registered to a different NVR Diagnosis Process When the camera is registered to the NVR Self diagnosi...

Page 20: ...Bring up the Live menu and click on icon using the mouse to log in 2 Select a user enter the password and then select OK Click on the button next to the password field using the mouse This will bring...

Page 21: ...PR User Password Reset verification and then click on UPR Verification button 4 Select the UPR file and then click on Import button To use UPR function the UPR file must be saved in advance For more i...

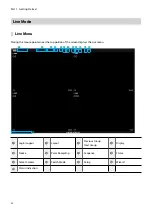
Page 22: ...use pointer near the top portion of the screen displays the Live menu 1 2 3 4 5 6 7 8 9 0 1 Login Logout 2 Layout 3 Previous Group Next Group 4 Display 5 Freeze 6 Panic Recording 7 Sequence 8 Status 9...

Page 23: ...in Live mode changes to the sequence mode To exit select Sequence icon 4 3 5678 9 0 once more The icon is displayed on the upper right part of the screen while Sequence is in progress Full Sequence D...

Page 24: ...therwise remaining HDD space is shown as a percentage value Zoom While in Live mode right click and select Zoom When a zoom frame appears on the selected channel right click on the mouse to zoom in Us...

Page 25: ...This menu lists Speed Auto Pan and other advanced PTZ camera control options available for the camera Also selecting Point Move button moves PTZ camera to the point that the user clicks Options that a...

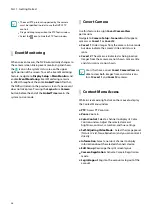
Page 26: ...Setup General and designate cameras as Covert 1 or Covert 2 Covert 1 Hides images from the camera in Live mode but does indicate the camera s title and status via icons Covert 2 The camera is indicat...

Page 27: ...if all the connections are made correctly as per information contained in Part 2 of this operation manual For more information on video recording settings refer to the Record Setup on page 52 Panic Re...

Page 28: ...mode is the recording s last playback point or the end of the recording data Covert protection on cameras also applies to video recording playback All Channel Playback 1 Place the mouse pointer near t...

Page 29: ...on to access the setup menu is needed to access and make changes to the Setup menu When using Use 2FA feature registered mobile device must be authenticated before entering the setup menu For more inf...

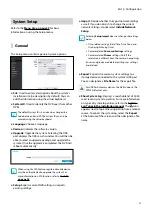
Page 30: ...Certain table format menus such as the shown in the Camera Setup on page 40 allow you to change the title value In this case changing the title value simultaneously changes all other entry values on...

Page 31: ...FA on page 36 Setup Exports current NVR settings or imports existing settings Import Decide whether to import network settings as well If you do not wish to change the current network settings do not...

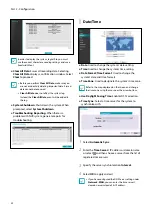
Page 32: ...nerate reports for troubleshooting Date Time Date Used to change the system s date setting Time Used to change the system s time setting Date Format Time Format Used to change the system s date and ti...

Page 33: ...2 Select a date 3 Select OK to apply and exit Select the icon to delete the existing holiday date User Use this option to register users and assign permissions 1 Select Group and enter a group name A...

Page 34: ...reen to delete all groups and users except Group Administrator and User admin simultaneously A password entry is required to edit existing groups and users Group Administrator s permissions cannot be...

Page 35: ...reviously saved NVR settings Setup Export May export current NVR settings Remote Connection Policy Camera Is Hidden Select camera channels to hide on the screen when connecting remotely Schedule Selec...

Page 36: ...evice was registered If you click the button at the bottom of the table the following message will appear and you can register the 2FA device 2FA device registration is supported only via IDIS Mobile...

Page 37: ...Format If the disk has been formatted indicates either Record or Not Using If you have connected an unformatted storage device the Use As value will be indicated as Not Formatted Information Indicate...

Page 38: ...ing Interval as one day period only the the reports from the last 24 days can be viewed If the NVR is turned off the reports will automatically turn off The reports are organized by recent date and ti...

Page 39: ...ON file on HTTP notifications Value Set the value of system properties to be included in a JSON file on HTTP notifications About User Agreement User agreement for the use of the FEN service If you agr...

Page 40: ...r encoder Even if the network device uses a protocol supported by the NVR the device itself may not be visible for scanning and registration by the NVR For more information about supported network dev...

Page 41: ...ocol Name Displays the scanned camera s IP name Status The Registered indicates the camera is registered to the NVR and Not registered indicates the camera is not registered to the NVR Login If the pa...

Page 42: ...apply the same password and e mail information to cameras that require password settings in the scan list When you select multiple network devices from the list and click the Add camera button a windo...

Page 43: ...ts the port or cameras Factory Reset Control the PoE Switch s port This option is available when connecting to Video In PoE port or using a DirectIP PoE Switch optional Select PoE Reset to reboot the...

Page 44: ...u can record up to two minutes of movement Directional Buttons Used to tilt and pan the camera Zoom Zoom in and out Focus Adjust camera focus to far or near Speed Specify the camera s panning and tilt...

Page 45: ...bottom Mechanical Automatically pans or tilts the camera Off Disables Auto Flip 0 Tilt Range Specify the camera s tilting range Restore Specify whether to restore the camera to its last position or fu...

Page 46: ...vot Enable this option and choose the direction of the pivot You can turn the image by 90 degree in the clockwise or counterclockwise direction This feature is particularly effective when monitoring h...

Page 47: ...rk due to backlighting conditions and on images containing over exposed sections Greater the value clearer the image e g Dark parking lot entrances and gas station entrances at night Local Exposure co...

Page 48: ...le for greater clarity in low lighting conditions On Off Enable disable Black White Mode Auto Allow the system to enable disable Black White Mode automatically Schedule Set up the Black White Mode sch...

Page 49: ...the Setup button to change the allocation for each channel For more information on bitrate refer to Camera View Buttons on page 16 Apply the video profile settings of the camera selected under Camera...

Page 50: ...layout Profile 4 sub stream is displayed If the total resolution does not exceed 8M it is displayed as follows If the channel is larger than 3x3 size on the screen layout the video profile main strea...

Page 51: ...y Set the motion detection sensitivity Higher values will result in more sensitive motion detection Inactivity Period Set the Inactivity Period If motion is not detected for the duration of time speci...

Page 52: ...Time Lapse Recording You can store event recording data for longer If you do not wish to use Limit Time Lapse Recording select Never This function is activated when data has been stored for longer tha...

Page 53: ...he Panic Record button is pressed no recording will take place during the scheduled time frames on the scheduled days Time The icon appears on the upper left corner of the screen The icon appears at s...

Page 54: ...s and video profiles Type Event specific and time recording icons are as follows Time Lapse Time Trip Zone Motion Detection Tampering Video Loss Recording Fail PIR Auto Tracking Video Profile Configur...

Page 55: ...ecording data If no event mode schedule exists in the schedule a warning message prompting you to add an event mode schedule will be displayed The warning message will appear even in Time Event mode E...

Page 56: ...each their maximum capacity Disk Bad Generates an event when the specified percentage of the disk becomes damaged Set to between 10 and 90 in 10 intervals Disk Temperature Specify the threshold temper...

Page 57: ...s the cameras to monitor when an event occurs In order to use the Callback feature the NVR must be registered on the remote program Camera System_Recording Fail Activation Time Specify how long record...

Page 58: ...in a certain period of time after PIR events of the camera channels are detected Set the value between 1 sec and 5 secs or choose Never Ignoring interval setting does not affect the motion detection r...

Page 59: ...everse Clear the blocks selected within the selection window and select all unselected blocks within the selection window Select All Select all blocks Clear All Clear all block selections Reverse All...

Page 60: ...Selects the cameras to monitor when an event occurs In order to use the Callback feature the NVR must be registered on the remote program Condition When a specific event occurs you can set the condit...

Page 61: ...system does not produce event log entries or remote notifications for events detected within a certain period of time after Tripzone events of the camera channels are detected Set a value between 1 s...

Page 62: ...me Actions Specify which actions to take when Tampering is detected Record Specify which cameras to begin linked recording on when an event occurs If the schedule is set to Event or Time Event mode th...

Page 63: ...t this function the PTZ will not move to the initial position after auto tracking ends Only some PTZ cameras support this event Please contact the manufacturer for availability of this event When sett...

Page 64: ...ote locale Bitrate Set the size of the bandwidth Burst Set the burst byte or buffer byte size Latency Set the latency MTU Set the maximum transmission unit MTU If you configured Network Bandwidth Limi...

Page 65: ...PnP Universal Plug and Play feature select Use UPnP If using an IP router or NAT UPnP service allows the device to automatically forward the port to the NVR This port is used to access a port that has...

Page 66: ...ed to connect remotely at the same time Contact the service center for more information When registering nvr with the Idis mobile application you can easily enter the IP address by using the QR code I...

Page 67: ...subnets It is not recommended to use this function unless you are a network expert DHCP Client Retrieves an IP address and other network settings automatically from a DHCP server Use NAT ROUTER VPN ET...

Page 68: ...eave the FEN name blank it automatically changes to the default name FEN Server Enter the FEN server s IP address or domain name If you have configured the DNS Server setting under Network WAN you can...

Page 69: ...e ethernet interface It refers to a WAN Network Client or VIN Video In Mac Address If the rule is set to MAC address enter the sending MAC address IP If the type of the rule is set to IPv4 or within t...

Page 70: ...er right corner of the screen to configure Callback Retry Policy Retry Policy Configure a policy to retry a callback event Retry Number of times to retry a callback event Dwell Wait time in seconds be...

Page 71: ...he icon to remove the account and added group SMTP Setup Select SMTP Setup at the bottom right corner of the screen to configure an SMTP server 1 Select the SMTP server Type 2 Enter the SMTP Server s...

Page 72: ...vent that the camera generates Push Configure Push settings Select Push to use Push feature The Push feature sends out event related messages to mobile phone Enable to receive the event occured in NVR...

Page 73: ...the name of HTTP notification attribute Value Enter the value of HTTP notification attribute Display Setup Refer to the Menu Use on page 29 for basic information on using the Setup menus OSD Show OSD...

Page 74: ...th Event Alert selected the red line appears on the top of the camera screen linking event monitoring when an event occurs Supported resolutions may be restricted depending on the monitor We recommend...

Page 75: ...sed on current Panic Record status Check Recording Displays event status based on System Monitoring settings For more information refer to the Self Diagnosis on page 38 Disk Almost Full Disk Full If t...

Page 76: ...as designated by the user Generates a system event Temperature N A Unable to detect the disk s temperature Good Operating within normal temperature range Bad Disk temperature higher than as designated...

Page 77: ...N port and shows how many cameras are connected Clicking the image displays the camera s channel number Clicking the image displays status information of the device connected to the NVR Video Encoder...

Page 78: ...dicates at least one client is connected indicates no client is connected Network Connection Info Indicates network connection statuses connected connecting disconnected and connection error using fol...

Page 79: ...r systems were connected 5 Panic Record Use the Panic Record feature 6 Camera Select a camera channel and display it as a single screen 7 Live Mode Activates Live mode 8 Search Mode Search by changing...

Page 80: ...own on the top of the search window The gray indicator line on Record Table indicates the current playback position Alternatively use the mouse to jump to the desired playback position Farther back th...

Page 81: ...clipplayer to be played Selecting Start displays a calculation on the size of the data to be copied Check the calculation and then select Continue to proceed While Clip Copy is in progress you can se...

Page 82: ...clock has been changed and the designated From or To point exists at more than one location you will have to choose one Only the events that took place between the selected From and To points will be...

Page 83: ...00 6 00 Segment 1 Segment 2 When searching overlapped video recordings you can choose a specific point in time or a time frame If you use the Go to the Date Time option and select a point within the...

Page 84: ...Part 3 Search 84 Memo V8 5...

Page 85: ...IDIS Co Ltd For more information please visit at www idisglobal com...

Reviews: