


Part 1 – Introduction
13
•
When switching over from 12 VDC to PoE as the
power source, the system will be rebooted once the
power adapter is disconnected.
•
Ground the power port's frame ground terminal
before use.
•
Organize the power cable so that it will not cause
people to trip over or become damaged from chairs,
cabinets, desks, and other objects in the vicinity. Do
not run the power cable underneath carpet or a rug
or plug the cable into a power outlet shared by a
number of other devices.
•
Wrap the camera-end of the network cable twice
around the provided ferrite core (28A2024-0A2,
Laird Technologies) to subdue electromagnetic
wave generation.
Ferrite Core
LAN Cable
LED Status Indications
LED Status
Description
Power LED
Off
Power not
connected
Flashing
Booting
On
Powered on
Network LED
On
Not connected to
network
Power LED/
Network LED
Flashing
(sequentially)
Software upgrade
in progress
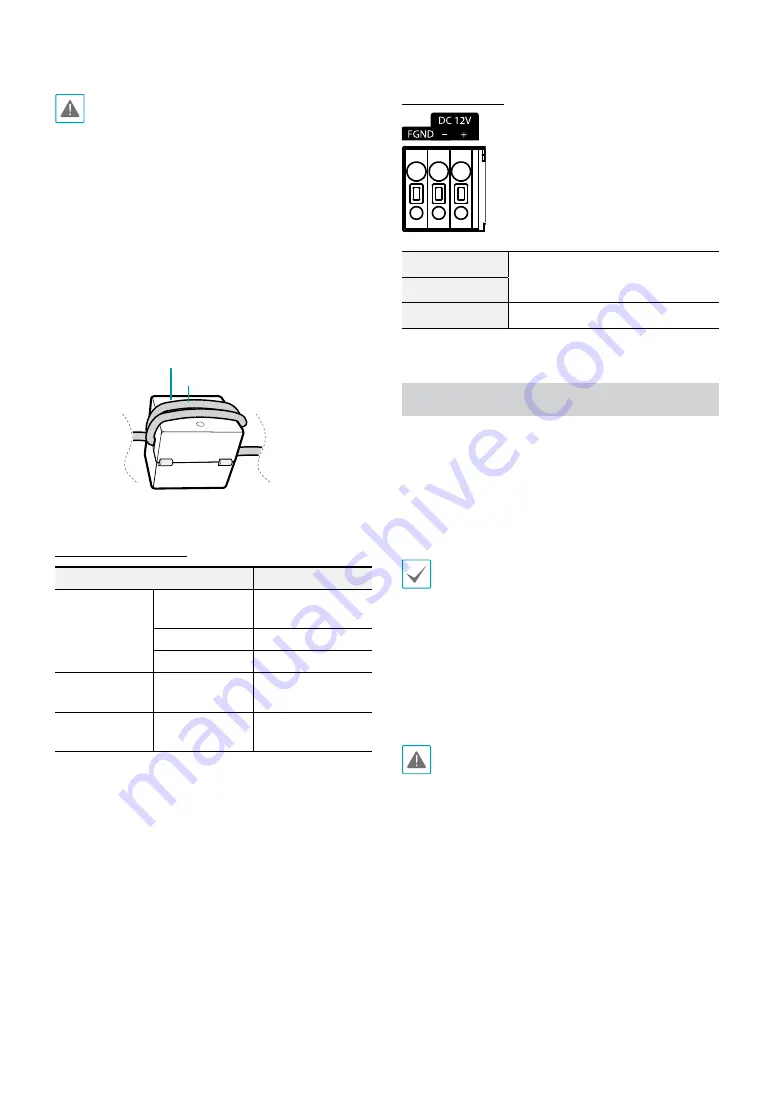
Power Connector
DC12V +
Power connection (Check + and -
markings)
DC12V -
FGND
Frame grounding
Installation
The lens must be purchased separately. If you'd like
to purchase a lens, contact your camera retailer. This
camera supports manual iris lenses and DC type auto iris
lenses, and P-iris lenses in either CS-mount or C-mount
format.
•
Product color and design may vary depending on
the model.
•
We recommend megapixel lenses for clearer and
higher resolution images.
•
Video type auto iris lenses are not supported.
•
Use a lens that weighs less than 450g. Heavier
lenses can cause the camera to lose its balance.
•
Change the setting of iris mode when installing
P-iris lenses.
•
Check the wall or ceiling to see if it needs to be
reinforced. The camera may fall off if the wall or
ceiling is not strong enough to support its weight.
•
Install the camera in a shaded area. If the camera
is installed in direct sunlight, it may be affected
adversely.