Capturing the images
1. Make sure the image request has been started (see the previous section).
2. In the Shot Selection window, select an anatomical region at the top, select one or more shots below,
and then tap
OK
or
.
Tips:
• To replace a shot, tap it in the shot list, and then select the new shot.
• To delete a shot, tap it in the shot list and then tap
.
• To save the study for later, tap
.
3. In the Study window, highlight the first shot you want to take.
4. Position the cassette dark side up (barcode window down), and with the green mark on the left.
5. Position the patient facing left, and then capture the image.
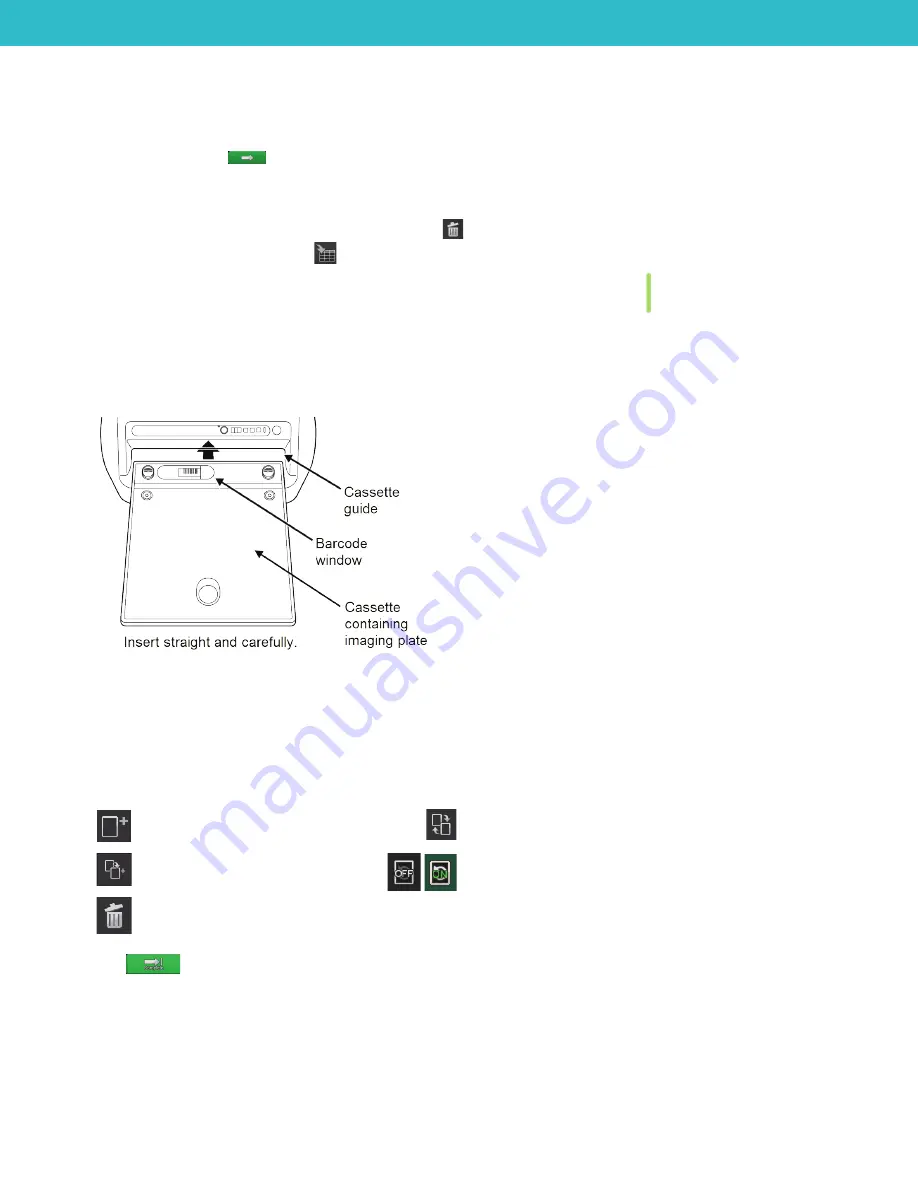
6. When the scanner Cassette Ready lamp is lit (green), turn the cassette over so the dark side is
down
(barcode
window is
up
), and then insert it into the scanner in alignment with the guide on the right. Be sure to remove any
exposure markers before inserting cassette.
7. When the image appears onscreen, add annotations or markers as needed, using the editing tools below
the image.
8. When the Cassette Removal lamp is blinking (blue), remove the cassette from the scanner.
9. Capture remaining radiographs.
IMPORTANT:
Do not capture a radiograph while the scanner is reading an image.
Tip:
Use these buttons to add or change shots in the capture list if needed:
Add more shots.
Replace currently selected shot with a different shot.
Add another instance of the currently
selected shot.
When On, you can take as many instances of the
currently selected shot as needed.
Tap again to turn Off, so you can take the next shot in
the list.
Delete selected shot.
10. Tap
to complete and save the study. The images are sent to the IDEXX-PACS* Imaging Software.


