Exalt
Gas Valve Replacement
2
1. Preliminary Instructions
1. Verify that the Gas Valve replacement kit is correct
for the model of boiler. See table on page 1.
2. Carefully open and unpack the PARTS BOX from its
shipping carton.
3. Carefully remove and check for any damage.
NOTICE
Do not proceed with installation and contact Idealright
away if the gas valve is damaged in any way.
4. Turn off the electrical power supply to the boiler.
5. Close the manual gas shut off valve to the unit.
2. Gas Valve Replacement:
1. Turn power to the unit “OFF”.
2. Shut off the gas supply to the boiler at the main
manual shutoff valve.
3. Remove the front jacket panel.
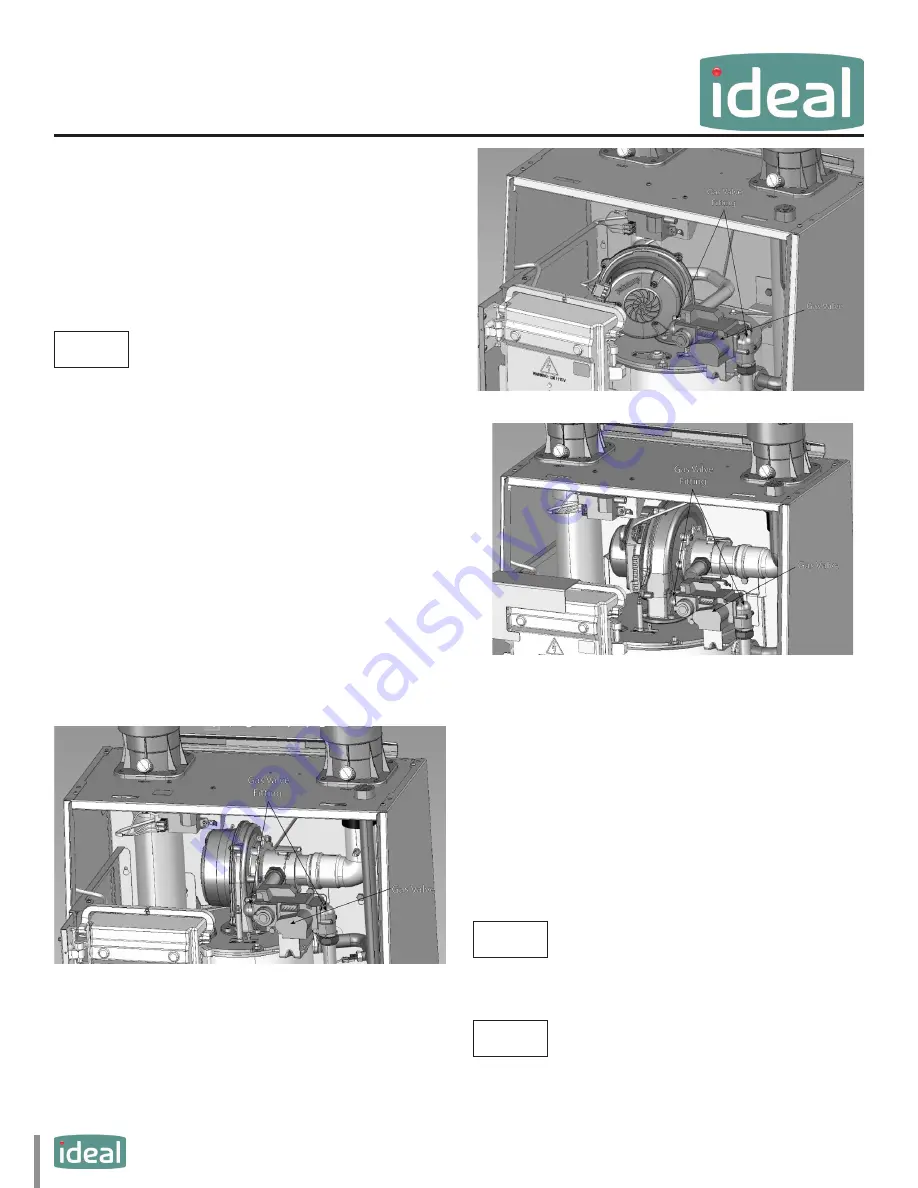
4. Remove the silicon tube from the gas valve but
leave it attached to the air inlet elbow.
Fig. 1: Exalt 110
Fig. 2: Exalt 155
Fig. 3: Exalt 199
5. Remove the Molex plug from the gas valve.
6. Unscrew the 4 screws securing the gas valve fit-
tings on both sides of the gas valve. Do not discard
the screws as they will be reused.
7. Remove the screws used to mount the gas valve
to the bracket. Do not discard these screws as they
will be reused
8. Remove the old Gas valve from the boiler.
NOTICE
Ensure the old o-rings installed between the gas valve and
fittings are removed and not reused.
NOTICE
For the reassembly process do not use adhesive on any gas-
ket surface.


