7
Important Note
: Before initial operation,
YOU SHOULD
FULLY CHARGE THE RECEIVER
for
about
15
hours.
To charge the
, you should place it on the charger.
The charge indicator will light during charging.
receiver
Charging Receiver
Outdoor station
Install six LR6(AA) 1.5V alkaline batteries (not supplied) into the
battery
compartment, matching correct po,-).
Reversing the orientation may damage the outdoor
station.
When replacing the batteries, always use good quality
alkaline
batteries.
Notes
:
Installation Instruction
Receiver
Connect the modular end of the AC
power adapter to the power jack of
the charger, then plug the AC adapter
into a standard AC wall outlet.
To AC wall outlet
With
Auto Snap On
, the camera will take photos
automatically.
If you have unreviewed photos, the backlight on the key will
be on.
of visitor
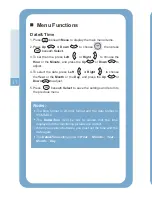
Menu Functions (continued)
Notes:
During a conversation, save a photo by pressing the
Snap
key.
While monitoring an Outdoor Station, a photo can be
saved by pressing the
Snap
key.
Up to 50 photos can be stored. When full, the oldest
photo will be deleted when a new one is taken.
Snap Setting
The unique
Snap Shot
function records up to 50 photos of any
visitors whether you are there or not. To get
Auto Snap
, set it up
in the receiver as follows.
1.Press beneath
Menu
to display the main menu items.
2.Press
Up
or
Down
to choose ,then press
beneath
Select
.
3.Press
Up
or
Down
to choose
1 Photo
,
2 Photos
,
3 Photos
and
Off
to enable or disable the function.
4.Press beneath
Select
to save the settings and return to
the previous menu.
20
Shaker jack


