background image

BASIC MANUAL

This device complies with part 15 of the FCC 

Rules. Operation is subject to the condition that 

this device does not cause harmful interference.
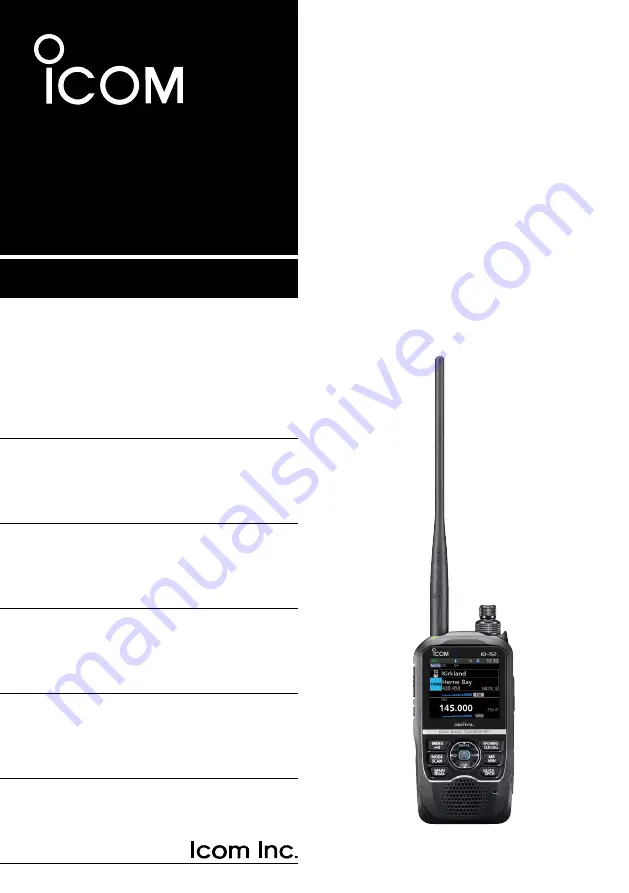
VHF/UHF TRANSCEIVER

ID-52A

ID-52E

WARNING:

 MODIFICATION OF THIS DEVICE 

TO RECEIVE CELLULAR RADIOTELEPHONE 

SERVICE SIGNALS IS PROHIBITED UNDER 

FCC RULES AND FEDERAL LAW.

Summary of Contents for ID-52A

Page 1: ...es Operation is subject to the condition that this device does not cause harmful interference VHF UHF TRANSCEIVER ID 52A ID 52E WARNING MODIFICATION OF THIS DEVICE TO RECEIVE CELLULAR RADIOTELEPHONE S...

Page 2: ...z z The Voice recorder records your QSO conversation voice audio for TX and microphone voice audio z z A microSD card slot that can accept different cards to backup settings various memories the GPS...

Page 3: ...form U S Patent Nos 8 595 002 8 359 197 8 315 860 8 200 497 7 970 606 6 912 495 B2 Trademarks Icom Icom Inc and the Icom logo are registered trademarks of Icom Incorporated Japan in Japan the United...

Page 4: ...s receiving signals 10 3 BASIC OPERATION 11 Receiving 11 Dualwatch operation 11 D D Turning Dualwatch ON or OFF 11 D D MAIN band selection 11 Monitor function 12 Setting a squelch level 12 Quick Menu...

Page 5: ...tooth 36 10 MAINTENANCE 37 Resetting 37 D D Partial Reset 37 Troubleshooting 38 D STAR GUIDE 40 INFORMATION 67 FCC information 67 Disposal 67 About CE and DOC 67 INDEX 68 MENU SCREEN LIST 71 D STAR GU...

Page 6: ...Other functions Firmware updating Options Updating the repeater list PDF type Instructions for the steps to update the repeater list About the GPS Logger function PDF type Instructions for operating t...

Page 7: ...2 4 GHz band The 2 4 GHz band is also used by other devices such as Wireless LAN products microwave ovens RFID systems amateur radio stations and so on When using the Bluetooth device near such devic...

Page 8: ...nload and install the RS MS3W or RS MS3A application software from the Icom website or Google Play See About the DV Gateway function that can be downloaded from the Icom website for details Terminal m...

Page 9: ...RS MS1A Advanced manual L To use this function a microSD card user supplied is required 2 Share Pictures function When you receive a call addressed to your own call sign but are in a situation that m...

Page 10: ...WARNING NEVER connect the transceiver to a power source of more than 16 V DC or use reverse polarity This could cause a fire or damage the transceiver CAUTION DO NOT short the terminals of the batter...

Page 11: ...the transceiver it meets IPX4 requirements for splash resistance When it is connected the transceiver corresponds to IPX4 Even when the transceiver power is OFF a slight current still flows in the cir...

Page 12: ...nside the battery get in your eyes This can cause blindness Rinse your eyes with clean water without rubbing them and immediately go to a doctor R R WARNING NEVER use deteriorated battery packs They c...

Page 13: ...iver Always disconnect the power adapter before a storm R R WARNING NEVER charge or leave the battery in the battery charger beyond the specified time for charging If the pack is not completely charge...

Page 14: ...e PWR Key 4 microSD CARD SLOT microSD Insert a microSD card User supplied p 7 5 ANTENNA CONNECTOR Connect the supplied antenna 6 TX RX INDICATOR Lights red while transmitting Lights green while receiv...

Page 15: ...ush to select 1 MHz tuning steps p 16 z z In the MENU screen push to select an upper tier menu p 21 z z Push to delete an entered character p 46 z z Hold down for 1 second to enter the Call Channel mo...

Page 16: ...ring plus duplex operation D Displayed during minus duplex operation 6 Bluetooth ICON Displayed when a Bluetooth device is connected p 32 7 FM RADIO ICON Displayed when the FM radio is ON p 20 8 PICTU...

Page 17: ...el mode displays 144 or 433 and C0 or C1 21 FREQUENCY SELECTING MODE ICONS Displayed while in the VFO mode Displayed while in the Memory mode Displayed while in the Call Channel mode Displayed while i...

Page 18: ...erate D STAR right now Attaching the Battery pack Attach or detach the battery pack or battery case as illustrated below L L When attaching slide the battery pack and hold it down until the both latch...

Page 19: ...E to turn OFF the transceiver while charging with the supplied battery charger Otherwise the attached battery pack cannot be charged While charging the charging icon and Charging are displayed The ico...

Page 20: ...ile the card is being accessed Otherwise the card data may be corrupted or deleted 4 Completely close the microSD slot cover microSD slot microSD card Terminals facing the front Slot cover CAUTION DO...

Page 21: ...tting a card erases all its data Before formatting any used card back up its data onto another device MENU SET SD Card Format 1 Turn ON the transceiver If a microSD card is inserted the microSD icon i...

Page 22: ...me is automatically set in the following format Setyyyymmdd_xx yyyy Year mm month dd day xx serial number 5 Push ENT to save the file with the displayed name The confirmation dialog is displayed 6 Sel...

Page 23: ...ending on your operating environment If you have difficulties receiving we recommend that you try a different location L L When GPS Select is set to Manual the icon is not displayed MENU GPS GPS Set G...

Page 24: ...actors D D Turning Dualwatch ON or OFF Hold down DUAL for 1 second to turn the Dualwatch function ON or OFF When the Dualwatch function is ON the display shows the A band in the upper half and the B b...

Page 25: ...ng a signal that is stronger than the set level A higher level blocks weak signals which enables you to receive only stronger signals A lower level enables you to hear weak signals L L Throughout this...

Page 26: ...X GPS Position Display Type GPS Position Voice TX Weather Alert 4 FM Radio D SQL Weather Alert 4 GPS Information Display Type FM Radio OFF SKIP Home CH Set GPS Position Voltage MR Home CH Set Voltage...

Page 27: ...and Atmospheric Administration NOAA broadcasts L L In the Weather Channel mode is displayed 1 Select a mode L L Information Push VFO MHz to select the VFO mode In the VFO mode push VFO MHz to select...

Page 28: ...de The transceiver has 5 operating modes FM FM N AM AM N and DV Push MODE to select the operating mode L L Information In the FM N mode the TX modulation is automatically set to narrow approximately 2...

Page 29: ...or signals On 108 000 MHz 136 991 MHz you can select only 8 33 kHz 25 0 kHz or Auto The 1 MHz Tuning Select mode Blinks D D Selecting the 1 MHz tuning You can change the operating frequency in 1 MHz s...

Page 30: ...he decimal point and the selected scan type icon blink L L When receiving a signal the S meter displays the received signal strength 4 Push CLR Cancels the scan Speech function The Speech function aud...

Page 31: ...ing DIAL a beep sounds You will know the Home CH selection without looking at the display D D Setting a Home Channel 1 Select the VFO or Memory mode or the DR screen to set a Home Channel p 14 2 Selec...

Page 32: ...t stops transmission after that This is done to protect the transceiver itself until it can cool down NOTE You can transmit on only the amateur frequency bands IMPORTANT Before transmitting monitor th...

Page 33: ...adio operation D D Turning ON the FM Radio 1 Push QUICK 2 Select FM Radio ON Returns to the standby screen and the FM RADIO window is displayed is displayed TIP To turn OFF the FM Radio push QUICK and...

Page 34: ...level Goes to the previous tree level Goes to the next tree level Returns to the default setting Selects an item or option ENT Sets an option Selects an item or option Simplified description Select o...

Page 35: ...Select Time Set 4 Select Auto Power OFF 5 Select 30min Sets the option then goes back to a tree level The TIME SET screen is displayed L L To exit the MENU screen push MENU TIP To return to the defau...

Page 36: ...1 Push VFO MHz to enter the VFO mode 2 Push MODE to enter the FM mode 3 Rotate DIAL to set a frequency to 146 030 MHz 4 Hold down MW for 1 second A short and a long beep sound 5 Select Write to New C...

Page 37: ...select Group Select L L Blank channels are not selected TIP To sequentially select a channel in a different group Set Channel Select Group Range to All Groups in the Quick Menu window Viewing the Mem...

Page 38: ...ssible after using it for a long period of time When reading or writing data is impossible the card s lifetime has ended In this case purchase a new one We recommend you make a backup file of the impo...

Page 39: ...t QSO Recorder in the RECORD menu 3 Select Recorder Set 4 Select REC Operation 5 Select A B Separate or A B Link A B Separate The recording function is separately active inactive on the selected band...

Page 40: ...en if you turn OFF the transceiver FM Radio audio cannot be recorded 1 Push QUICK 2 Select REC Start Recording started is displayed L L Information is displayed while recording is displayed while the...

Page 41: ...N MENU SET SD Card Unmount 1 Push MENU 2 Select SD Card in the SET menu 3 Select Unmount The confirmation dialog is displayed 4 Select YES When the unmounting is completed Unmount is completed is brie...

Page 42: ...s location while transmitting push QUICK then select GPS Position D D Displaying Location Data 1 Confirm the GPS icon is displayed 2 Push QUICK 3 Select GPS Position The GPS POSITION screen is displa...

Page 43: ...l mapping software L L See the Advanced manual for details on copying the log files onto your PC NOTE The GPS Logger function requires a microSD card User supplied See page 7 for details This function...

Page 44: ...y 10 meters 33 feet IMPORTANT The Bluetooth communication range may vary depending on the environment in which the device operates Microwave ovens or Wireless LAN may cause interference In that case s...

Page 45: ...instruction manual of the headset to select the pairing mode Step 2 Searching for the headset Transceiver MENU SET Bluetooth Set Pairing Connect 1 Push MENU 2 Select Bluetooth Set in the SET menu 3 S...

Page 46: ...u must first pair with it again p 32 Disconnecting a Bluetooth device You can disconnect a paired Bluetooth device if it is not being used MENU SET Bluetooth Set Pairing Connect 1 Push MENU 2 Select B...

Page 47: ...it 144 000 146 000 430 000 440 000 B band Receive 137 000 174 000 Guaranteed only 144 146 MHz 375 000 479 000 Guaranteed only 430 440 MHz Transmit 144 000 146 000 430 000 440 000 BC band WFM Receive 7...

Page 48: ...1 BER Outside Ham band Band Frequency range MHz FM FM N WFM 1 12 dB SINAD AM AM N 2 10dB S N BC band 76 000 108 000 Less than 1 V A band 108 000 136 991 Less than 1 V 137 000 142 000 Less than 0 18 V...

Page 49: ...equency modulation DV GMSK reactance frequency modulation Output power at 7 4 V DC High 5 0 W Mid 2 5 W Low2 1 0 W Low1 0 5 W S Low 0 1 W SAR 10g XX W kg Maximum frequency deviation FM 5 0 kHz FM N 2...

Page 50: ...ction because the Repeater List contents are also cleared D D Partial Reset MENU SET Others Reset Partial Reset 1 Push MENU 2 Select Others in the SET menu 3 Select Reset 4 Select Partial Reset The co...

Page 51: ...or digital squelch function is turned ON Turn OFF the tone or digital squelch function AM An external speaker is connected to the SP jack Check the external speaker connection A Bluetooth headset is c...

Page 52: ...dio band p 19 A Program Scan does not start The VFO mode is not selected Push VFO MHz to select the VFO mode p 14 The same frequencies are entered into the scan edges Enter different frequencies into...

Page 53: ...D STAR GUIDE for the ID 52A ID 52E...

Page 54: ...res of D STAR Easy Cross band operation through the repeater 430 MHz 430 MHz 1200 MHz 1200 MHz CQCQ CQCQ CQCQ CQCQ INTERNET INTERNET Easy call sign entry with the Repeater list or TX RX History The Ca...

Page 55: ...you to make QSOs with stations near or far from your location Advanced Amateur radio technology of D STAR The DV mode has a bandwidth of only 6 kHz compared to 16 kHz for the analog FM mode with 5 kH...

Page 56: ...ay the DR screen hold down DR for 1 second z z On the DR screen pushing D pad selects FROM and pushing D pad selects TO NOTE If the repeater set in FROM Access Repeater has no Gateway you cannot make...

Page 57: ...y wait until it is clear or ask for a break using a method acceptable to your local procedures The transceiver has the Time Out Timer function for the DV Repeater operation The timer limits a continuo...

Page 58: ...was assigned to you and is on your license Example Enter JA3YUA as your own call sign into MY1 Step 1 Display the MY CALL SIGN edit screen MENU SET My Station My Call Sign 1 Push MENU 2 Select My Sta...

Page 59: ...nge the entry mode in the MY CALL SIGN edit screen TIP You can enter a note of up to 4 characters such as the model of the transceiver name area name after your call sign 1 After entering a call sign...

Page 60: ...alternate system NOTE If needed ask the gateway repeater administrator for call sign registration instructions Step 1 Access the call sign registration screen 1 Access the following URL to find the g...

Page 61: ...unt with your registered call sign and password Click Step 4 Register your D Star equipment 1 Register your D STAR equipment information Ask the gateway repeater administrator for details 2 When your...

Page 62: ...445 670 MHz Step 1 Set FROM Simplex channel 1 Push D pad to select FROM and then push ENT 2 Select Repeater List 3 Select a Simplex group 4 Select a frequency Returns to the DR screen and the selecte...

Page 63: ...ing mode to DV 4 Hold down LO for 1 second to set an output power p 20 5 Hold down PTT to transmit and speak into the microphone at your normal voice level The TX RX indicator lights red while transmi...

Page 64: ...lect your access repeater Returns to the DR screen and the selected repeater name is displayed in FROM L L By just selecting the repeater name the repeater call sign its frequency duplex setting and f...

Page 65: ...e repeater Hold down PTT for 1 second to access the repeater L L If you get a reply call or UR is displayed within 3 seconds your signal reached your access repeater and your call was successfully sen...

Page 66: ...ion data is received Caller station RX message Received date and time Called station The S meter and the caller s call sign are displayed RX HISTORY screen LAST MAIN Step 1 Display a received call sig...

Page 67: ...isplays the RX HISTORY DETAIL screen 3 Push QUICK 4 Select Add To Your Memory 5 Select the call sign that you want to save 6 Select NAME 7 Enter a name of up to 16 characters then push ENT L L Usable...

Page 68: ...ck and easy Step 1 Set the received call sign to TO Destination While receiving hold down RX CS for 1 second After releasing the key the transceiver announces the station call sign and the call sign i...

Page 69: ...ct the repeater group where your access repeater is listed 4 Select your access repeater Returns to the DR screen and the selected repeater name is displayed in FROM Step 2 Set TO Destination 1 Push D...

Page 70: ...s repeater L L Same as described in page 56 Step 2 Set TO Destination 1 Push D pad to select TO and then push ENT 2 Select Gateway CQ 3 Select the repeater group where your destination repeater is lis...

Page 71: ...hat the station accessed So even if you don t know where the station is you can make a call using Call Sign Routing Step 1 Set FROM Access repeater L L Same as described in page 56 Step 2 Set TO Desti...

Page 72: ...lector your voice can be heard on other repeaters linked to the reflector and you can hear other stations that are connected to the reflector D D Unlinking a reflector Before trying to link to another...

Page 73: ...move the cursor and rotate DIAL to select the reflector type reflector number or module letter 6 Push ENT Returns to the DR screen and Link to Reflector and entered reflector are displayed in TO 7 Hol...

Page 74: ...g a reflector 1 Push D pad to select TO and then push ENT 2 Select Reflector 3 Select Use Reflector Returns to the DR screen and Use Reflector and CQCQCQ are displayed in TO 4 Hold down PTT to transmi...

Page 75: ...een and Echo Test and E are displayed in TO 4 Hold down PTT and speak into the microphone The TX RX indicator lights red 5 Release PTT to hear your message D D Requesting repeater information When you...

Page 76: ...or a repeater using the DR scan The Normal DR scan searches for output repeater frequencies or simplex signals You can also find FM repeaters Search for the nearest repeater The transceiver searches f...

Page 77: ...l sign in the Your Call Sign To select from RX History When you receive a call the caller station data is saved in RX History You can select the destination from the record To directly enter the desti...

Page 78: ...and the access repeater s call sign Your own call sign MY has not been set Set your own call sign MY p 45 Your own call sign MY has not been registered on a gateway repeater or the registered contents...

Page 79: ...ign p 47 The repeater set in FROM Access Repeater has no Gateway Check the repeater settings L is displayed on the LCD While receiving through the internet some packets may be lost due to network erro...

Page 80: ...an outlet on a circuit different from that to which the receiver is connected Consult the dealer or an experienced radio TV technician for help CAUTION Changes or modifications to this device not expr...

Page 81: ...band 11 BK 4 Bluetooth Connecting 32 Deleting 33 Disconnecting 33 icon 3 Pairing 32 Turning ON 31 C Call Gateway 44 57 Individual station 58 Local 44 56 Simplex 19 44 49 Call Channel mode 14 CALL key...

Page 82: ...electing a item 22 microSD card Formatting 8 Inserting 7 Removing 28 MIC SP jack 2 MODE key 1 Monitor function 12 MR key 2 MW key 2 23 My Call Sign 45 N Near Repeater search function viii 63 O Operati...

Page 83: ...Simplex 19 49 Simplex call 44 Single band display 3 11 SPCH key 2 Specifications 34 Speech function 17 SQL key 1 Squelch 12 S RF meter 4 T Terminal mode vii TO 64 Transmit power level 20 Transmitting...

Page 84: ...t MIC Gain Player Set Skip Time DV Auto Reply FM RADIO FM Radio Memory FM Radio Set Auto Mute Earphone Antenna Power Save FM Radio FM Radio ON FM Radio Mode MEMORY Memory CH Call CH Your Call Sign Rep...

Page 85: ...gn SET My Station My Call Sign TX Message SET DV Set Tone Control RX Bass RX Treble RX Bass Boost TX Bass TX Treble Auto Reply DV Data TX DV Fast Data Fast Data GPS Data Speed TX Delay PTT Digital Mon...

Page 86: ...dress CI V Baud Rate SP Jack CI V Transceive CI V USB Bluetooth REMOTE Transceive Address USB Connect USB Serialport Function Heterodyne Charging Power ON USB Power Input Phone Tablet PC Screen Captur...

Page 87: ...SD Card Load Setting Save Setting Import Export Import Export CSV Format Opening Picture SD Card Info Screen Capture View TX RX Picture View Firmware Update Format Unmount SET Bluetooth Set Bluetooth...

Page 88: ...1 1 32 Kamiminami Hirano ku Osaka 547 0003 Japan A7608D 1EX Printed in Japan 2020 Icom Inc Oct 2020...

Reviews: