


37
CLONING
9
■
Cloning operation
Cloning allows you to quickly and easily transfer the
programmed contents from one transceiver to another.
D
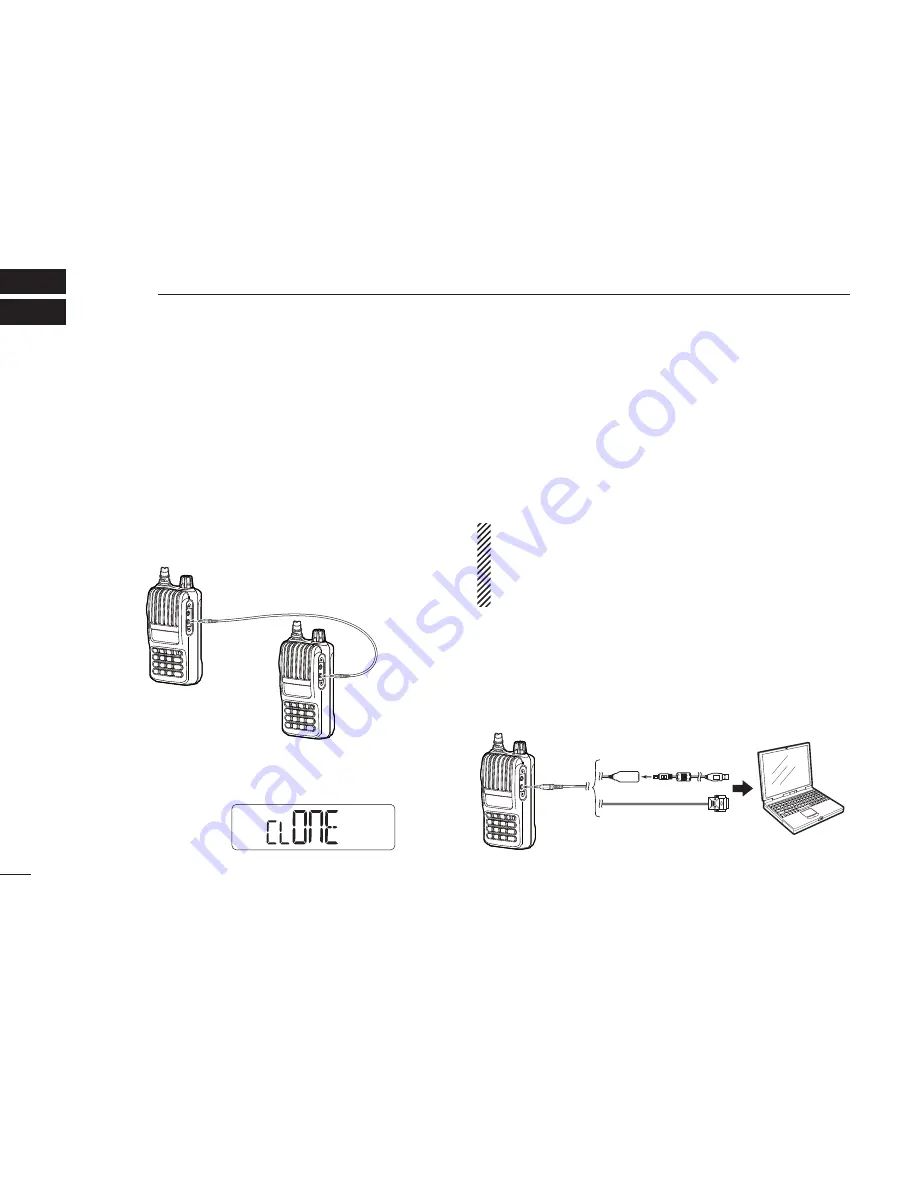
Transceiver-to-transceiver cloning
q
Turn OFF the power, and then connect an optional OPC-474
cloning cable to the
[SP]
jacks of the master transceiver
and the sub transceiver.
• The master transceiver is used to send the data to the sub trans-
ceiver.
w
While pushing
[FUNC](
M
)
and
[
S
]
, turn ON the master
transceiver to enter the cloning mode.
e
Turn ON the sub transceiver.
r
Push
[PTT]
on the master transceiver to start the data transfer.
• “CL Out” appears on the master transceiver’s display, and the signal
indicator shows the data is being transferred to the sub transceiver.
• “CL In” appears on the sub transceiver’s display, and the signal indi-
cator shows the data is being received from the master transceiver.
t
When cloning is fi nished, "CLOnE" appears again.
y
Turn OFF both transceivers, and then turn them ON again
to exit the cloning mode.
NOTE:
• DO NOT push
[PTT]
on the sub transceiver while clon-
ing. This will cause a cloning error.
• DO NOT disconnect the cloning cable or turn OFF the
power while cloning. This will cause a cloning error.
D
Cloning using a PC
The CS-80FX
CLONING
SOFTWARE
is also used to clone/edit
contents with a PC (using Microsoft
®
Windows
®
2000/XP or
Windows Vista
®
/Windows
®
7) using ICF format fi les.
Refer to the INSTRUCTIONS and the Help file that come
with the CS-80FX, for details.
Master transceiver
Sub transceiver
Transceiver
PC
OPC-478
(RS-232C type)
OPC-478UC*
(USB type)
to USB port
to RS-232C
port
*Refer to the OPC-478UC instruction manual for OS driver compatibility.
• “CLOnE” appears


