

1-1-32 Kamiminami, Hirano-ku, Osaka 547-0003, Japan
A-6368W-1EX
Printed in Japan
© 2004 Icom Inc.
■
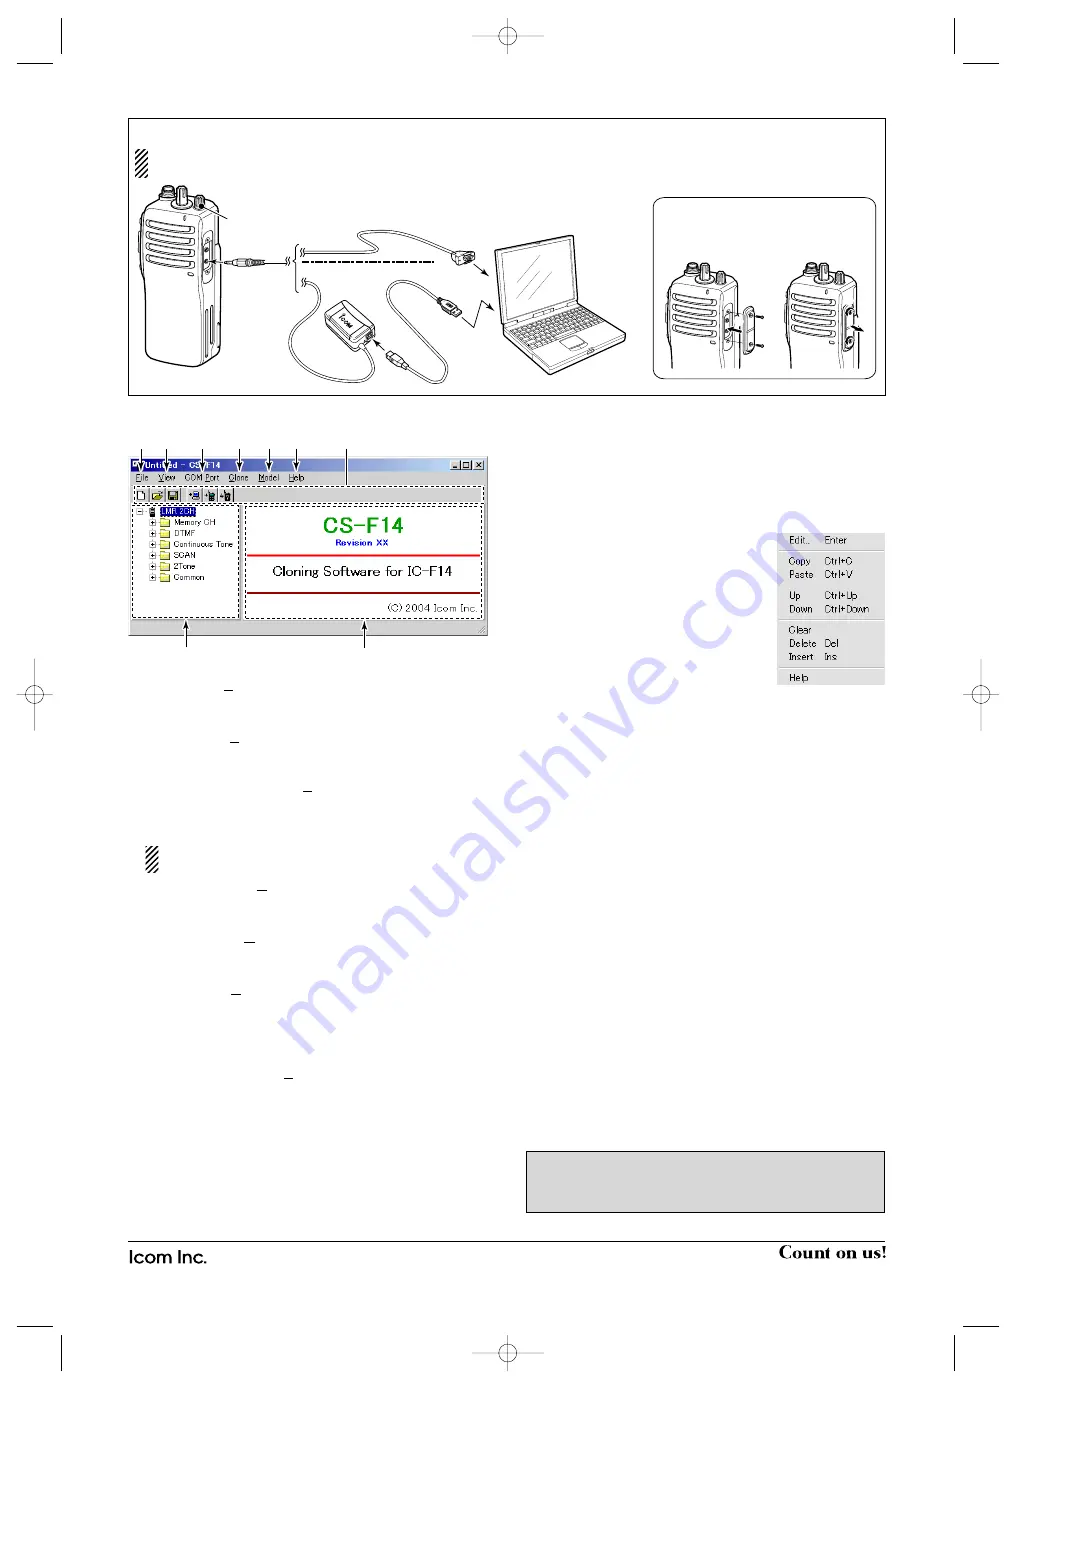
Screen menus description
q
FILE MENU [File]
Used for saving memory channel contents, printing the
pre-programmed information or quitting the program, etc.
w
VIEW MENU [View]
• Selects the displayed font size.
• Turn the Toolbar ON or OFF.
e
COM PORT MENU [COM Port]
• Click to display the COM port (1 to 4 and More) setting
dialog box.
• Set the transfer speed (Normal or High).
NOTE:
‘Check the following’ dialog box appears
when the COM port is not set correctly.
r
CLONING MENU [Clone]
Click to display the cloning menu and cloning information
dialog box.
t
MODEL MENU [Model]
Click to select the appropriate model name which going to
clone.
y
HELP MENU [Help]
Click to display the help contents and cloning software re-
vision information.
u
TOOL BAR
Shortcut buttons appear on the tool bar when clicking the
tool bar function in the [View] menu.
i
TREE VIEW SCREEN
Click the folder icon which you want to edit.
o
CONTENTS LIST SCREEN
Display the contents list (Memory CH information, DTMF
settings, etc.).
■
Programming information
• Read all the transceiver cloning data into the PC before
starting editing with this software. Otherwise the frequency
data may not be cloned properly to your transceiver.
• Select the model type.
- LMR : Land Mobile Radio. 2Tone function is available.
- PMR : Private Mobile Radio. 5Tone function is available.
• Double click the desired cell in the
memory channel screen directory, or
right-click the cell then click
[Edit...
Enter]
.
- You can click the pull down menu to
select and change the channel set-
ting depends on the item.
- You can edit it directly.
• Click
[Help]
to display the help
screen for the item.
■
Cloning menus
The
Memory CH
,
DTMF
,
Continuous Tone
,
SCAN
,
2Tone
,
5Tone
and
Common
menus allow you to set the transceiver
customised
ï
ï
Memory CH
Specify the operating frequency and details of the operating
conditions for each memory channel.
ï
ï
DTMF
Edit the DTMF Codes, and then set the time period/signal
length for the DTMF Timer, etc.
ï
ï
Continuous Tone
Set the Continuous Tone Setting items for Tone Burst,
CTCSS Reverse Burst Timer, etc.
ï
ï
SCAN
Set the Scan List settings for Mode type and Power Save
function. And set the Timer settings, etc.
ï
ï
2Tone
(Available only when LMR is selected)
Set the 2Tone code channel items and the 2Tone RX code
settings.
ï
ï
5Tone
(Available only when PMR is selected)
Set the 5Tone code channel items, the 5Tone code settings,
Format and User Tone.
ï
ï
Common
Assign the desired functions to the programmable function
keys and set the set mode items, common items, etc.
NOTE:
The above instructions are for reference only.
Please refer to the HELP file of the cloning software for
the function or setting details.
q
r
y
u
t
e
w
i
o
(Edit menu)
■
Connections
All cloning operations are performed from the computer’s keyboard—the operation required on the transceiver side is;
First, connect the cloning cable as illustrated below. And then rotate [VOL] to turn power ON.
q
w
e
r
PC
Detaching:
Unscrew (
e
),
then detach the
jack cover (
r
).
Attaching:
Attach the jack cover
(
q
), then tighten the
screws (
w
).
To [SP]
connector
TRANSCEIVER
to USB port
to RS-232C port
OPC-478 (RS-232C type)
OPC-478U (USB type)
[VOL]
CS-F14_0.qxd 05.7.29 10:42 Page 2


