Motorola M11UGD6CB1_N, Service Manual
Introducing the Motorola M11UGD6CB1_N Service Manual - your ultimate companion for optimal product usage! Easily download this comprehensive manual, filled with detailed instructions and troubleshooting tips, completely free from manualshive.com. Unlock the full potential of your Motorola device and optimize its performance with this must-have resource.
Share
Download


Reviews:
No comments
Related manuals for M11UGD6CB1_N
151
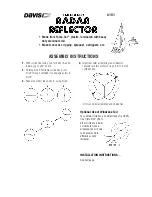
Brand: Davis Instruments Pages: 3

ATLANTIS250 BK - ATLANTIS 250 VHF Radio
Brand: Uniden Pages: 36

Rino 655t
Brand: Garmin Pages: 12

RS 133
Brand: Majestic Pages: 26

PCR2-EU868-ODA
Brand: Parametric Pages: 9
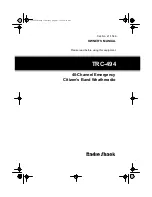
TRC-494
Brand: Radio Shack Pages: 40

DL150HP
Brand: Palstar Pages: 2

GB7MT
Brand: Yaesu Pages: 3

RR25
Brand: Richter Pages: 12

GTX 45R
Brand: Garmin Pages: 69

RFU-400
Brand: ICP DAS USA Pages: 3

MK12D TSO
Brand: Narco Avionics Pages: 19

ZP8 Series
Brand: B&B Electronics Pages: 60

WaveGuide 5 Direction
Brand: RADAC Pages: 35

FM Tower 17
Brand: Oehlbach Pages: 11

RT-300
Brand: NAVICOM Pages: 15

Simrad RS90S
Brand: Navico Pages: 53

Turbo HR2003
Brand: Emerson Pages: 19


