Chapter 5. Installing options
51
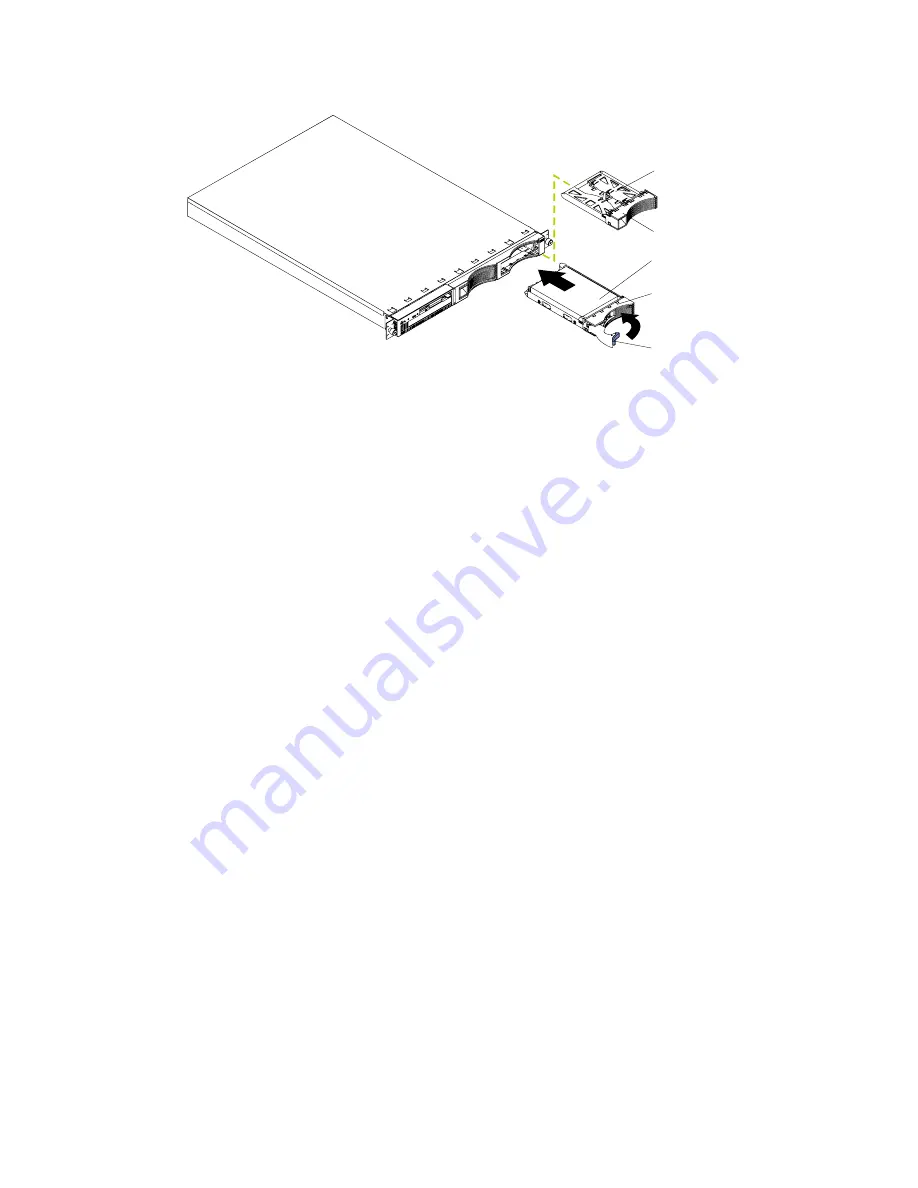
Complete the following steps to install a hot-swap drive in a hot-swap drive bay:
Attention:
•
To maintain proper system cooling, do not operate the server for more than two
minutes without either a drive or a filler panel installed for each bay.
•
When you handle electrostatic discharge sensitive devices (ESD), take precautions
to avoid damage from static electricity. For details on handling these devices,
refer to “Handling electrostatic discharge-sensitive devices” on page 110.
1.
Remove the filler panel from one of the empty hot-swap bays by inserting your
finger into the depression at the left side of the filler panel and pulling it away
from the server.
2.
Install the hard disk drive in the hot-swap bay:
a.
Ensure the tray handle is open (that is, perpendicular to the drive).
b. Align the rails on the drive assembly with the guide rails in the drive bay.
c.
Gently push the drive assembly into the bay until the drive connects to the
backplane.
d. Push the tray handle toward the closed position until it locks the drive in
place.
3.
Check the hard disk drive status indicators to verify that the hard disk drives are
operating properly. See “Server controls and indicators” on page 6 for the
location of the status indicators.)
•
When a ServeRAID adapter is installed and:
— The amber light is on continuously, the drive had failed.
— The green light flashes slowly (one flash per second), the drive is being
rebuilt.
— The green light flashes rapidly (three flashes per second), the controller is
identifying the drive.
Replacing a drive in a hot-swap bay
You do not have to turn off the server to remove or install the hot-swap drives.
1.
Before you remove a hot-swap hard disk drive that is not defective, back up all
important data.
Slim filler
Filler panel
Hard disk drive
Drive tray
Drive tray handle
(in open position)
Summary of Contents for xSeries 330
Page 1: ...IBM Hardware Maintenance Manual xSeries 330...
Page 2: ......
Page 3: ...IBM Hardware Maintenance Manual xSeries 330...
Page 18: ...10 Hardware Maintenance Manual xSeries 330...
Page 36: ...28 Hardware Maintenance Manual xSeries 330...
Page 84: ...76 Hardware Maintenance Manual xSeries 330...
Page 90: ...82 Hardware Maintenance Manual xSeries 330...
Page 108: ...100 Hardware Maintenance Manual xSeries 330...
Page 114: ...106 Hardware Maintenance Manual xSeries 330...
Page 127: ...Chapter 9 Related service information 119...
Page 128: ...120 Hardware Maintenance Manual xSeries 330...
Page 129: ...Chapter 9 Related service information 121...
Page 130: ...122 Hardware Maintenance Manual xSeries 330...
Page 131: ...Chapter 9 Related service information 123...
Page 132: ...124 Hardware Maintenance Manual xSeries 330...
Page 133: ...Chapter 9 Related service information 125...
Page 134: ...126 Hardware Maintenance Manual xSeries 330...
Page 147: ...Chapter 9 Related service information 139...
Page 148: ...140 Hardware Maintenance Manual xSeries 330...
Page 149: ...Chapter 9 Related service information 141...
Page 157: ......


