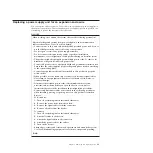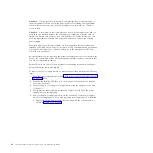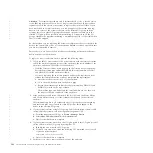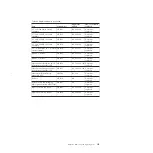
For each of the canisters, verify the status of the system status LED. If the
LED is lit on either of the canisters, do not continue because the system is still
online. Determine why the node canisters did not shut down in step 3 on
page 102 or step 4 on page 102.
Note:
If you continue while the system is still active, you risk losing the
clustered system configuration and volume cache data that is stored in the
canister.
6.
Turn off the power to the enclosure using the switches on the power supply
units.
7.
Record which data cables are plugged into the specific ports. The cables must
be inserted back into the same ports after the replacement is complete;
otherwise, the system cannot function properly.
8.
Disconnect the cable retention brackets and the power cords from the power
supply units.
9.
Disconnect the data cables for each canister.
10.
Remove the power supply units from the enclosure.
11.
Remove the canisters from the enclosure. Record the location of each canister.
They must be inserted back into the same location in the new enclosure.
12.
Remove all the drives and blank drive assemblies from the enclosure. Record
the location for each drive. They must be inserted back into the same location
in the new enclosure.
13.
Remove both enclosure end caps from the enclosure. Keep the left end cap
because it is used again.
14.
Remove the clamping screws that attached the enclosure to the rack cabinet.
15.
Remove the enclosure chassis from the front of the rack cabinet and take the
chassis to a work area.
16.
Install the new enclosure chassis in the rack cabinet.
17.
Remove the end caps from the new enclosure and install the clamping screws
that attach the enclosure to the rack cabinet.
18.
Replace the end caps. Use the new right end cap and use the left end cap that
you removed in step 13.
Using the left end cap that you removed preserves the model and serial
number identification.
19.
Reinstall the drives in the new enclosure. The drives must be inserted back
into the same location from which they were removed on the old enclosure.
20.
Reinstall the canisters in the enclosure. The canisters must be inserted back
into the same location from which they were removed on the old enclosure.
21.
Install the power supply units.
22.
Reattach the data cables to each canister using the information that you
recorded previously.
Note:
The cables must be inserted back into the same ports from which they
were removed on the old enclosure; otherwise, the system cannot function
properly.
23.
Attach the power cords and the cable retention brackets to the power supply
units.
24.
Write the old enclosure machine type and model (MTM) and serial number on
the repair identification (RID) tag that is supplied. Attach the tag to the left
flange at the back of the enclosure.
Chapter 8. Removing and replacing parts
103
|
|
|
|
Summary of Contents for Storwize V7000
Page 1: ...IBM Storwize V7000 Version 6 3 0 Troubleshooting Recovery and Maintenance Guide GC27 2291 02...
Page 6: ...vi Storwize V7000 Troubleshooting Recovery and Maintenance Guide...
Page 8: ...viii Storwize V7000 Troubleshooting Recovery and Maintenance Guide...
Page 10: ...x Storwize V7000 Troubleshooting Recovery and Maintenance Guide...
Page 34: ...18 Storwize V7000 Troubleshooting Recovery and Maintenance Guide...
Page 42: ...26 Storwize V7000 Troubleshooting Recovery and Maintenance Guide...
Page 80: ...64 Storwize V7000 Troubleshooting Recovery and Maintenance Guide...
Page 128: ...112 Storwize V7000 Troubleshooting Recovery and Maintenance Guide...
Page 156: ...140 Storwize V7000 Troubleshooting Recovery and Maintenance Guide...
Page 166: ...150 Storwize V7000 Troubleshooting Recovery and Maintenance Guide...
Page 171: ......
Page 172: ...Printed in USA GC27 2291 02...

