


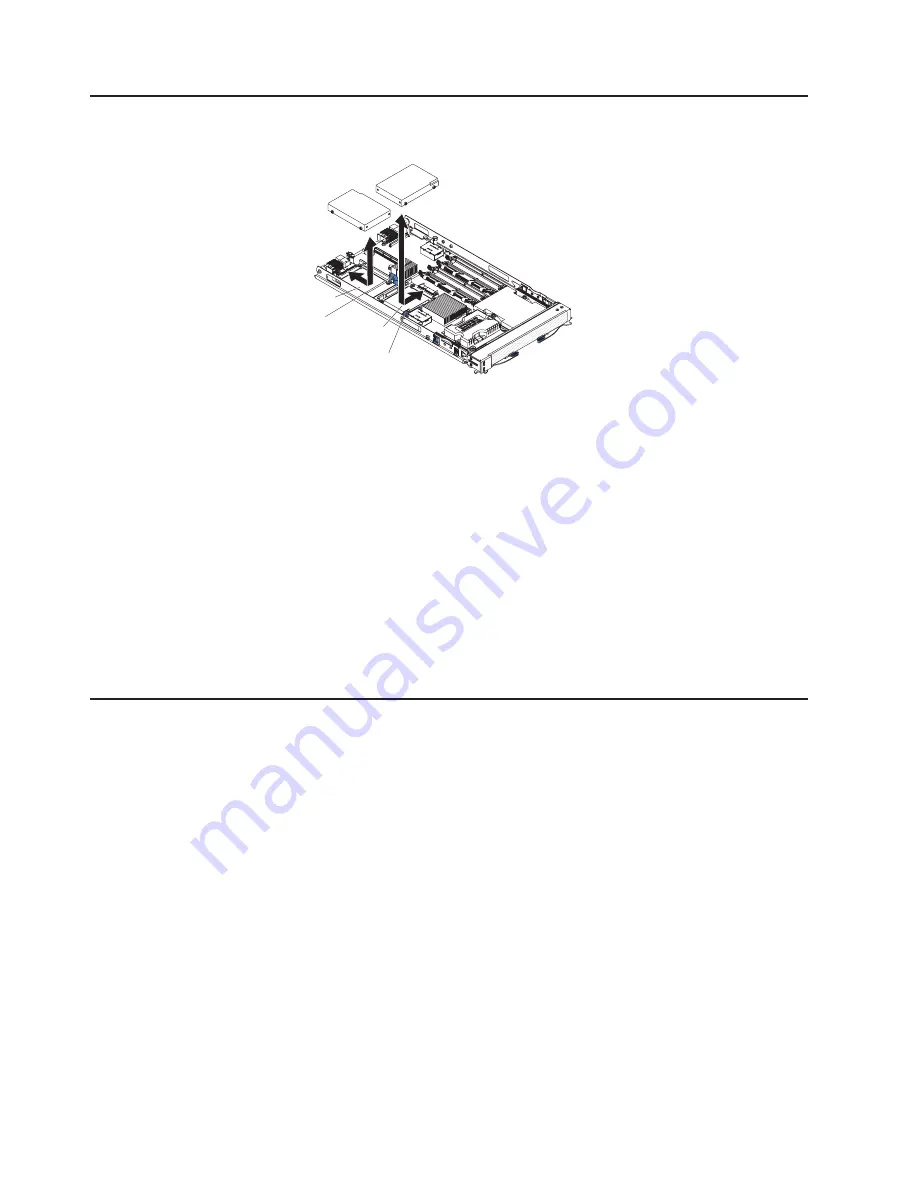
Removing
a
SAS
hard
disk
drive
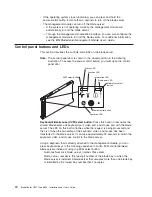
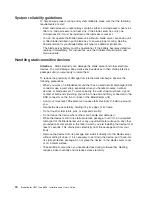
The
following
illustration
shows
how
to
remove
a
SAS
hard
disk
drive.
SAS ID 0
SAS ID 1
Hard disk drive
release lever
Hard disk
drive release
lever
To
remove
a
SAS
hard
disk
drive,
complete
the
following
steps:
1.
Read
the
safety
information
that
begins
on
page
v
and
“Installation
guidelines”
on
page
15.
2.
If
the
blade
server
is
installed
in
a
BladeCenter
unit,
remove
it
(see
“Removing
the
blade
server
from
the
BladeCenter
unit”
on
page
17
for
instructions).
3.
Carefully
lay
the
blade
server
on
a
flat,
static-protective
surface.
4.
Open
the
blade
server
cover
(see
“Opening
the
blade
server
cover”
on
page
18
for
instructions).
5.
If
a
Memory
and
I/O
Expansion
Blade
is
installed,
remove
it
(see
“Removing
an
expansion
unit”
on
page
19).
6.
Locate
SAS
connector
0
(J136)
or
SAS
connector
1
(J137).
Slowly
pull
the
blue
lever
at
the
back
of
the
hard
disk
drive
tray
away
from
the
hard
disk
drive
to
disengage
the
drive
from
its
tray.
7.
From
the
rear
edge
of
the
drive,
slide
the
drive
out
of
the
SAS
connector.
Installing
memory
modules
The
following
notes
describe
the
types
of
dual
inline
memory
modules
(DIMMs)
that
the
blade
server
supports
and
other
information
that
you
must
consider
when
you
install
DIMMs:
v
The
system
board
contains
four
DIMM
connectors.
If
an
optional
IBM
BladeCenter
Memory
and
I/O
Expansion
Blade
is
installed
on
your
blade
server,
it
provides
four
additional
DIMM
connectors.
The
server
supports
two-way
memory
interleaving.
v
The
DIMM
options
that
are
available
for
the
blade
server
are
512
MB,
1
GB,
2
GB,
and
4
GB.
Depending
on
the
memory
configuration
set
in
the
Configuration/Setup
Utility
program,
the
blade
server
can
support
a
minimum
of
1
GB
and
a
maximum
of
16
GB
of
the
system
memory
in
the
system
board
and
a
maximum
of
32
GB
of
system
memory
when
an
optional
IBM
BladeCenter
Memory
and
I/O
Expansion
Blade
is
installed.
22
BladeCenter
HS21
Type
8853:
Installation
and
User’s
Guide
Summary of Contents for HS21 - BladeCenter - 8853
Page 3: ...BladeCenter HS21 Type 8853 Installation and User s Guide...
Page 60: ...48 BladeCenter HS21 Type 8853 Installation and User s Guide...
Page 78: ...66 BladeCenter HS21 Type 8853 Installation and User s Guide...
Page 79: ......
Page 80: ...Part Number 44W1496 Printed in USA 1P P N 44W1496...