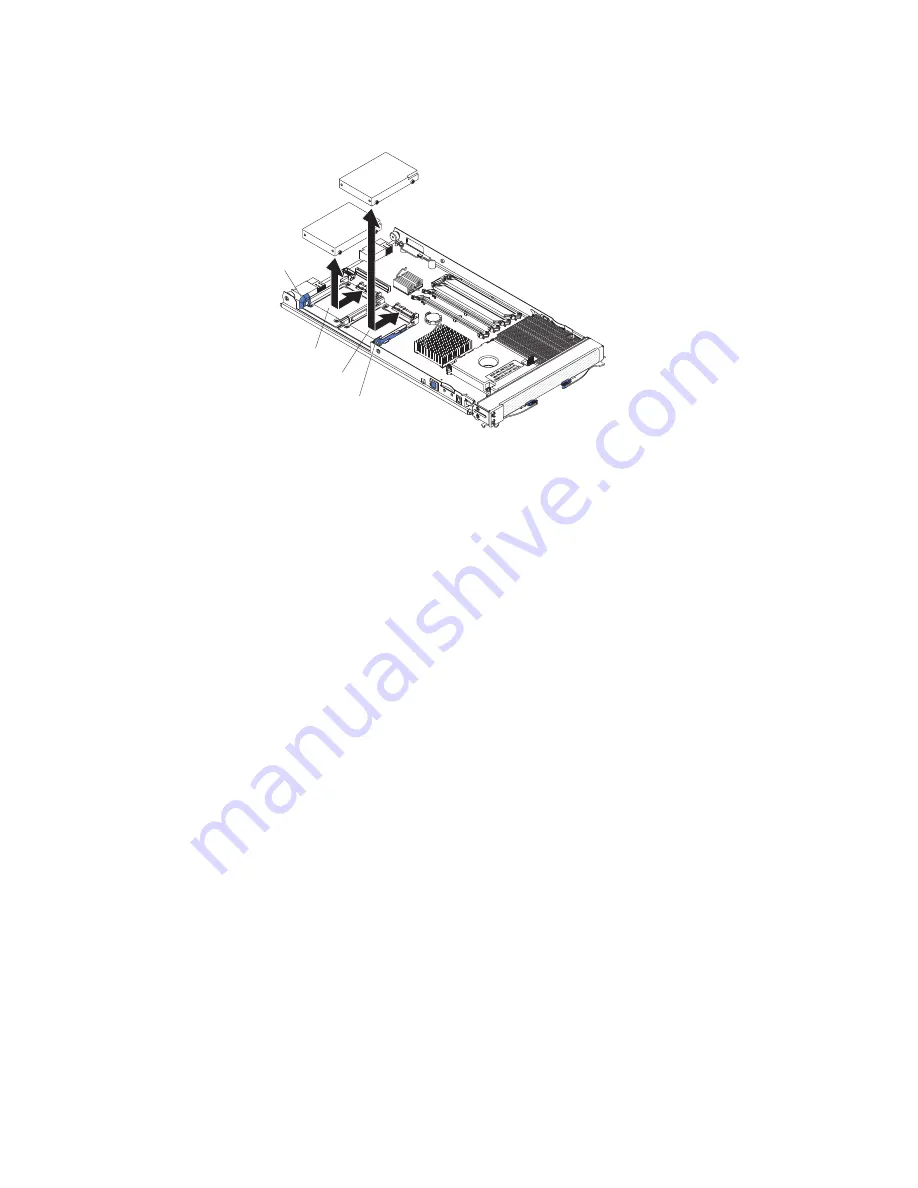
Removing
a
SAS
hard
disk
drive
To
remove
a
SAS
hard
disk
drive,
complete
the
following
steps:
SAS ID 0
SAS ID 1
Hard
drive
release
lever
Hard drive
release
lever
1.
Read
the
safety
information
that
begins
on
page
vii
and
“Installation
guidelines”
on
page
55.
2.
Shut
down
the
operating
system,
turn
off
the
blade
server,
and
remove
the
blade
server
from
the
BladeCenter
unit.
See
“Removing
the
blade
server
from
a
BladeCenter
unit”
on
page
57
for
instructions.
3.
Remove
the
blade
server
cover
(see
“Removing
the
blade
server
cover”
on
page
59
for
instructions).
4.
Locate
the
hard
disk
drive
that
is
to
be
removed
(SAS
ID
0
or
SAS
ID
1).
5.
While
pulling
the
blue
release
lever
at
the
front
of
the
hard
disk
drive
tray,
slide
the
drive
out
of
the
SAS
connector
and
disengage
it
from
the
drive
tray.
6.
The
SAS
drive
tray
can
be
removed
by
removing
the
four
screws
that
secure
it
to
the
system
board
and
then
lifting
the
tray
from
the
system
board.
7.
If
you
are
instructed
to
return
the
SAS
drive,
follow
all
packaging
instructions,
and
use
any
packaging
materials
for
shipping
that
are
supplied
to
you.
62
BladeCenter
HS20
Type
7981
and
1884:
Problem
Determination
and
Service
Guide
Summary of Contents for eServer BladeCenter HS20Type 8832
Page 1: ...BladeCenter HS20 Type 7981 and 1884 Problem Determination and Service Guide...
Page 2: ......
Page 3: ...BladeCenter HS20 Type 7981 and 1884 Problem Determination and Service Guide...
Page 8: ...vi BladeCenter HS20 Type 7981 and 1884 Problem Determination and Service Guide...
Page 16: ...xiv BladeCenter HS20 Type 7981 and 1884 Problem Determination and Service Guide...
Page 68: ...52 BladeCenter HS20 Type 7981 and 1884 Problem Determination and Service Guide...
Page 98: ...82 BladeCenter HS20 Type 7981 and 1884 Problem Determination and Service Guide...
Page 110: ...94 BladeCenter HS20 Type 7981 and 1884 Problem Determination and Service Guide...
Page 111: ......
Page 112: ...Part Number 31R1716 Printed in USA 1P P N 31R1716...


