


Chapter 2. Installing options
11
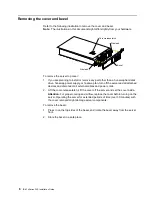
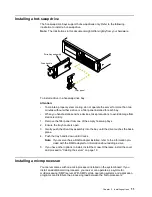
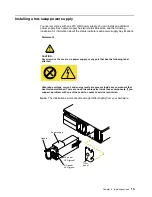
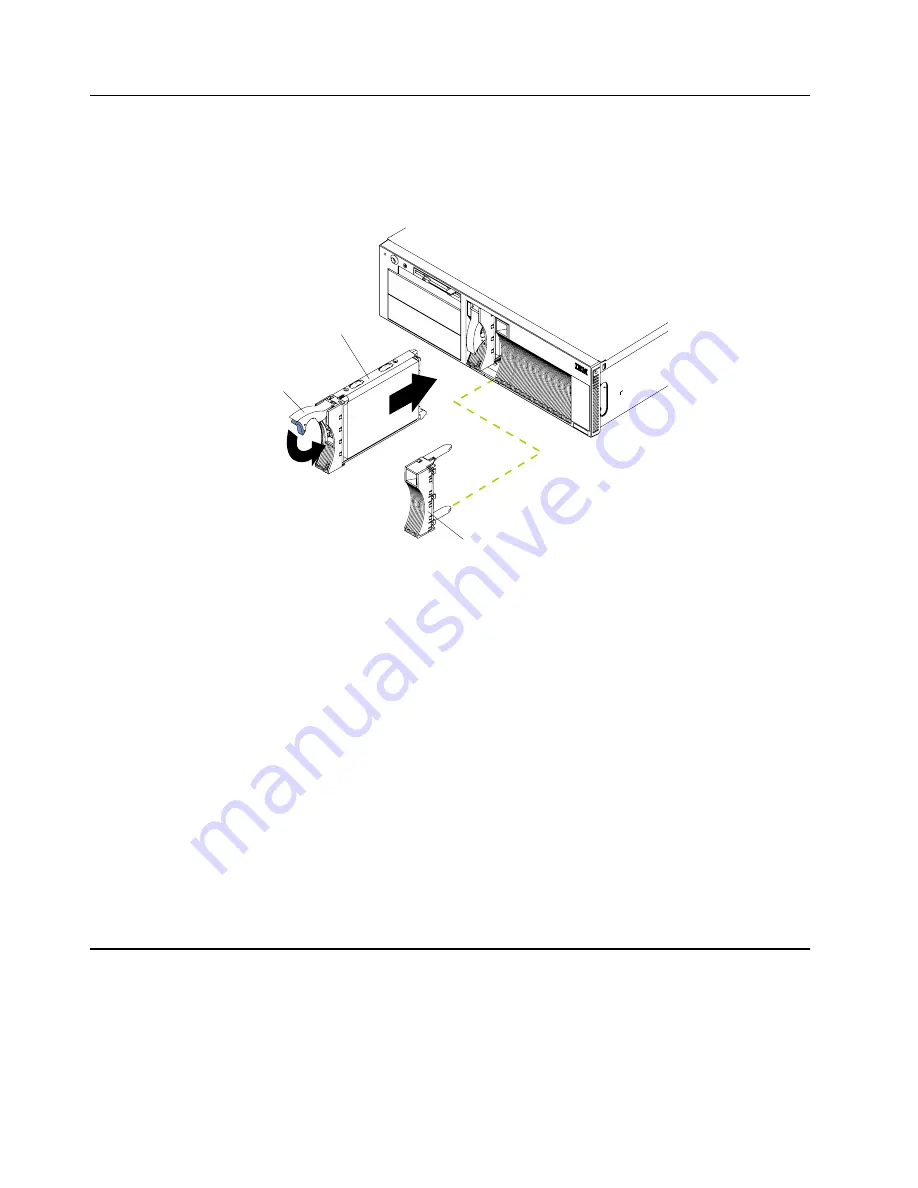
Installing a hot-swap drive
The hot-swap drive bays support hot-swap drives only. Refer to the following
illustration to install a hot-swap drive.
Note: The illustrations in this document might differ slightly from your hardware.
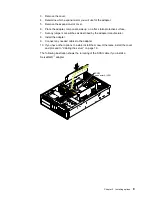
To install a drive in a hot-swap drive bay:
Attention:
•
To maintain proper system cooling, do not operate the server for more than two
minutes without either a drive or a filler panel installed for each bay.
•
When you handle static-sensitive devices, take precautions to avoid damage from
static electricity.
1.
Remove the filler panel from one of the empty hot-swap bays.
2.
Ensure the tray handle is open.
3.
Gently push the drive-tray assembly into the bay until the drive touches the back-
plane.
4.
Push the tray handle down until it locks.
Note: If your server has a RAID adapter installed, refer to the information pro-
vided with the RAID adapter for information about adding a drive.
5.
If you have other options to install, install them now. Otherwise, install the cover
and proceed to “Cabling the server” on page 19.
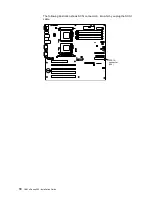
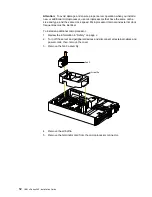
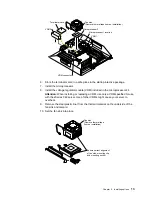
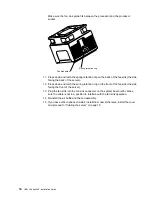
Installing a microprocessor
Install
ing a mi
croproc
essor
Your server comes with one microprocessor installed on the system board. If you
install an additional microprocessor, your server can operate as a symmetric
multiprocessing (SMP) server. With SMP, certain operating systems and application
programs can distribute the processing load between the microprocessors.
Drive-tray assembly
Drive handle
Filler panel
Summary of Contents for eServer 342 xSeries
Page 3: ...IBM IBM xSeries 342 Installation Guide ...
Page 32: ...20 IBM xSeries 342 Installation Guide ...
Page 38: ...26 IBM xSeries 342 Installation Guide ...
Page 52: ...40 IBM xSeries 342 Installation Guide ...
Page 69: ......
Page 70: ...IBM Part Number 24P2880 Printed in the United States of America 24P288 ...


