Installing the RackSwitch G8124
31
3.
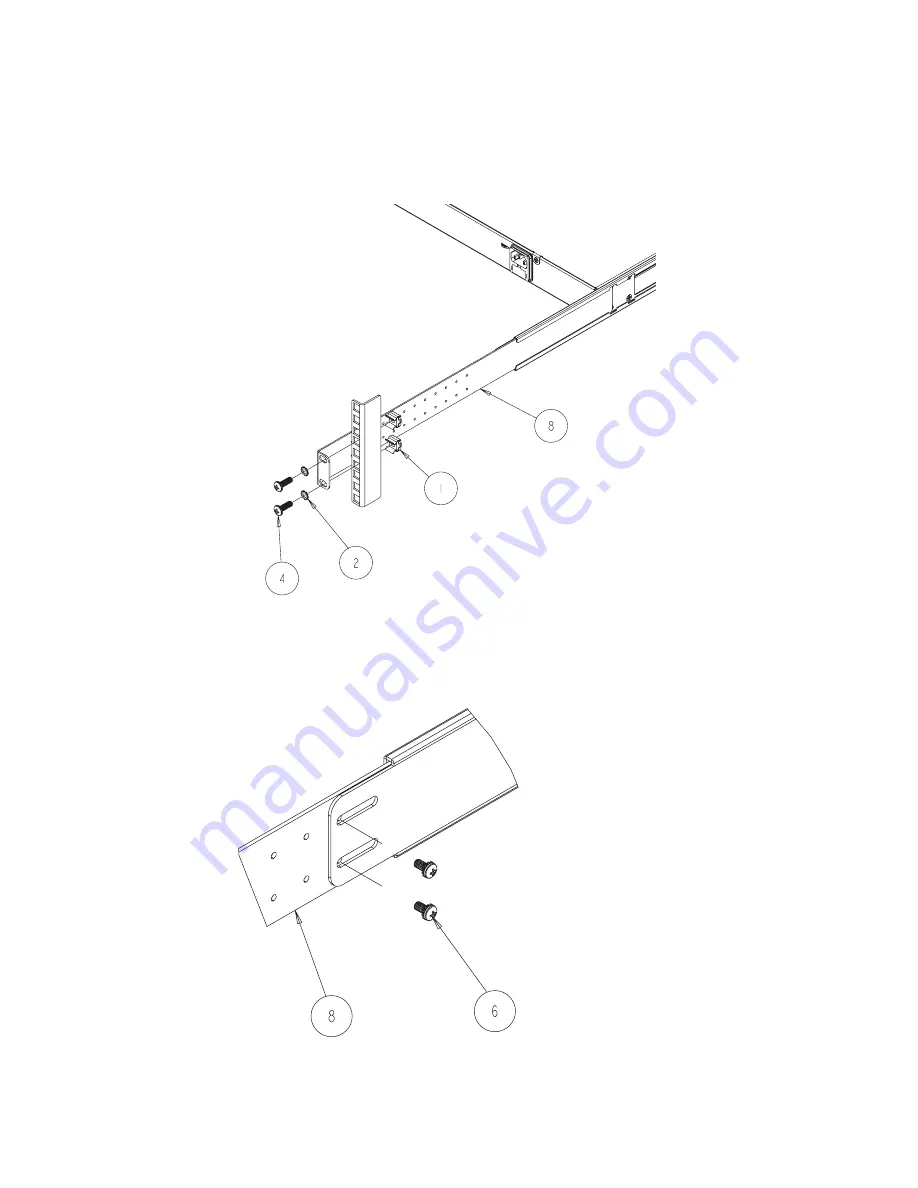
The rear mounting brackets are secured to the rack with M6 screws, washers, and clip nuts. Torque
the screws to approximately 30 inch-pounds (3.5 Nm).
Figure 12
Attaching Rear Mounting Brackets
4.
The front mounting brackets and the rear mounting brackets are secured with M3 screws. Torque
the screws to approximately 4 inch-pounds (0.5 Nm).
Figure 13
Securing the Rear Bracket to the Front Bracket
Summary of Contents for BNT RackSwitch G8124DC
Page 2: ......
Page 5: ...Safety v Safety...
Page 7: ...Safety vii...
Page 8: ...viii BNT RackSwitch G8124 Installation Guide...
Page 9: ...Safety ix...
Page 11: ...Safety xi...
Page 12: ...xii BNT RackSwitch G8124 Installation Guide...
Page 24: ...10 BNT RackSwitch G8124 Installation Guide...
Page 35: ...Installing the RackSwitch G8124 21...
Page 54: ...40 BNT RackSwitch G8124 Installation Guide...
Page 60: ...46 BNT RackSwitch G8124 Installation Guide...
Page 70: ...56 BNT RackSwitch G8124 Installation Guide Part Number 60Y1448 Printed in USA...


