3.
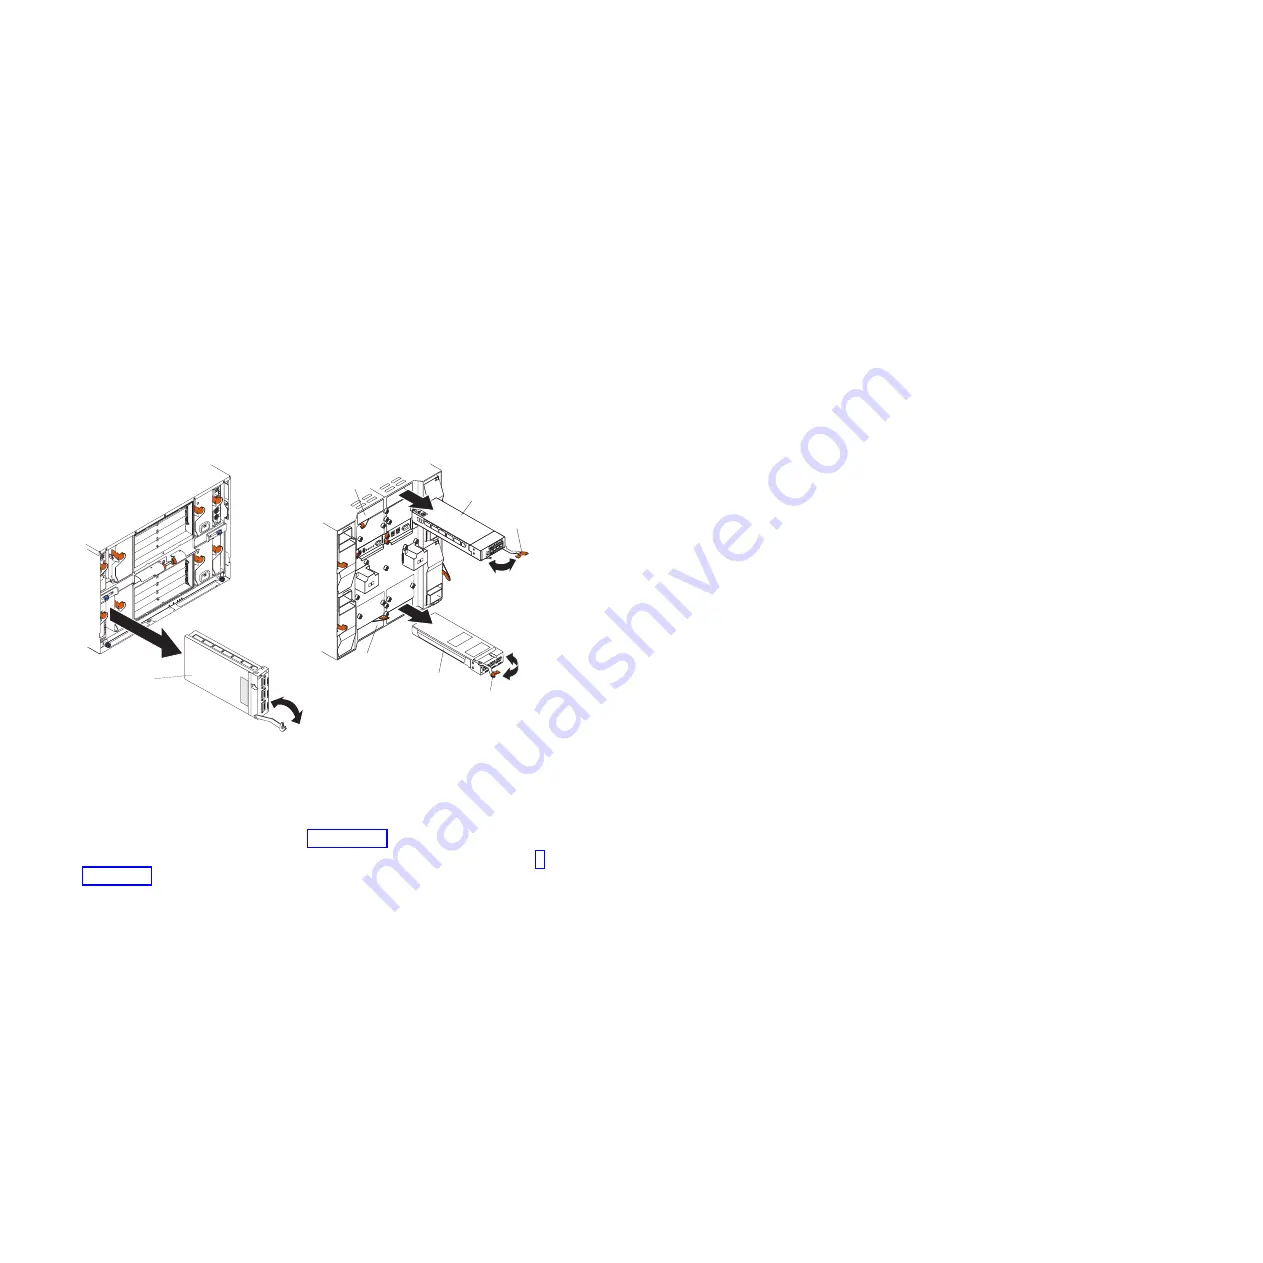
Pull the release latch to the fully-open position as shown in the illustration.
The module moves out of the bay slightly.
1
5
6
10
11
14
2
3
LI
N
K
O
K
1
!
I/O module
Release
latch
(open)
Release
latch
(open)
Ethernet
switch
module
Copper
pass-thru
module
Filler
module
Filler
module
2
3
L
IN
K
O
K
LINK OK
1
!
4.
Slide the module out of the bay and set it aside.
5.
Place either another I/O module or a filler module in the bay within 1
minute.
6.
If you placed another copper pass-thru module in the bay, reconnect any
cables that you disconnected in step 2 on page 20.
7.
Replace the acoustic-attenuation module option, if you removed it in step 1
on page 20.
Chapter 2. Installing and removing a copper pass-thru module
21
Summary of Contents for BladeCenter Copper Pass-thru
Page 1: ...IBM BladeCenter Copper Pass thru Module Installation Guide...
Page 2: ......
Page 3: ...IBM BladeCenter Copper Pass thru Module Installation Guide...
Page 14: ...xii IBM BladeCenter Copper Pass thru Module Installation Guide...
Page 36: ...22 IBM BladeCenter Copper Pass thru Module Installation Guide...
Page 55: ......


