


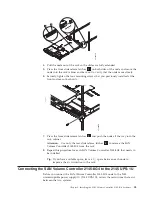
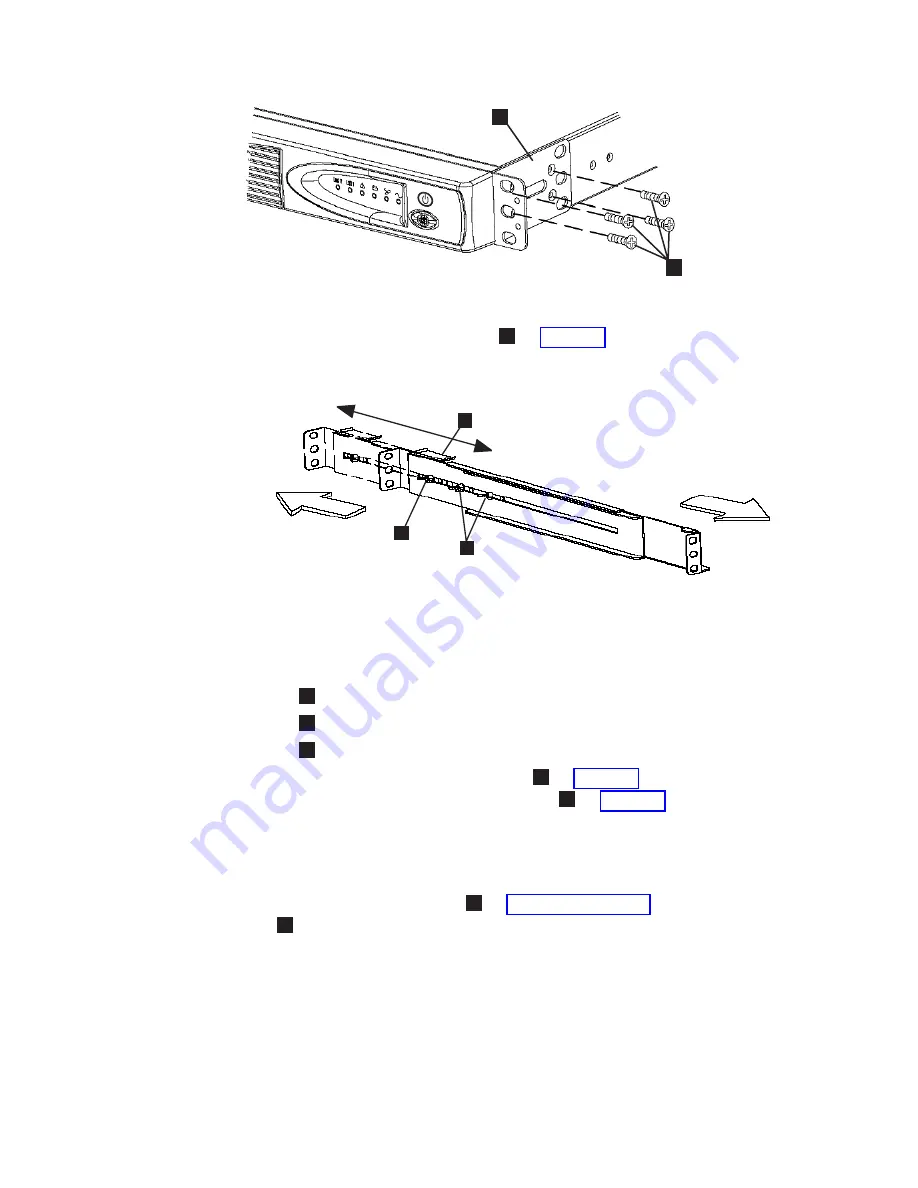
4.
Loosen
the
assembly
wing
nuts
(
1
in
on
both
rail
assemblies
and
adjust
the
rail
size
to
the
depth
of
your
rack.
1
Assembly
wing
nuts
2
Hold-down
bracket
3
Wing
nut
5.
Position
the
rear,
hold-down
bracket
(
2
in
towards
the
end
of
the
rail
assemblies
and
tighten
the
wing
nut
(
3
in
6.
Select
the
holes
in
the
rail
where
you
want
to
position
the
2145
UPS-1U.
Note:
The
bottom
flange
of
the
support
rail
must
align
with
the
EIA
mark
on
the
rack.
7.
Using
two
M6
×
10
screws
(
1
in
and
two
clip
nuts
2
,
attach
the
rail
to
the
rear
of
the
rack.
The
customer’s
rack
might
be
different
than
the
one
shown
here,
and
if
so,
might
require
different
clip
nuts
or
fasteners.
1
2
svc00004
Figure
15.
Installing
the
support
rails
for
a
2145
UPS-1U
into
the
rack
1
2
3
Front
Rear
svc00033
Figure
16.
Adjusting
the
rail
depth
on
the
2145
UPS-1U
42
IBM
System
Storage
SAN
Volume
Controller:
Hardware
Installation
Guide
Summary of Contents for 2145UPS-1U
Page 2: ......
Page 8: ...vi IBM System Storage SAN Volume Controller Hardware Installation Guide...
Page 56: ...18 IBM System Storage SAN Volume Controller Hardware Installation Guide...
Page 72: ...34 IBM System Storage SAN Volume Controller Hardware Installation Guide...
Page 102: ...64 IBM System Storage SAN Volume Controller Hardware Installation Guide...
Page 138: ...100 IBM System Storage SAN Volume Controller Hardware Installation Guide...
Page 190: ...152 IBM System Storage SAN Volume Controller Hardware Installation Guide...
Page 192: ...154 IBM System Storage SAN Volume Controller Hardware Installation Guide...
Page 200: ...162 IBM System Storage SAN Volume Controller Hardware Installation Guide...
Page 228: ...190 IBM System Storage SAN Volume Controller Hardware Installation Guide...
Page 231: ......
Page 232: ...Part Number 31P1046 Printed in USA GC27 2132 01 1P P N 31P1046...


