


Installing
the
keyboard
in
the
console
unit
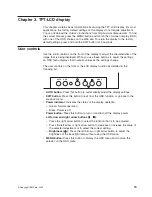
To
install
the
keyboard
in
the
console
unit,
complete
the
following
steps:
1.
Place
the
console
unit
on
a
table
or
other
flat
surface
and
make
sure
that
the
right
side
of
the
unit
extends
approximately
76
mm
(3
in.)
over
the
edge
of
the
surface.
This
will
help
you
route
the
keyboard-and-mouse
cable
more
easily
later
in
the
procedure.
(See
the
illustration
in
step
5
on
page
7.)
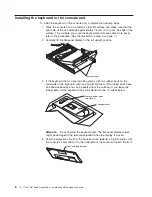
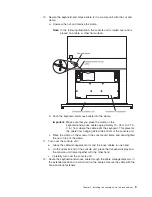
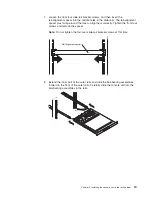
2.
Carefully
lift
the
flat-panel
display
to
the
full
upright
position.
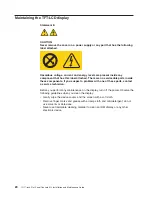
Thumbscrews
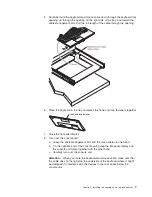
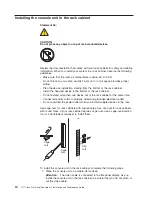
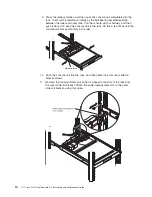
3.
If
the
keyboard
that
you
are
installing
comes
with
two
rubber
pads
on
the
underside
of
the
keyboard,
remove
and
discard
them.
(The
rubber
pads
have
an
adhesive
backing
and
can
be
peeled
from
the
surface.)
If
you
leave
the
rubber
pads
on
the
keyboard,
they
will
extend
into
the
1U
space
below.
Remove rubber pads
(two places)
Keyboard foot
Attention:
Do
not
extend
the
keyboard
feet.
The
flat-panel
display
screen
might
be
damaged
if
the
feet
are
extended
when
the
display
is
closed.
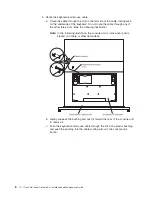
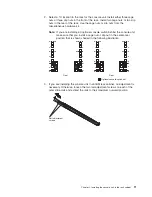
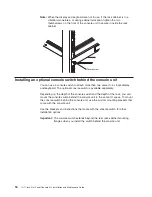
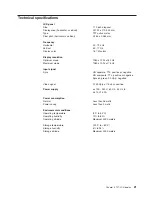
4.
Peel
the
protective
strip
from
the
hook-and-loop
fastener
strip
that
comes
with
the
console
kit
and
attach
it
to
the
underside
of
the
keyboard
toward
the
front.
Hook-and-loop fastener
6
1U
17-inch
Flat
Panel
Console
Kit:
Installation
and
Maintenance
Guide
Summary of Contents for 1U
Page 1: ...1U 17 inch Flat Panel Console Kit Installation and Maintenance Guide...
Page 2: ......
Page 3: ...1U 17 inch Flat Panel Console Kit Installation and Maintenance Guide...
Page 32: ...22 1U 17 inch Flat Panel Console Kit Installation and Maintenance Guide...
Page 91: ......
Page 92: ...Part Number 46M1369 Printed in USA 1P P N 46M1369...