background image


13 


The tool uses an iBELL charger and battery with the above 
mentioned specifications exclusively for this product

. Use of 

other charging procedures are not appreciated. There is an option 
for an additional battery pack as well *. 
 

CHARGING THE BATTERY: 


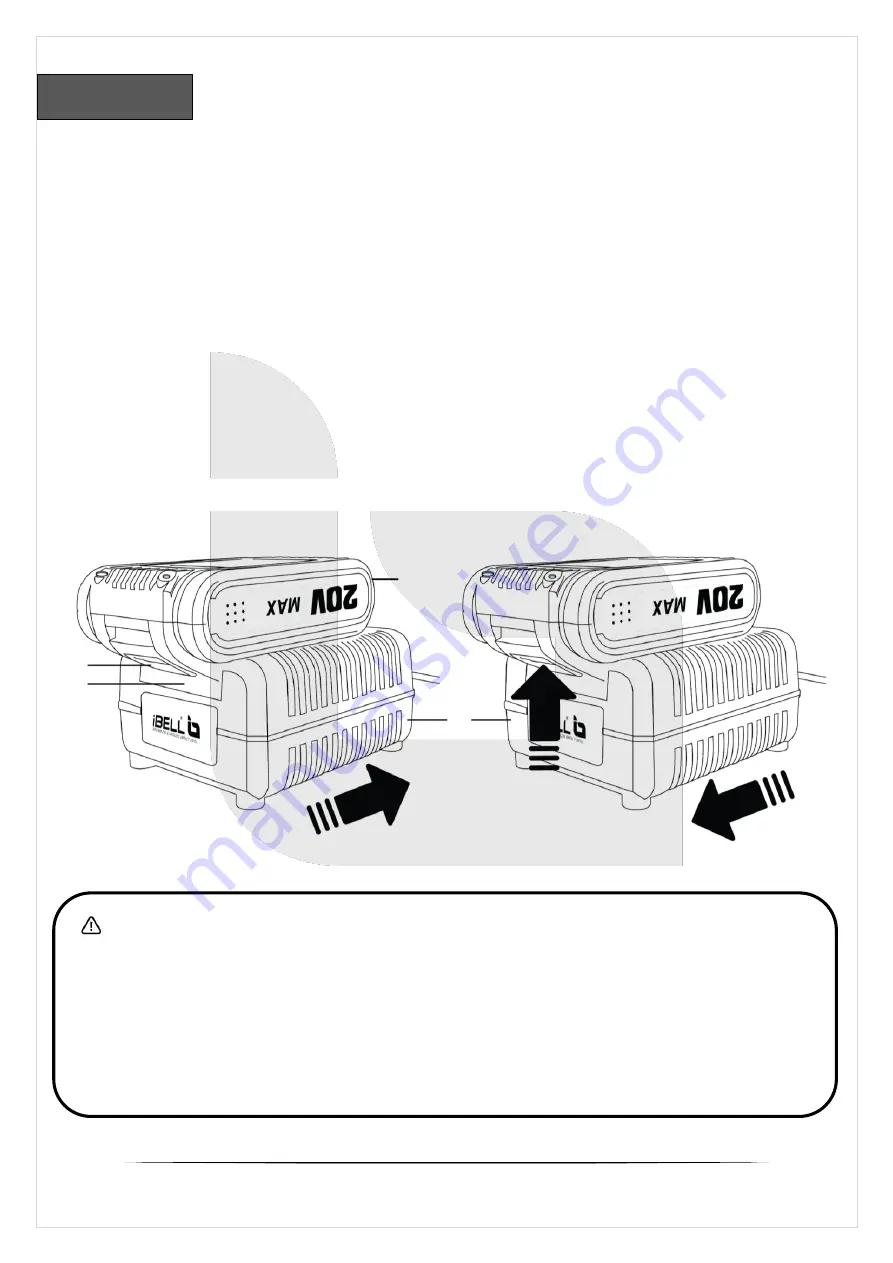
Slide the battery pack (8) into the charger base (11) until it locks in 
place. Connect the charger (12) to the power supply. The indicator 
light (displays in the iBell logo) lights in red when battery is charging 
and green/blue when charging is finished.


After charging finished, disconnect the charger from power supply 
and remove battery pack from the charger base by pressing the 
release button (9) and pulling out the battery pack.


CHARGING


            IBL BM18-60   


WARNING!


Do not use any charger other than that specifically 

provided for use with the product.  

If the battery pack is very hot you must remove your battery pack 

from the charger and allow time for the battery to cool down before 
recharging. Please charge the battery to reach full or no less than 
half charge before storage. If the tool will not be used for long 
periods of time, charge the battery every 3-6 months. 

12 

11 

Summary of Contents for IBL BM18-60

Page 1: ......

Page 2: ...1 ...

Page 3: ..._________________ 4 PRODUCT SPECIFICATIONS __________________________ 5 SETUP ________________________________________________ 6 PRODUCT FUNCTIONS _______________________________ 7 GENERAL OPERATION ________________________________ 8 TROUBLESHOOTING __________________________________ TABLE OF CONTENTS IBL BM18 60 3 6 10 11 12 17 20 23 ...

Page 4: ...body is earthed or grounded Do not expose power tools to rain or wet conditions Water entering a power tool will increase the risk of electric shock Do not abuse the cord Never use the cord for carrying pulling or unplugging the power tool Keep it away from heat oil sharp edges or moving parts When operating a power tool outdoors use an extension cord suitable for outdoor use Use of a cord suitabl...

Page 5: ...e power tool may result in personal injury Do not overreach Keep proper footing and balance at all times This enables better control of the power tool in unexpected situations Dress properly say no to loose clothing or jewellery Keep your hair clothing away from moving parts Loose clothes jewellery or long hair can be caught in moving parts If devices are provided for the connection of dust extrac...

Page 6: ...d users Keep cutting tools sharp and clean Properly maintained cutting tools with sharp cutting edges are less likely to bind and are easier to control Use the power tool accessories and tool bits etc in accordance with these instructions taking into account the working conditions and the work to be performed Use of the power tool for operations different from those intended could result in a haza...

Page 7: ...espiratory protection appropriate for the dust exposure Avoid prolonged contact with dust from drilling and other activities Wear protective clothing and wash exposed areas with soap and water Allowing dust to get into your mouth eyes or lay on the skin may promote absorption of harmful chemicals When not in use place tool on its side on a stable surface where it will not cause a tripping or falli...

Page 8: ...ks in a tool with the trigger switch locked on Never tape the trigger switch in the ON position Damaged battery packs should be returned to the service centre for recycling Never attempt to open the battery pack for any reason If the battery pack case is cracked or damaged do not insert into the charger Do not crush drop or damage the battery pack If battery contents come into contact with the ski...

Page 9: ...or plug Disconnect the charger from the outlet before attempting any cleaning This will reduce the risk of electric shock Removing the battery pack will not reduce this risk Never attempt to connect 2 chargers together The charger is designed to operate on standard 100 240V household electrical power Do not attempt to use it on any other voltage This does not apply to the vehicular charger Even if...

Page 10: ...otective gloves This product is of protection class II That means it is equipped with enhanced or double insulation Wear hearing and eye protection Approx 1 hr charging time Indoor use only IBL BM18 60 Do note expose battery packs to heat in excess of 40ºC Do not charge or store the battery pack in temperatures below 0 C and above 40 C Do not dispose of battery packs in fire They will explode and ...

Page 11: ... adjustment ring 4 Two speed gear control 5 Forward Reverse rotation control switch 6 ON OFF trigger switch IBL BM18 60 7 Handle 8 Battery pack 9 Release button 10 Power indicator light 11 Charging base 12 Charger 13 Operation mode adjustment ring 13 ...

Page 12: ...K Type Capacity Voltage Weight CHARGER Rated input voltage Rated output voltage Protection class Charging time Weight PRODUCT SPECIFICATIONS 18V 20V 0 450 0 1450 rpm 20 Settings 3 mode settings 1 14 Kg 10 mm Wood 15 mm Steel 10mm Li Ion 1500 mAh 20V DC max 0 4 Kg 100 240V 50 60Hz 20V DC Class II approx 1 hr 0 2 Kg IBL BM18 60 ...

Page 13: ...also for hammering This product is intended for light and medium impact drilling in brickwork masonry It should not be used for working on materials that are dangerous to health It must not be used for tightening or loosening car wheel nuts For safety reasons it is essential to read the entire instruction manual before first operation and to observe all the instructions mentioned in it SETUP UNPAC...

Page 14: ...green blue when charging is finished After charging finished disconnect the charger from power supply and remove battery pack from the charger base by pressing the release button 9 and pulling out the battery pack CHARGING IBL BM18 60 WARNING Do not use any charger other than that specifically provided for use with the product If the battery pack is very hot you must remove your battery pack from ...

Page 15: ...ge in the battery is below the usable limit the gauge meter will not illuminate and the battery will need to be recharged BATTERY PACK NOTE The battery gauge is only an indication of the charge left on the battery pack It does not indicate tool functionality and is subject to variation based on product components temperature and end user application 75 100 charge 51 74 charge Less than 50 charge P...

Page 16: ...y docking port and slide the battery pack in Ensure it clicks in place To remove the battery press the release button 9 and pull out the battery pack from the product ON OFF TRIGGER SWITCH Switch the device ON by pressing the ON OFF switch 6 and OFF by releasing the switch It is also a variable speed switch that delivers higher speed and torque with increased trigger pressure BATTERY PACK INSTALLA...

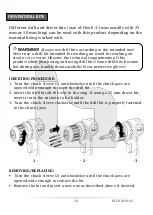
Page 17: ...chuck sleeve clockwise until the drill bit is properly fastened in the chuck jaws REMOVING REPLACING Turn the chuck sleeve 2 anticlockwise until the chuck jaws are opened wide enough to remove the bit Remove the bit and insert a new one as described above if desired DRIVER DRILL BITS IBL BM18 60 WARNING Always use drill bits according to the intended use Never use a drill bit intended for working ...

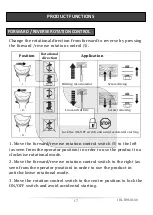
Page 18: ... reverse rotation control switch to the right as seen from the operator position in order to use the product in anticlockwise rotational mode 3 Move the rotation control switch to the centre position to lock the ON OFF switch and avoid accidental starting PRODUCT FUNCTIONS FORWARD REVERSE ROTATION CONTROL Position Application Rotational direction Screw driving Screw removing Lock the ON OFF switch...

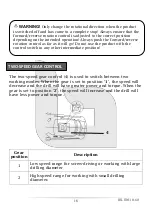
Page 19: ...crew driving or working with large drilling diameter 2 High speed range for working with small drilling diameter WARNING Only change the rotational direction when the product is switched off and has come to a complete stop Always ensure that the forward reverse rotation control is adjusted to the correct position depending on the intended operation Always push the forward reverse rotation control ...

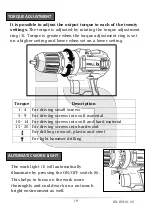
Page 20: ...It is possible to adjust the output torque to each of the twenty settings The torque is adjusted by rotating the torque adjustment ring 3 Torque is greater when the torque adjustment ring is set on a higher setting and lower when set on a lower setting AUTOMATIC WORK LIGHT 1 The work light 1 will automatically illuminate by pressing the ON OFF switch 6 This helps to focus on the work more thorough...

Page 21: ...justment ring to drilling mode when drilling into wood plastic or steel Always hold the product perpendicular to the point to be drilled Holding at an angle may cause slipping jamming of the drill bit Always place the drill tip directly on the point to be drilled first and then switch the product on Pre drill larger holes with a small diameter drill bit first Doing so makes drilling with a larger ...

Page 22: ...s much pressure as necessary to keep the screw in place and the driver bit in contact with the screw head Too much pressure will cause damage to the screw head and driver bit too little pressure will cause the driver bit to slide away Remove blocked and stuck screws by changing the rotational direction SCREW DRIVING OTHER OPERATIONS The tool can also be used as a hammer drill to pulverize holes in...

Page 23: ...re to protect it against dust Before and after each use check the product and accessories or attachments for wear and damage If required exchange them for new ones as described in this instruction manual Observe the technical requirements This product does not contain any parts that can be repaired by the consumer Contact an authorised service centre or a similarly qualified person to have it chec...

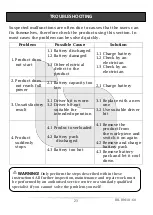
Page 24: ...battery 3 Unsatisfactory result 3 1 Driver bit is worn 3 2 Driver bit not suitable for intended operation 3 1 Replace with a new one 3 2 Use suitable driver bit 4 Product suddenly stops 4 1 Product overloaded 4 2 Battery pack discharged 4 3 Battery too hot 4 1 Remove the product from the work piece and switch it on again 4 2 Remove and charge battery pack 4 3 Remove battery pack and let it cool do...

Page 25: ...le shells from one another by removing the fixing screws for handle disconnect the battery from the circuit with a suitable tool Fully wrap it with tape to avoid exposing two conductive ends of the battery Waste electrical products should not be disposed of with household waste Please recycle where facilities exist Check with your Local Authority or local store for recycling advice CONTACT US HiTe...

Reviews: