5-3
TROUBLESHOOTING
SFC BOILER / WATER HEATERS - SFC 199
5.2.2 Fan/Blower
Control and power to the fan is provided via a single wiring harness to the
controller.
5.2.3 Thermostat Connections
The unit’s controller is designed to heat a single space heating load. The load can
consist of a single zone or several zones. In either method, the ‘Call for Heat’ must
be from a device providing a dry contact and connected to X13.1 and X13.2. The
use of power-robbing thermostats directly will cause the unit to operate erratically.
If using a power-robbing thermostat, you will need to isolate it through a relay. An
Open Therm device can also be used across X13.1 and X13.2.
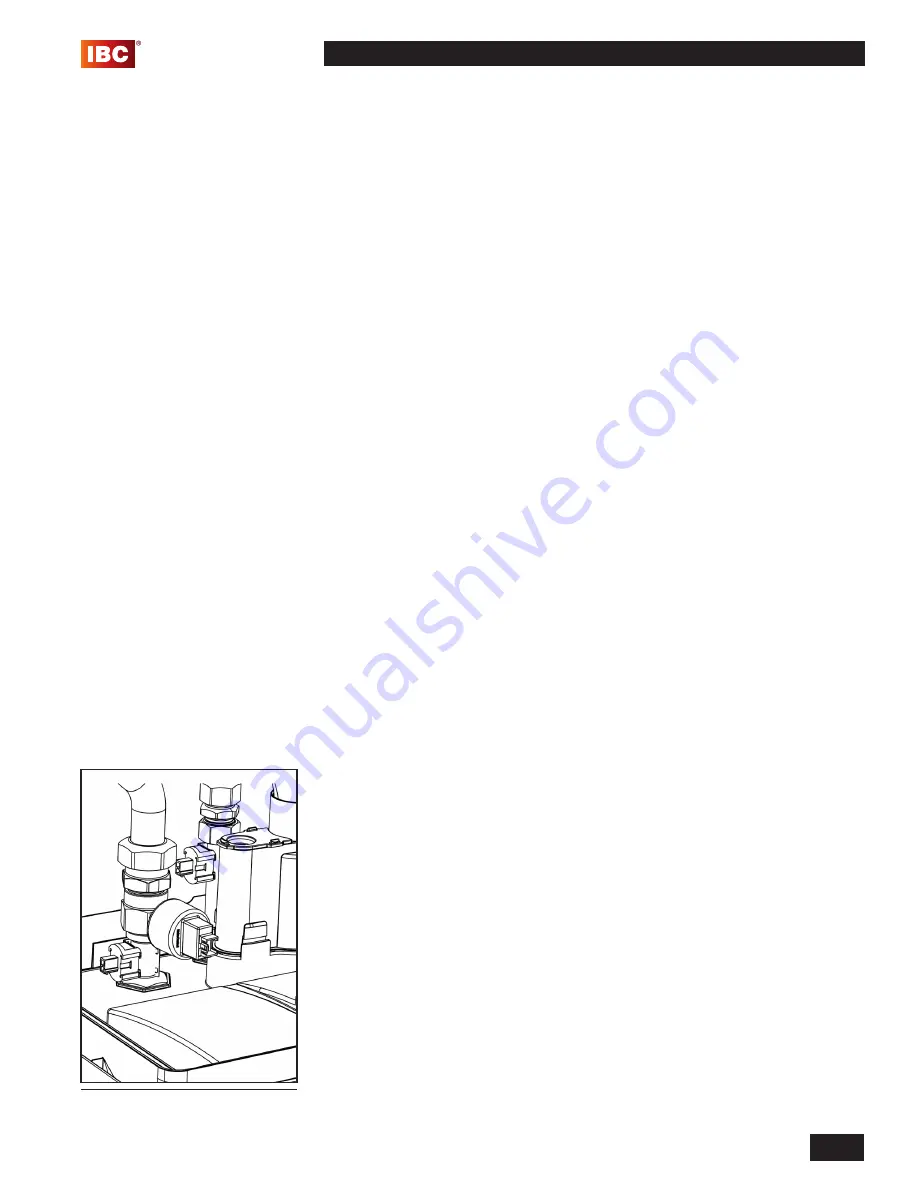
5.2.4 Water Pressure Sensor-Type Low Water Cut Off
(LWCO)
The SFC unit is equipped with a pressure sensor that serves as a low-water
cut-off. The water pressure is displayed in the main display when the pressure is
low. For example, a system water pressure of 4.6psi would be displayed as 4.6P.
If the pressure is too low the controller flashes an error message in the main
display by toggling between the actual pressure and LO. To correct this error,
increase the system pressure. The water pressure in the heating system must
be higher than 14.5psi for the unit to reach maximum firing rate. When the water
pressure is less than 4.5psi, the unit restricts its firing rate. If the pressure is less
than 4psi then the unit will not fire at all.
To test the operation of the pressure sensor – type LWCO
1.
Turn off the unit at the controller by pressing the area above the dot. The
current system pressure is displayed.
2.
Isolate the space heating circuit, and reduce the water pressure. The
displayed water pressure should drop as the system water is being removed
(expansion tank isolated). If the pressure remains steady the pressure sensor
may be blocked or faulty. If it remains “fixed”, drain the unit and replace the
sensor, or dislodge any blocking debris from the sensor inlet channel and
reinsert.
3.
If the pressure sensor is OK refill the unit and open the closed valves. Ensure
the system pressure is adequate for the heating system.
PRESSURE SENSOR LWCO REPLACEMENT
1.
Turn off the power to the unit.
2.
Isolate and drain the unit.
3.
Disconnect the electrical connection to the sensor.
4.
Carefully remove the pressure sensor by loosening it, turn the nut counter
clockwise until it can be removed. If there is some water leakage, ensure the
water does not spill into the controller.
5.
Push the new sensor into the socket while twisting slightly. Take care to avoid
damage to the O-ring.
6.
Connect the electrical connector to the sensor.
7.
Restore water pressure to the unit.
8.
Restore power to the unit.
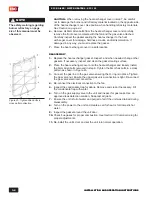
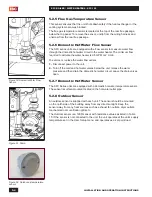
Figure 49: Water Pressure Sensor
Type LWCO

