background image


5.


Basic Operations  

a)


Power on/Standby 

Insert the power plug into the power outlet. First turn on the ON/OFF button  

on the product, 

if available; then press  

on the remote control or control panel to turn on the product. In the 

absence of the ON/OFF button 

, just press 

In power-on state, press 

, and the product will enter standby.  


b)


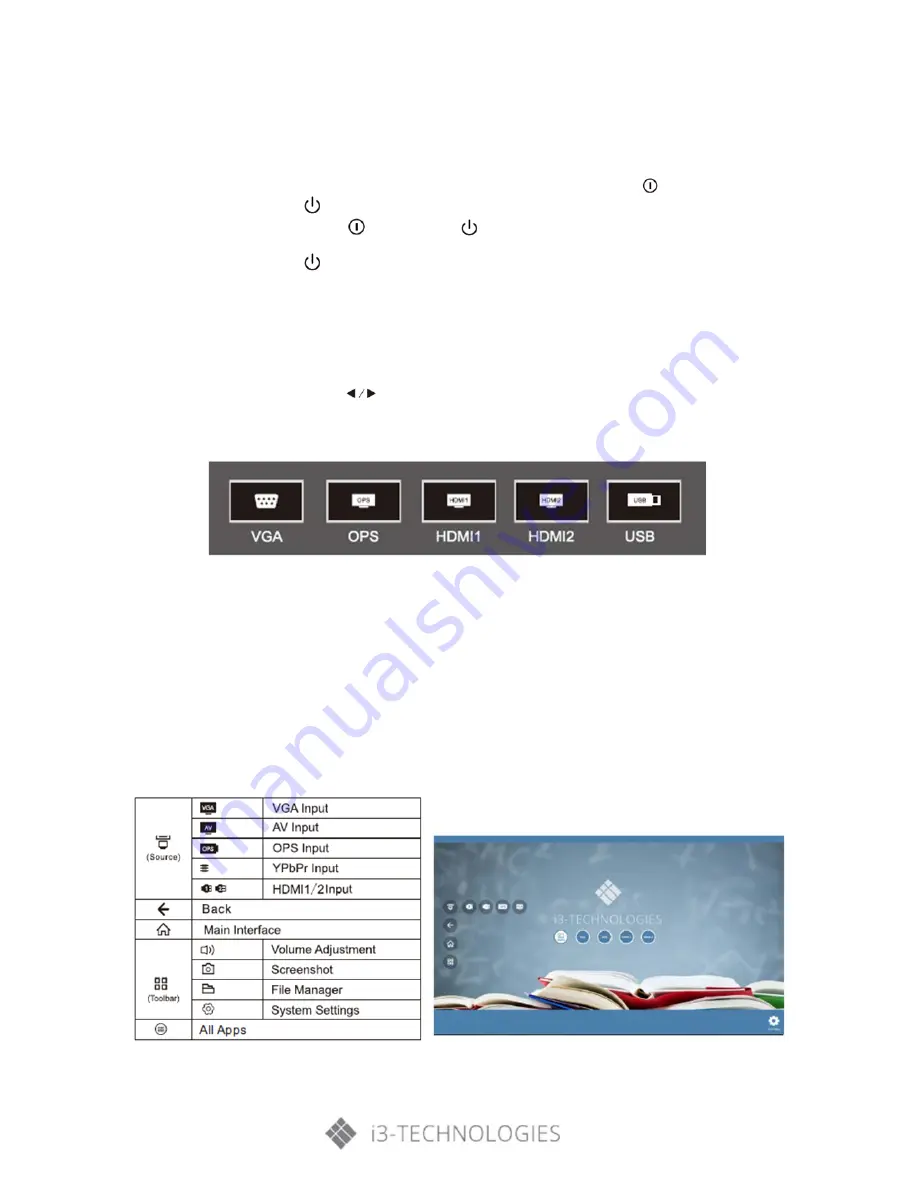
Source Selection  

Upon startup, press “SOURCE” on the remote control; the screen will display the “Input Source” menu. 
At this moment, you can press  

on the remote control to select a source. Press “OK” on the 

remote control; the product will switch to the input source selected. 


c)


Menu Operations 

The menu operations described in this chapter are all in the LCD electronic whiteboard mode.  Menu 
operations in other modes are basically the same. For operations in the intelligent mode, please refer 
to the instructions on operation of the intelligent platform below. 


Description of sidebar: first press SOURCE once to show  the sidebar by swiping on the right side; 
then press SOURCE again to close the sidebar. 


Summary of Contents for i3TOUCH V-11

Page 1: ...i3TOUCH V SERIES MANUAL User Manual for i3TOUCH V Series 11 20180806...

Page 2: ...anel 10 4 Remote Control 11 5 Basic Operations 13 a Power on Standby 13 b Source Selection 13 c Menu Operations 13 d List of Menu Settings 15 6 Intelligent Platform Operations 16 a Basic operations 16...

Page 3: ...ring its best performance into full play please read and understand the operating instructions and nameplates and observe the following safety precautions carefully before using the product and keep t...

Page 4: ...to one power outlet may cause fire due to excessive power consumption To avoid the risk of electric shock and fire keep the product away from naked flames like burning candles Do not put any containe...

Page 5: ...n the screen and survive long after the product is turned off Such fault is not covered by the warranty To avoid the risk of dew and fault do not use the product immediately after moving it from a low...

Page 6: ...icture Never cover the ventilation holes or insert any object into the housing Do not place the product in a confined space such as a bookcase or imbedded closet unless appropriate ventilation conditi...

Page 7: ...way to restrain interference Installation tips Install the product near an AC power outlet with easy access For the sake of safety you are suggested to use a fitting wall mount bracket or base for th...

Page 8: ...ts The above pictures are subjected to the actual product 1 Power Port 7 PC AUDIO Port 2 TOUCH USB 8 USB 3 0 Ports 3 RS232 Port 9 USB 2 0 Port 4 HDMI Ports 10 Headset Port 5 Lan Port 11 SPDIF Port 6 V...

Page 9: ...cting the product to a PC Note Disconnect the power plug before installing or removing the product Connection diagram Remark The connection diagram in this manual is only for reference when connecting...

Page 10: ...10 d Control Buttons on the front panel Remark Different models may have slightly different appearances The above pictures are subject to the actual product...

Page 11: ...he angle of lighting or the machine or operate the remote control close to the remote receiver Low battery voltage will affect the remote control distance Please replace the batteries with new ones If...

Page 12: ...12 Keys to the remote control...

Page 13: ...splay the Input Source menu At this moment you can press on the remote control to select a source Press OK on the remote control the product will switch to the input source selected c Menu Operations...

Page 14: ...ttings 2 Press on the remote control to select the desired item in the category menu 3 Press OK on the remote control to enter the item to be adjusted 4 Press on the remote control to change the analo...

Page 15: ...lable under PC signal source Remark the analog values of Contrast Brightness Hue Sharpness and Saturation are adjustable only in User Mode Sound Sound mode Select the sound effect mode Standard Music...

Page 16: ...on Some functions cannot be achieved with the remote control To ensure convenient operation user is suggested to operate with a USB mouse and keyboard The mouse and keyboard should be connected to the...

Page 17: ...locally installed apps Tip You can access Settings Security Restrictions Unknown Sources to set whether it is allowed to install apps not from the App Store and also set the preferred installation loc...

Page 18: ...the system is playing a file otherwise system or device failures will occur 4 This system supports USB flash drives mobile hard drives and other devices with standard USB 1 1 USB 2 0 USB 3 0 port tra...

Page 19: ...ow automatically obtaining an IP address you must complete network connection by the following steps select Static in TP configuration 3 Select IP address and configure an available IP address for the...

Page 20: ...l search out your network during WiFi network search Caution Please set the network password which should not be too simple 7 Important Statement on network Service All contents and services obtained...

Page 21: ...to adjust the horizontal or vertical position 3 Use the recommended mode Short remote control distance malfunction of remote control 1 The remote receiver of the product is blocked by some object 2 B...

Page 22: ...idity 10 60 Barometric pressure 86kPa 104kPa 1 Supported systems PAL NTSC SECAM 2 Antenna input 75 coaxial unbalanced 3 Intelligent operating system Android 5 0 1 VGA Display Mode No Mode Resolution R...

Page 23: ...the content limit specified in GB T26572 2011 As shown in the above table prepared based on the data provided by our material suppliers for each type of material and verified by us this product contai...

Page 24: ...24 This Manual is provided for reference only The functions of the actual product are subject to change without further notice...

Reviews: