


12
13
Operation
Operation
the arrow icon in the right/left part of the screen
to switch between the 2 menu pages; or touch
the screen on any non-functional area, then
slide the page aside (rightwards/leftwards) to
select between the 2 menu pages.
The Disc, USB and SDHC modes are
only available when a disc, USB or a memory
card is inserted into the unit.
Navigation (option)
• Before switching the unit on, connect the
supplied GPS antenna to the GPS antenna input
on the rear panel.
• Insert Navigation memory card into the
Memory card slot of the unit. The unit will
automatically switch to the SDHC mode. You
should select the map path (for more details,
see “System setup. General page“ item below).
This is required only for the first use of the
Navigation SD card. To enable navigation mode,
touch NAVIGATION button in the main menu or
press and hold MODE button on the panel.
• For more details about operations with
navigation program, please read the instruction
manual to the navigation software. You can
download the quickstart guidance and full
instruction manual for the navigation program
from the web site of the navigation software
manufacturer.
AV in jack
AV jack is intended to receive audio and video
signals by connecting to external device.
Subwoofer
Connect a subwoofer to this unit using the
Subwoofer output of this unit. For subwoofer
operation an external amplifier is required.
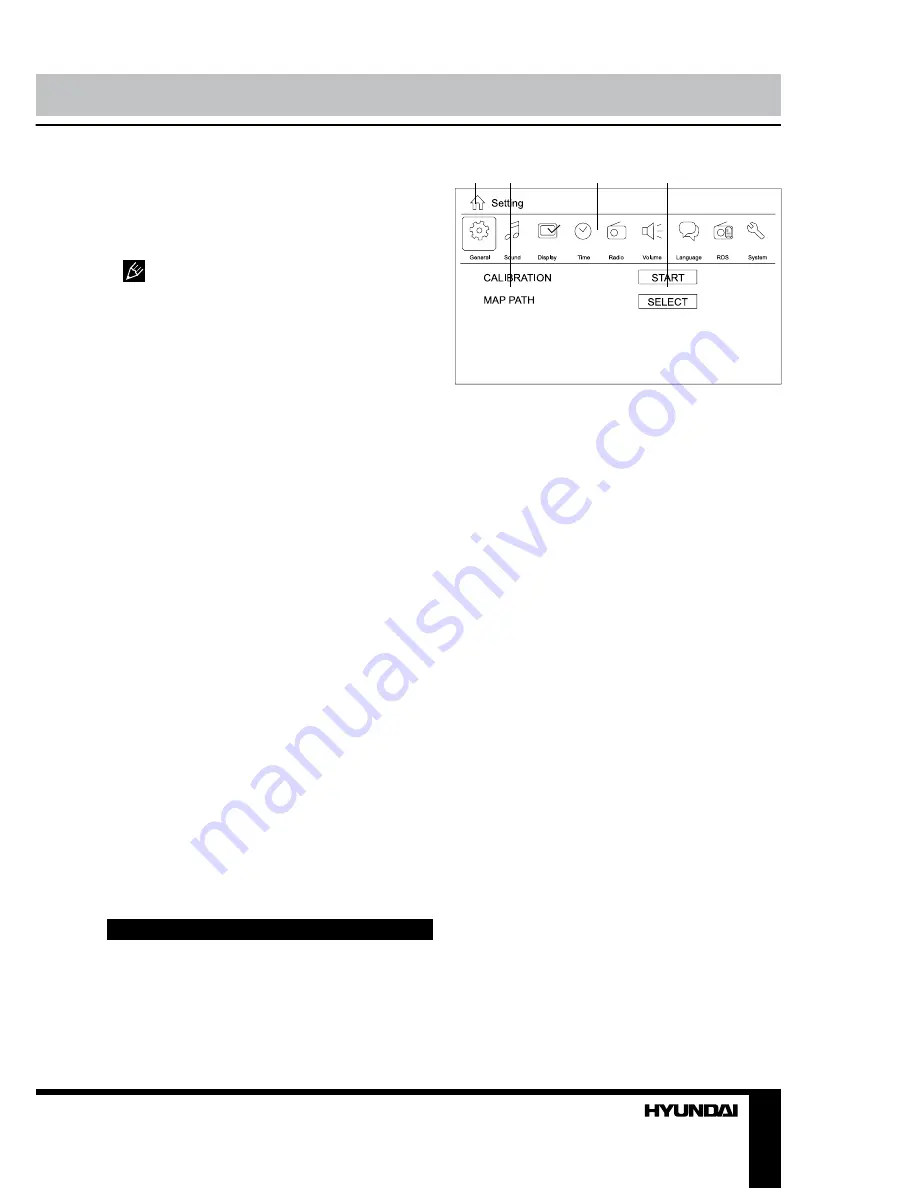
System setup
When you select SETTING mode, the menu
will be displayed, in which you can touch any
item to select corresponding setting page:
1
2
3
4
1. Touch to return to the main menu.
2. Parameter list. Touch a parameter to select
it for adjustment.
3. Touch an icon to select corresponding
setting page.
4. Option/setting list. Touch to adjust the
corresponding parameter.
General page
• Calibration: “Carefully press and hold
stylus on the center of the target. Repeat
as the target moves around the screen” is
displayed. Touch and hold the cross in each
position until it moves to a different position.
After repeating it 4 times, the calibration of the
screen is complete; touch the screen anywhere
to return to menu. The calibration procedure is
useful when some malfunction occurs with the
touch screen, and it needs adjustment.
• Map Path: Select the path to the
navigation maps, when the navigation card is
inserted into the unit.
Sound page
• Beep: Select ON (beep is heard at any
button pressing) or OFF (no beep).
• Loud: Selecting loudness ON will
emphasize the low frequency output.
• Subwoofer: set the subwoofer on or off.
Display page
• Backlight: adjust the display brightness.
• Backlight off: set the time after which the
screen will turn off automatically (if DIMMER is
Summary of Contents for H-CMD2062G
Page 26: ...26 46 46 47 47 47 47 47 47 47 47 47 48 48 48 48 48 48 48 48 48 49 49 49 49 50 51 DVD PBC ID3...
Page 27: ...27 1 1 20...
Page 28: ...28...
Page 29: ...29 35 5 6 2 4 3 5 6 1...
Page 30: ...30 1 2 3 5 4 5 4 6 6 4 6...
Page 31: ...31 Key1 Key2 15 A GPS ISO ISO 1 ISO 2 ISO 1 2...
Page 32: ...32 ISO A B 1 2 3 4 12 5 6 7 8...
Page 33: ...33 Key 1 2 illumination...
Page 34: ...34 1 SEL VOL 2 3 4 POWER MUTE 5 6 7 AV 8 USB 9 RESET 10 11 MODE 1 2 3 4 5 6 7 8 9 10 11...
Page 37: ...37 SDHC Disc USB SDHC USB GPS NAVIGATION MODE SETTING...
Page 45: ...45 4 5 6 7 8 9 10 11 12 13 14 15 16 1 2 3 4 5 6 7 8 9 1 2 PIP 3 4 5 6 7 8 9 DVD AVI...
Page 49: ...49 12...
Page 50: ...50 35 35 RESET...


