6
EDGE Pro and MicroEDGE Pro CNCs
Field Service Bulletin 808280
To replace the SERCOS II or SERCOS III board:
1.
Insert the SERCOS II board into PCI slot 2 on the motherboard.
2.
Fasten the screw in the PCI bracket and tighten it to 1.12 N·m (10 lb·in.).
3.
Reconnect the RX and TX cables to the correct connector on the back of the CNC.
To replace the enclosure cover:
1.
Place the cover over the enclosure.
2.
Fasten the 6 screws on the top of the cover and tighten them to 2.25 N·m (20 lb·in.).
3.
Fasten the 2 screws on the side, at the bottom and tighten them to 2.25 N·m (20 lb·in.).
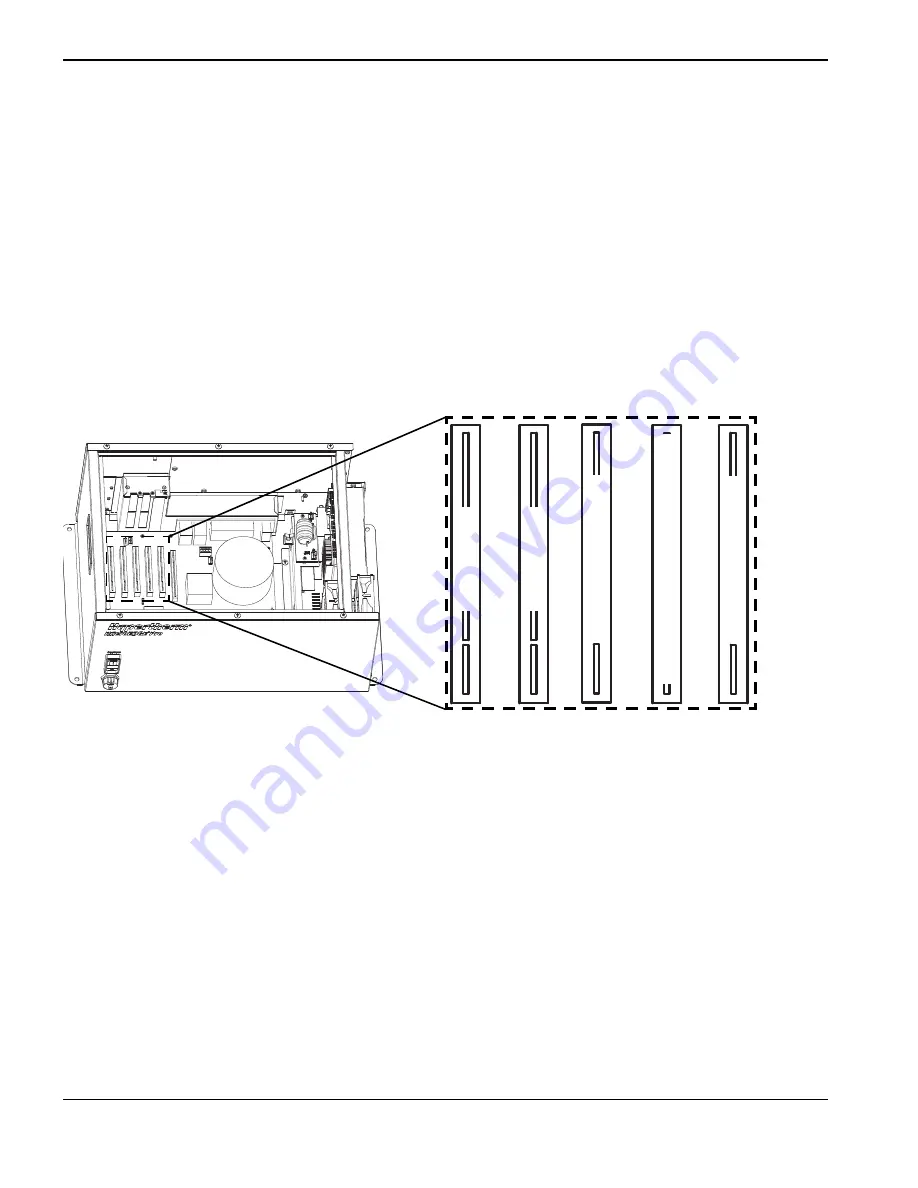
New location of boards in MicroEDGE Pro PCI slots
After you reposition the boards
Moving the wireless card may reset network passwords and IDs. If the controller does not
connect to the network, refer to the
MicroEDGE Pro Instruction Manual
for wireless setup
information.
After a SERCOS II update, if you cannot establish the ring, verify that the RX and TX fiber
optic cables are securely plugged into the correct connector. LED 1, for the RX port,
should be illuminated in green. For more details, see the
EDGE Pro SERCOS II
Instruction Manual
(807640).
After a SERCOS III update, if you cannot establish the ring, verify that the SERCOS III
cables are securely plugged into the correct ports.
Slot 1
Slot 2
Slot 3
Slot 4
Slot 5
SE
RCOS
I
I o
r SE
RCOS
I
II m
a
s
te
r b
o
a
rd
Utility/serial isolation board
No
t used
No
t used
W
ireless board


