


Title
Rev.
Page
HMK-072
Ver1.0
P.7
2. Operation
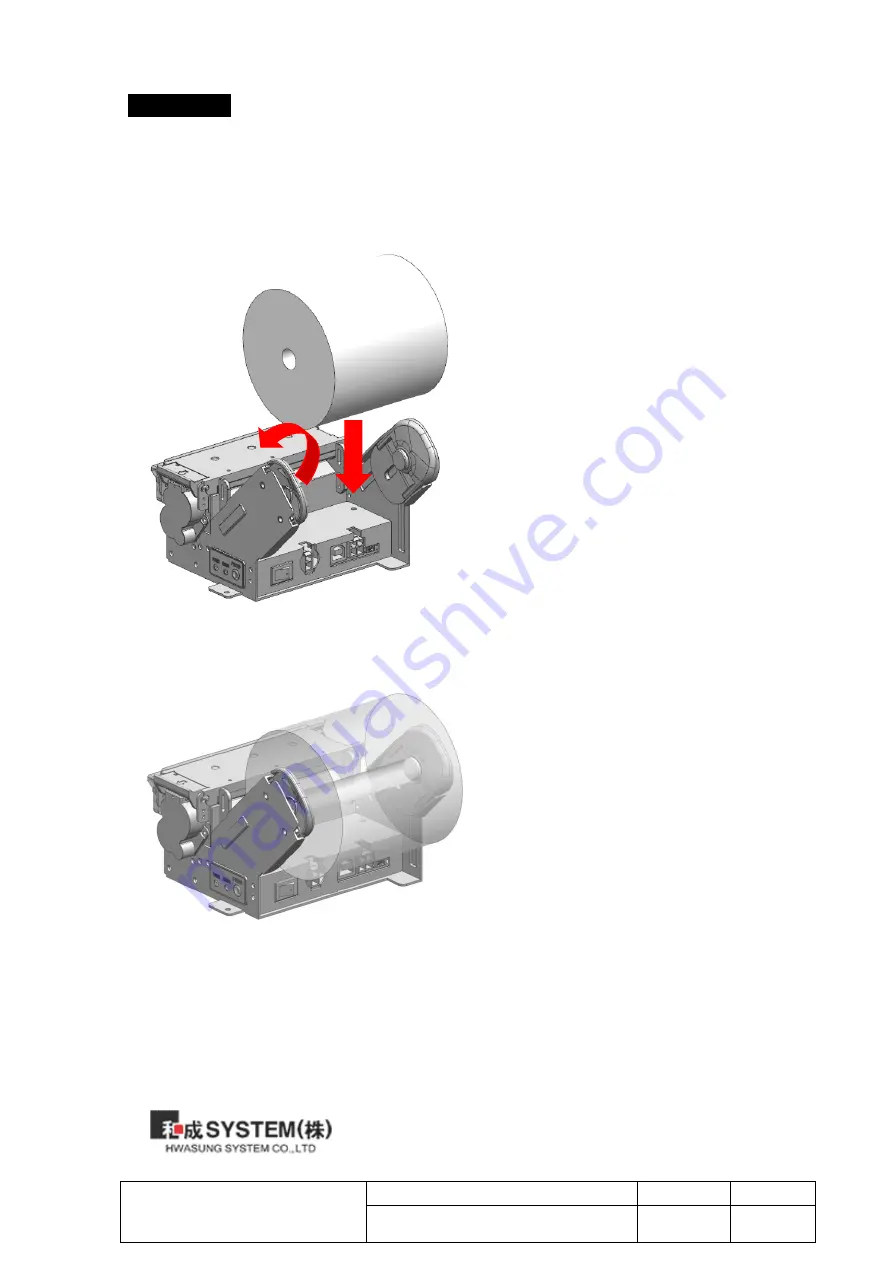
2-1) Paper Change
[Image 2-1]
[Image 2-2]
2. Release the spread Paper Lever
of Left side, then the Paper Roll is
installed.
1. Move the Paper Roll down to the Arrow
direction while spreading out the Paper Lever of
Left side, and install the Paper Roll to the Paper
Lever of Right side.
Summary of Contents for HMK-072
Page 1: ...User Manual HMK 072 ...
Page 5: ...Title Rev Page HMK 072 Ver1 0 P 4 1 2 External Dimension 1 2 1 STANDARD TYPE ...
Page 6: ...Title Rev Page HMK 072 Ver1 0 P 5 1 2 2 SHAFT TYPE ...
Page 62: ...Title Rev Page HMK 072 Ver1 0 P 61 ...
Page 68: ...Title Rev Page HMK 072 Ver1 0 P 67 No Date History Page Ver 1 2018 08 24 Created New 1 0 ...


