background image

8

CHANGES AND T YPING ERRORS RESERVED

CHANGES AND T YPING ERRORS RESERVED

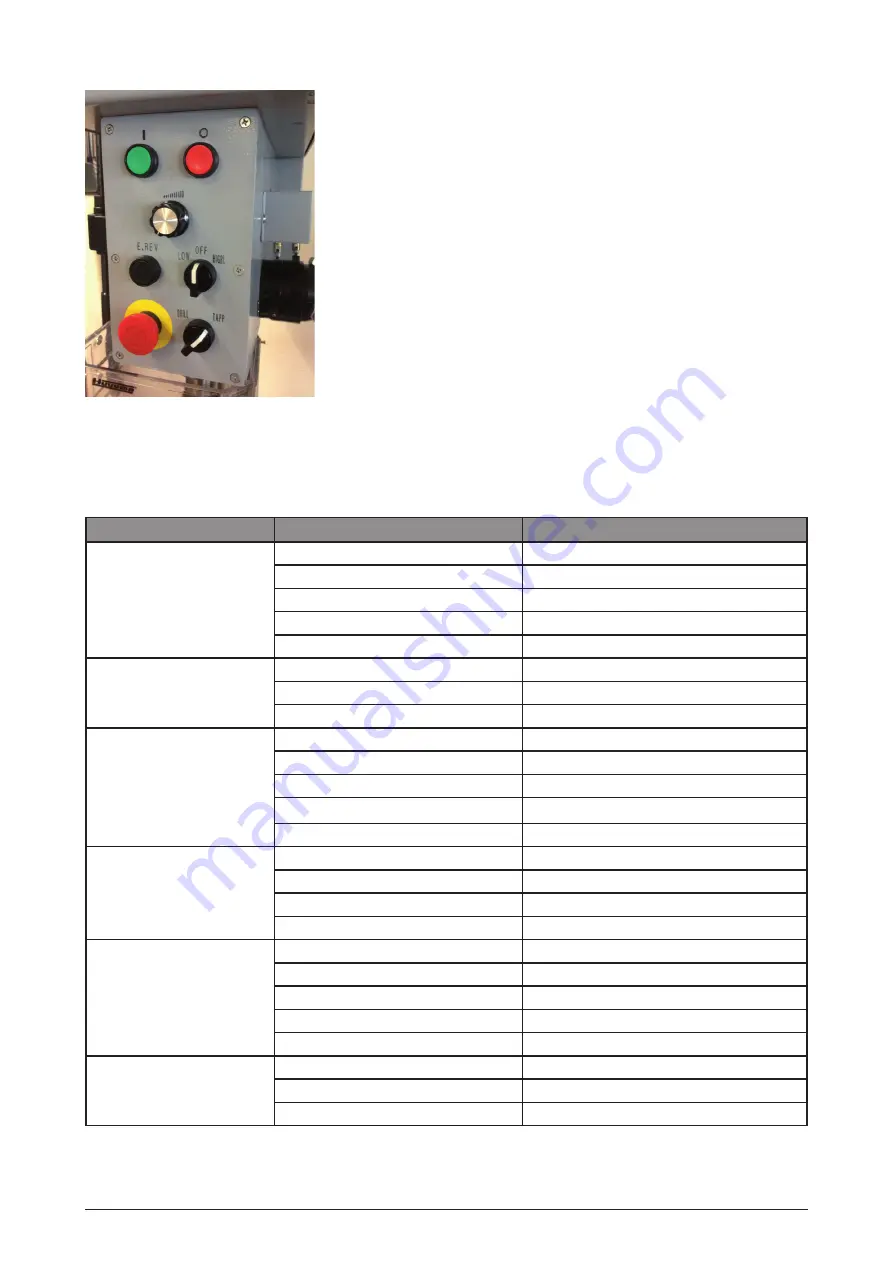
7.7  Tapping

Tapping can be done as follows:

•  Turn the switch for drilling and tapping in the ‘TAPP’ position.

•  Set the depth with the depth adjustment on the right-hand side of the  

  machine (see also 5.2).

•  Turn the switch for high or low speed to ‘OFF’.

•  Set the speed with the rotary speed knob. 

•  Move the spindle downwards with the feed handles.

When the set depth is reached, the turning direction of the spindle 

automatically reverses and the spindle can be taken out of the tapping 

hole.

Always use a low speed for tapping!

7.8  e.reV 

buTTon

With this button you can reverse the turning direction of the spindle manually.

8.  T

roubleshooTing

Problem

Possible cause

Possible solution

Too much noise

Wrong belt tension

Adjust tension

Spindle not lubricated

Remove spindle quill and lubricate

Pulley loose

Tighten pulley

V-belt loose

Adjust belt tension

Worn bearing

Exchange bearing

Play of the chuck

Drill chuck loose

Tighten by pressing chuck against table

Worn spindle shaft or bearing

Replace spindle shaft or bearing

Worn drill chuck

Replace drill chuck

Motor won't start

Power supply

Check power cord

Motor connections

Check motor connections

Switch connections

Check switch connections

Motor windings burned

Replace motor windings

Switch broken

Replace switch

Drill binds in work piece

Excessive pressure on feed handle

Apply less pressure

V-belt loose

Check belt tension

Drill chuck loose

Tighten drill with key

Speed too high

Adjust speed

Drill burns or smokes

Wrong speed

Check speed table

Chips not discharging

Clean drill

Dull drill

Check sharpness and taper

Needs lubrication

Lubricate during drilling

Wrong feed

Apply less pressure

Table difficult to raise

Needs lubrication

Lubricate with a little oil

Bent rack

Straighten

Clamp bolt locked

Loosen clamp bolt

Figure 9

Summary of Contents for Hu 30 K

Page 1: ...HU 30K VARIO TOPLINE C O L U M N D R I L L I N G M A C H I N E S...

Page 2: ...5 6 1 Table adjustment 5 6 2 Depth adjustment 6 6 3 Speed adjustment 6 7 Use of the machine 7 7 1 Placing the drill head 7 7 2 Placing the drill 7 7 3 Tool ejector 7 7 4 Placing the work piece 7 7 5 U...

Page 3: ...r apparel No loose clothing gloves neckties rings necklaces bracelets or jewellery they may get caught in moving parts No slip footwear is recommended Wear a hairnet to contain long hair 12 Always wea...

Page 4: ...ith bare hands The flutes of the drill may seize the work at any time especially when breaking through the stock If the piece is whirled out of the operator s hand he may be injured In any case the dr...

Page 5: ...d any parts missing or damaged please contact your dealer Note Clean the cone and taper of the drill head with a clean cloth before using the machine 6 Adjustment 6 1 Table adjustment Height adjustmen...

Page 6: ...Re tighten the clamp Figure 3 6 3 Speed adjustment Figure 4 Pull the plug from the power supply 1 Open the v belt cover by turning the screw A fig 4 and using the bracket to pull away the cover 2 Loos...

Page 7: ...ject the tool 7 4 Placing the work piece Always put a piece of wood or pliewood on the table This prevents splintering or burring at the bottom side of the work piece when the drill goes through it Pl...

Page 8: ...ubricate Pulley loose Tighten pulley V belt loose Adjust belt tension Worn bearing Exchange bearing Play of the chuck Drill chuck loose Tighten by pressing chuck against table Worn spindle shaft or be...

Page 9: ...tor Apply a light coat of car wax to the table and column to keep the surfaces clean If the power cord is worn damaged or cut have it replaced immediately by a qualified electrician 9 1 Lubrication Al...

Page 10: ...must be plugged into a matching outlet that is properly installed and grounded in accordance with all local regulatory requirements Do not modify the plug when it does not fit the outlet Have the prop...

Page 11: ...11 CHANGES AND TYPING ERRORS RESERVED 11 Parts drawings and list Figure 11...

Page 12: ...12 CHANGES AND TYPING ERRORS RESERVED Figure 11 1 Figure 11 2...

Page 13: ...ck nut 1 21 2 Locking handle 1 97 Spring cap 1 21 3 Washer 1 98 Quill set screw 1 22 Pinion shaft base 1 99 Nut 1 22 1 Pinion shaft base 2 100 Socket head screw 1 22 2 Pinion shaft base 1 100 1 Washer...

Page 14: ...t set screw 2 130 Housing 1 54 Pull rod seat 1 131 Cable H07RN F 4G 1 5 mm2 1 55 Motor switch rod 1 132 Wire protector 1 56 Handle knob 1 133 Electric cabinet 1 57 Fixed plate 1 134 Washer 4 58 Hex so...

Page 15: ...Manufacturer and importer assume no responsibility for defects which result from not reading the manual carefully or wrong use of the machine No rights can be derived from this manual All rights reser...

Page 16: ...2015 V1...

Reviews: