Hussmann® Impact™ Hot Food Merchandiser
Installation
10
Case Leveling
Merchandisers must be installed level to ensure proper operation. During all steps of setting, joining and
leveling cases, close attention to glass position and operation must be maintained. Please review all
steps and photos before making any adjustments. DO NOT make any glass adjustments until individual
case is set and level.
Preparation
1. Using store blueprints, measure off and mark on floor the exact dimensions/locations of the case
footprint.
2. Snap a chalk line for the front and rear positions of the base legs.
3. Mark the location of each joint from front to back lines.
4.
FLOORS ARE NOT LEVEL!!!
When working with two or more cases to be joined, the whole
lineup must be leveled on the same plane, left to right and front to back. This means that the
entire lineup must be brought up to the level of the highest case in the lineup.
Along the lines previously marked, find the highest point of the floor by:
•
Walking the floor and noticing any dips or mounds;
•
Using a string level; and
•
Using a transit.
Leveler Adjustment
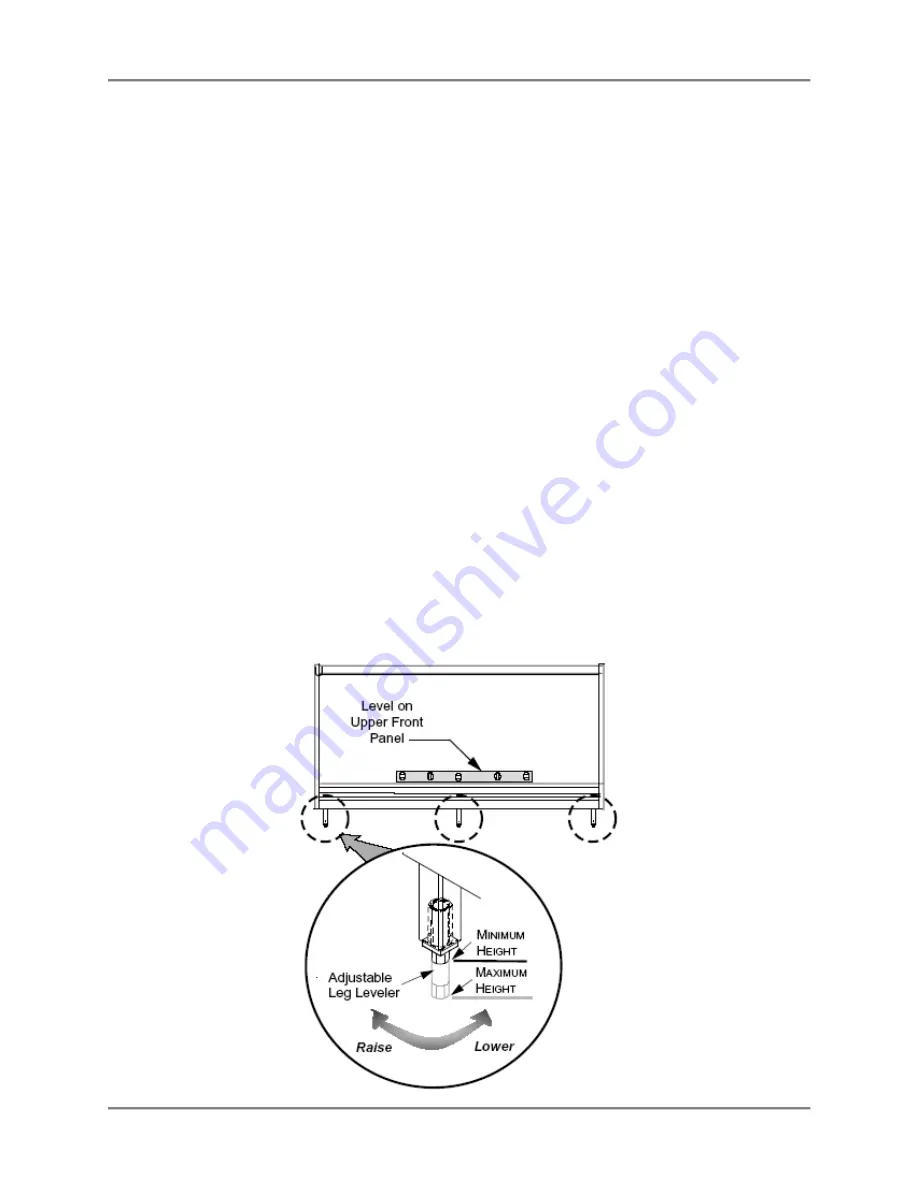
Position the first case at the highest point. Set a long level (4 ft [1220 mm] or more) on the upper front
panel of the case. Use an open-end wrench to turn leg levelers until the case is level from end to end and
from front to back. Check all 6 legs on 8 ft (2438 mm) cases, or 8 legs on 12 ft (3658 mm) cases.
Note:
To avoid removing concrete flooring, begin lineup leveling from the highest point of the store floor


![FRIGOGLASS ICOOL 1300 HD [R290] User Manual preview](http://thumbs.mh-extra.com/thumbs/frigoglass/icool-1300-hd-r290/icool-1300-hd-r290_user-manual_2338093-001.webp)
