background image

Protocol 

Control 

System 

Users 

Manual 

      2/12/01 


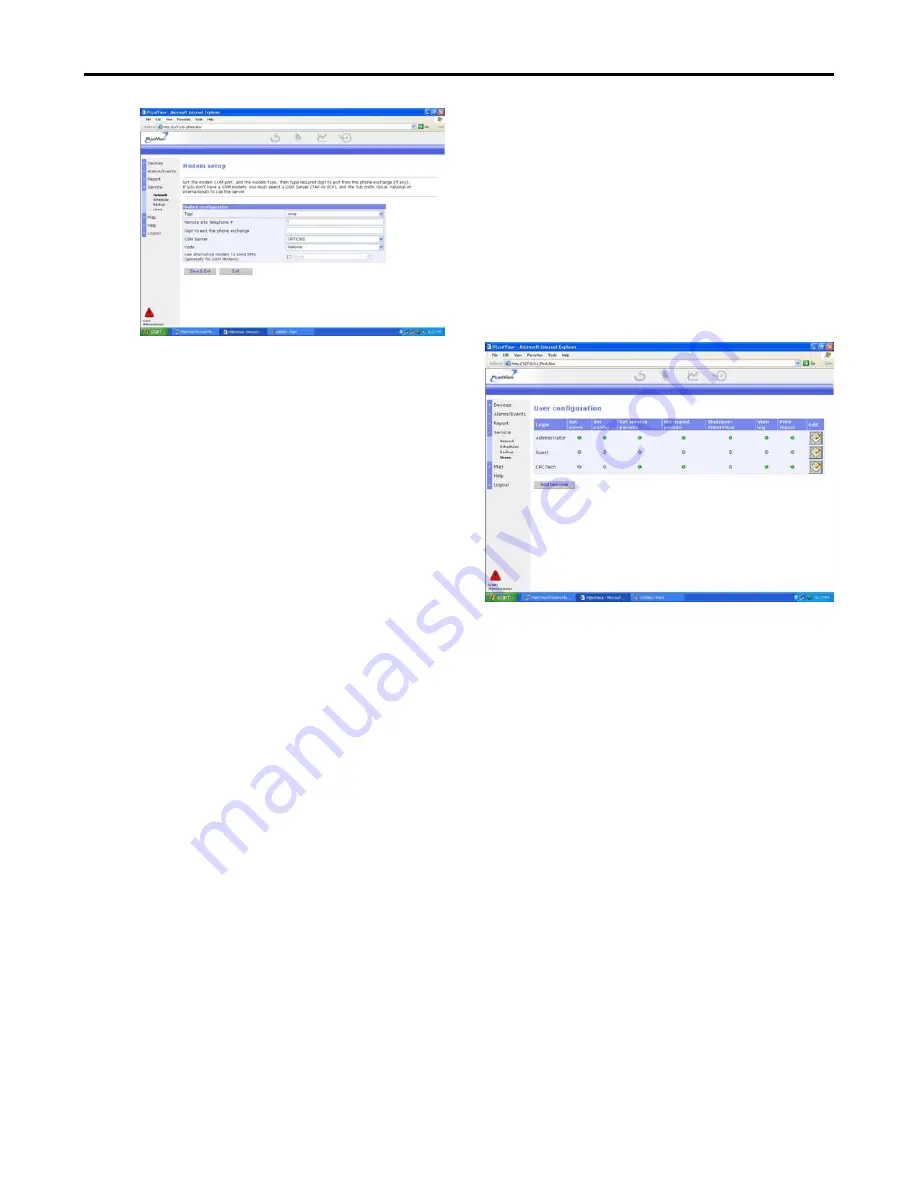
In the modem setup screen enter the modem 
from the drop down list under the TAPI field.    
You will then see a message explaining that the 
machine will be rebooted when Save is selected.  
Click the OK button in the message box.  The 
Remote Site Telephone # is used if this PC will 
be dialing into a PlantVisor remote (off site- 
Not at the store) PC.  The “Digit to exit phone 
exchange” allows a character to be dialed in 
certain circumstances where It is necessary to 
dial some digit before getting an outside line.  
The GSM Server and Code fields are not used.  
If no remote PC will be utilized, leave the 
telephone number blank.  When the modem 
setup is completed, press the Save & Exit 
button.  The PC will now reboot to configure 
the modem.  When the setup has been 
completed, it may take several minutes for the 
Plantvisor engine to shut down and reboot

.  Do 

not force the reboot, let the PC complete the 
process. 
 

After the PC has rebooted, start the Plantvisor 
application again and click the Scheduler link 
under the Service Dropdown menu.  You should 
now be able to click the checkbox on the Fax To 
selection.    Type in the fax number exactly how 
it needs to be dialed (i.e. with the appropriate 
digit to access an outside line followed by a 
comma, then the fax number (For example, if 
the fax number is 123-456-7890 and you must 
dial an 8 for an outside line, the Fax number 
would be entered as 8, 1234567890).  If you 
insert an incorrect number, you must correct the 
number then shut down and restart PlantVisor 
for the change to take effect.  Note that 
PlantVisor does not follow the Windows dialing 
property rules in the Windows modem setup 
area. 
 

Important: Always verify that the Fax works 
properly and that a Fax  is correctly received by 

the Fax machine after setting up the fax portion 
of Plantvisor. 


10.7.3.2 User Setup 

The next step in the configuration is to set up the users.  
Click the Users button on the left hand menu tab to enter 
the User setup screen. 
 

Figure 100- User Configuration Screen 


There are 2 users configured by default, Administrator 
and Guest.  Additional users can be added by clicking the 
Add New User button.  Click the Edit Icon for each user 
to customize the rights and password of each user.  Note 
that the User Configuration screen has both Service & 
Manufacturing parameters.  For the PCS PlantVisor 
system, these are the same and should both be checked if 
a user is allowed to change parameters of the PCS 
controllers. 
To add a new user, click the “Add New User” button.  
The screen shown in Figure 101 will be displayed.  Enter 
the Username and password for the new user, then 
configure the user rights by checking the appropriate 
button to Allow or Deny each of the privileges listed.  
Note that FTP access should be left unchecked for the 
user.  When finished with the configuration, press the 
Save & Exit button to return to the User Configuration 
screen.    
 

Page 44

Summary of Contents for PCS

Page 1: ...Protocol Control System PCS Users Manual Document No 0709304 Date 5 17 2005 ...

Page 2: ...19 8 1 CIRCUIT CONTROL 19 8 1 1 Defrost 19 8 2 PRESSURE CONTROL 19 8 2 1 Switchback 19 8 2 2 Pressure Control Algorithm 19 8 3 CONDENSER CONTROL 20 8 4 MENU STRUCTURE 20 8 4 1 Status Screens 20 8 4 2 Configuration Screens 20 8 4 3 Maintenance Screens 20 8 4 4 Alarm Screen 21 8 4 5 Screen Navigation 21 8 5 SCREENS 21 8 5 1 Status Screens 21 8 5 2 Configuration Screens 22 8 5 3 Alarms 32 8 5 4 Maint...

Page 3: ... Engine Screens 46 10 9 3 Supervisory Main Screen 47 10 9 4 Unit Main Screen 47 10 9 5 System Setup 48 10 9 6 Suction Group Compressor Setup 49 10 9 7 Aux Control and Temperature Monitor 49 10 9 8 Light Ckt 49 10 9 9 Info 50 10 9 10 Circuits 50 10 9 11 Alarms 51 11 APPENDIX A SUPERVISORY WIRING 53 12 APPENDIX B TROUBLESHOOTING 54 12 1 PCS TROUBLESHOOTING 54 12 2 SUPERVISORY SYSTEM TROUBLESHOOTING ...

Page 4: ...figuration Screen 28 Figure 52 Suction Configuration Screen 1 29 Figure 53 Suction Configuration Screen 2 29 Figure 54 Suction Configuration Screen 3 29 Figure 55 Suction Configuration Screen 5 29 Figure 56 Suction Configuration Screen 6 29 Figure 57 Suction Configuration Screen 7 30 Figure 58 Discharge Configuration Screen 30 Figure 59 Lighting Configuration Screen 1 30 Figure 60 Lighting Configu...

Page 5: ...re 113 Pressure Graph 49 Figure 114 Supervisory Temperature Monitor and Aux Control Screen 49 Figure 115 Lighting Circuit Screen 50 Figure 116 Information Screen 50 Figure 117 Circuit Setup Screen 50 Figure 118 Defrost Setup Screen 51 Figure 119 Circuit Temperature Graph 51 Figure 120 Case Size Screen 51 Figure 121 Case Type Screen 51 Figure 122 Supervisory Alarms Screen 52 Figure 123 Supervisory ...

Page 6: ...ay be contained herein In no event will Computer Process Controls Inc be liable for any direct indirect special incidental or consequential damages resulting from any defect or omission in this manual even if advised of the possibility of such damages In the interested of continued product development Computer Process Controls Inc Reserves the right to make improvements to this manual and the prod...

Page 7: ... This document is organized into a number of sections The first section is an overview of the hardware A quick start section is included next to enable users to quickly get a minimum amount of information needed to start using the controller A detailed section follows The last section describes the PCS supervisory system It is recommended that the user familiarize himself with the PCS system by re...

Page 8: ...ll the I O for all compressors in the Protocol refrigeration system The temperature inputs must use the PCS temperature sensors described below and the pressure inputs must use the PCS pressure probes described below Figure 1 shows a picture of the PCS Controller and identifies the different parts of the Controller Figure 1 PCS Controller 5 1 1 Input Power The Controller uses 24 VAC 15 50 60 Hz Cl...

Page 9: ...ation inputs and temperature inputs to the PCS Controller Typically the expansion board will contain the I O for circuits refrigeration valve relays temperature inputs and defrost termination inputs The Expansion board contains 8 relay outputs Normally Open Normally Closed outputs 8 Temperature inputs and 8 Digital inputs The temperature inputs must use the PCS temperature sensors described below ...

Page 10: ...ame type of fuse 5 2 4 Expansion Board Wiring The field wiring for the expansion board consists of the temperature probes and defrost termination sensors Refrigeration valve relays are factory wired to terminal blocks Figure 4 shows the connection points for the field wiring Figure 4 Expansion Board Wiring 5 3 Pressure Transducer The PCS system uses a 4 20 milliamp pressure transducer Inputs are p...

Page 11: ...sensors and defrost termination sensors should be wired to the controller and expansion board using Belden 8761 22AWG 2 conductor twisted shielded pair or equivalent This wiring should be carefully routed away from power lines or other high electrical noise environments The PCS system offers the option of using a supervisory system where all units in the store are connected to a PC allowing comple...

Page 12: ... PI algorithm to maintain smooth discharge pressure If the Protocol system uses a fluid cooler instead of an air cooled condenser a separate controller will be used to control the Pump Station refer to the section on Pump Station Control The PCS controller will provide alarming on the discharge pressure input but will not provide direct control in this case 6 1 5 Alarms The PCS system keeps an ala...

Page 13: ... a high pressure cutout or the discharge temperature is to high See the Protocol schematic for details 6 1 5 8 Phase Loss This alarm will be signaled if the controller detects a phase loss 6 1 5 9 Controller Reset If the controller resets due to an interruption of power this alarm will be signaled when power is restored 6 1 6 Maintenance Diagnostics The controller provides the following capabiliti...

Page 14: ...guration menus for a given field 2 On other screens Used to move between fields and to accept a value 7 1 1 1 Cursor Each screen can have one or more fields The active field will have a cursor on the first character of the field The cursor will alternate between a block and the normal character for the field 7 1 2 Login Certain actions changing setpoints forcing defrosts etc require the user to lo...

Page 15: ... key several times 7 1 4 Configuration Screens There are several configuration screens In general these screens provide more detailed status information and also contain setpoints Typically there are several configuration screens for a given function circuit configuration for example When a configuration screen is first entered the cursor rests in the upper left hand corner of the screen If you pr...

Page 16: ... next row displays the current state of the circuit REFR indicates refrigeration DEFR indicates defrost SATISFIED indicates that the circuit has temperature control enabled and the circuit temperature is currently satisfied The third row shows the current temperature for the circuit Note that there can be up to three temperature probes defined for a circuit and the number displayed on this screen ...

Page 17: ...ther alarms use the UP or DOWN ARROW keys to display other alarms that are in the alarm log 7 1 10 1 Acknowledging Alarms To acknowledge an alarm you must be in the Alarm maintenance screen To enter the Alarm maintenance screen first enter the alarm screen then press the PROGRAM key The Alarm maintenance screen will be displayed Figure 15 Alarm Maintenance Screen The alarm maintenance screen has t...

Page 18: ...Protocol Control System Users Manual 2 12 01 Figure 16 Alarm Confirmation Screen Page 18 ...

Page 19: ... and the Low Pressure Control Refer to the Protocol schematics for more detail 8 2 2 Pressure Control Algorithm There are two basic pressure control algorithms used in the Controller If all compressors have the same horsepower an equal horsepower algorithm is used that equalizes run times between compressors If there are different horsepowers a different algorithm is used The algorithms are descri...

Page 20: ... the capability to control an air cooled condenser see Figure 32 and Figure 33 The condenser control is very similar to the equal horsepower pressure control with the number of compressors being the number of fans Note that the control of the fans is Proportional control only 8 4 Menu Structure The screens on the controller consist of 4 basic types of screens They are Status screens Configuration ...

Page 21: ...screen move the cursor to the Discharge pressure field then press the ENTER key To enter the Circuit configuration screen move the cursor to the appropriate circuit number see Figure 9 then press the ENTER key Once in the configuration screen you can move to the next configuration screen by pressing the DOWN ARROW key with the cursor in the upper left hand corner You can move back to the previous ...

Page 22: ... The name of the controller as set by the user Release The version number of the software release Date The release date of the software 8 5 2 Configuration Screens The configuration screens are shown on the second row of Figure 18 Note that each configuration screen block shown in Figure 18 may have several configuration screens associated with it The following paragraphs detail the configuration ...

Page 23: ...rtional Integral It is recommended to use P I for smooth pressure control Figure 26 System Configuration Screen 3 Table 8 System Configuration Screen 3 Field Explanation Maximum Power Load Amps The amount of Current draw the Protocol unit is rated for used for compressor shedding during electric defrost Temperature Display Mode The display mode for temperature F or C Figure 27 System Configuration...

Page 24: ... Explanation Min On Displays the minimum on time for the compressor Min Off Displays the minimum off time for the compressor Figure 31 System Configuration Screen 8 Table 13 System Configuration Screen 8 Field Explanation Compressor Setup IntrostageDelay Displays the minimum time that will elaspe before bringing on a different compressor This is useful to prevent all compressors from coming on all...

Page 25: ...ressors circuits suction group etc being lost Use this with caution 8 5 2 2 Circuit Configuration The following are the circuit configuration screens Note that the top row of each screen contains the circuit number and the name of the circuit The circuit number in the top row is an active field in all screens To view the configuration information for a different circuit change the circuit number t...

Page 26: ...and to be applied to the setpoint if the circuit is controlling temperature Temp Ctrl Displays the temperature control mode of the circuit ENABLED temperature control enabled DISABLED temperature control disabled Note that if the circuit is a hot gas defrost there is not an option for temperature control of the circuit Figure 41 Circuit Configuration Screen 6 Table 20 Circuit Configuration Screen ...

Page 27: ...rs before this period of time Figure 44 Circuit Configuration Screen 9 Table 23 Circuit Configuration Screen 9 Field Explanation Defr Time 1 2 3 Displays the time of the defrost 24 hour format Figure 45 Circuit Configuration Screen 10 Table 24 Circuit Configuration Screen 10 Field Explanation Defr Time 4 5 6 Displays the time of the defrost 24 hour format Figure 46 Circuit Configuration Screen 11 ...

Page 28: ...DOWN ARROW keys Case Size Displays the case size defined for the circuit Select the size by selecting the fields and pressing the UP or DOWN ARROW keys The above screen is the last screen for circuit configuration 8 5 2 3 Copying Circuit Configuration A circuit configuration can be copied from an existing circuit to save time during the setup process To copy a circuit configuration first setup one...

Page 29: ...ff compressors Integration Time Displays the Integration Time for the P I algorithm in seconds The larger this number the slower the controller will be to respond to and try to correct pressure changes Figure 55 Suction Configuration Screen 5 Table 32 Suction Configuration Screen 5 Field Explanation Alm Low Dlt Displays the Low pressure alarm delta difference in PSI Note that value will be subtrac...

Page 30: ...figuration Screen 1 Field Explanation State Read Only field that displays whether the circuit is ON or OFF Output 1 Displays the output point board point assignment for the output relay Figure 60 Lighting Configuration Screen 2 Table 35 Lighting Configuration Screen 2 Field Explanation Type Control Displays the control mode for the lighting circuit Can be either SCHED controlled from a schedule or...

Page 31: ...n Temp Deadband Displays the deadband for the temp control function Control Displays the type of control either DIRECT relay closes on temperature above setpoint deadband or REVERSE relay opens on temperature above setpoint deadband Figure 65 Aux Configuration Screen 2 Table 37 Aux Configuration Screen 2 Field Explanation Temp Input Bd Pt Displays the input point assignment board point for the tem...

Page 32: ... Figure 69 Suction Group Maintenance Screen 1 Table 39 Suction Group Maintenance Screen 1 Field Explanation Compressor 1 Read only field that shows the current state of the compressor Force Mode Displays the control mode of the compressor AUTOMATIC the pressure control algorithm is controlling the state ON the state of the compressor will be forced on OFF the state of the compressor will be forced...

Page 33: ...times If the water pressure is outside of the low and high pressure setpoints for a programmable amount of time an alarm will be indicated and the controller will be switched to the other pump The interval timer will not operate until the condition is reset by the user 9 3 2 Fluid Cooler The fluid cooler algorithm attempts to maintain the temperature of the glycol leaving the fluid cooler This is ...

Page 34: ...al run time of pump 1 P2 Run Time Total run time of pump 2 Figure 73 PSC Pump Date Time Screen Table 43 Date Time Status Fields Field Explanation Time Current Time Date Current Date and Day Unit Address The address of the unit on the supervisory communications network Figure 74 PSC Release Screen Table 44 Release Fields Field Explanation Name Name of this controller as set by the user Release Vers...

Page 35: ...he pump timer expires Note that the pump timer is reset when the pumps are changed Figure 77 PSC Configuration Screen 2 Table 46 PSC Configuration Screen 2 fields Field Explanation On Temp Temperature to turn the Spray pump ON3 Off Temp Temperature to turn the Spray pump OFF Figure 78 PSC Configuration Screen 3 Table 47 PSC Configuration Screen 3 fields Field Explanation On Temp Temperature to tur...

Page 36: ...ure is below this value for the delay time an alarm will be activated Maximum PSI High Pressure setpoint for the water pressure If the pressure is above this value for the delay time an alarm will be activated Alarm Delay Delay time before activating pressure alarm Figure 82 PSC Configuration Screen 7 Table 51 PSC Configuration Screen 7 Fields Field Explanation Max Range Maximum range of the press...

Page 37: ...nu There is a prompt to reset alarms in the maintenance menu Entering YES to this prompt will reset the current alarm and clear the alarm menu The following Alarms are provided in the Pump Station controller 9 5 1 Controller Reboot Power was applied to the controller 9 5 2 Spray Pump Fail The proof for the Spray Pump failed 9 5 3 Low Speed Fan The proof for the Low Speed Fan failed 9 5 4 High Spee...

Page 38: ...ystem Users Manual 2 12 01 9 5 12 Ambient Temp Fail The ambient temperature probe failed 9 5 13 Alarm Winter Override The outlet temperature was higher than the Winter Override setpoint Figure 87 PSC Alarm Screen Page 38 ...

Page 39: ...ess 2 RS 485 cable type Belden 8641 2 conductor shielded 3 Supervisory Kit shipped with Protocol s to job site which consists of a Supervisor Software b RS485 Converter c Transformer d DB25 to DB9 RS232 cable e Connector for RS485 converter f Terminating Resistors 10 4 Software Installation Note that the PCS Supervisory System runs on the Windows platform It is assumed that the user is familiar wi...

Page 40: ...ee Appendix A for details 3 Connect the power supply 12 VAC to the adapter Note that there is power LED that should light up when power is applied The adapter has LED s that light to represent serial network traffic being sent and received RX and TX LED s Under normal operation these LED s should flash at an intermittent rate TX represents the PC attempting to communicate to the controller s and R...

Page 41: ... software will run in Demo mode as described in paragraph 10 5 2 and will terminate stopping all logging alarming and other supervisory functions after a short period of time Figure 92 After the Engine starts and all modules are running a Internet Explorer browser page will automatically be opened displaying the PlantVisor logon screen Figure 93 Note that if a KEY is not present the PlantVisor sof...

Page 42: ...ve occurred Report The Report menu item is used to create various reports that detail operation of the system Service The Service menu item is used to configure the system Logout The Logout menu item is used to logout of the PlantVisor system Help The Help menu item brings up a Help information for the system 10 7 3 Configuration When the supervisor is first started you will need to configure cert...

Page 43: ... to add and configure the units You must first select the address then set the device type in the drop down box then rename the units to a descriptive name There are two ways to set the address for each unit individually or as a group To set the address individually set the From and To boxes to the serial address of the unit a new unit with the given address will be added to the list of devices To...

Page 44: ...st dial an 8 for an outside line the Fax number would be entered as 8 1234567890 If you insert an incorrect number you must correct the number then shut down and restart PlantVisor for the change to take effect Note that PlantVisor does not follow the Windows dialing property rules in the Windows modem setup area Important Always verify that the Fax works properly and that a Fax is correctly recei...

Page 45: ...ge is a schedule showing the days of the week and the hours in the day A check mark in the box signifies that the schedule is active at that particular time This feature can be used to have different alarm handling during the evening or on weekends A 2nd Alarm schedule would be setup with the new configuration information and the active times selected for the 2nd schedule Note that the appropriate...

Page 46: ...ervisory system The information on these screens are generally the same as previously described under the appropriate section of the PCS manual For detailed information about a status value or setpoint refer to the appropriate section of the PCS manual 10 9 1 General Information There are two basic types of information on the Supervisory screens Status information that is for display only for exam...

Page 47: ...mple and will display active alarms that have not been acknowledged for the units If the PCS Controller is communicating with the PlantVisor appropriately there will be either a green dot or red dot next to the Name The green dot indicates normal communications and the PCS Controller is not in alarm The red dot indicates normal communications and the unit is in alarm A grey dot indicates no commun...

Page 48: ...play the Suction Compressor Setup Screen where the setpoints can be changed 10 9 4 4 Circuits The circuit state refrigeration or defrost the current temperature and the setpoint are shown for all circuits The user can view a graph of the circuit temperature by clicking on the appropriate button located beneath the circuit Clicking on the appropriate Setup button will enter the Circuit Setup Screen...

Page 49: ...r Setup Screen A graph of the suction and discharge pressures can be obtained by clicking on the Graph button Figure 113 shows the pressure graph Figure 113 Pressure Graph 10 9 7 Aux Control and Temperature Monitor The Aux Control and Temperature Monitoring Setup screen is used to 1 display the temperature monitoring points 2 change the setpoints associated with the temperature monitoring points 3...

Page 50: ...id yet When the Data Synchronized light turns GREEN this means that the data displayed is valid In addition the circuit temperatures displayed in this screen may not be updated Clicking the back button then entering the circuit screen will update the displayed temperatures The Circuit Setup Screen is shown in Figure 117 Figure 117 Circuit Setup Screen There are two other screens that can be access...

Page 51: ...hows the Case Size Screen Figure 120 Case Size Screen 10 9 10 2 Case Type The Case Type button in the Circuit Setup Screen is used to set the type of case the circuit is associated with By using the Case Size field with the Case Type field the case can be completely described Figure 121 shows the Case Size Screen Figure 121 Case Type Screen 10 9 11 Alarms If a Protocol unit is in an alarm state an...

Page 52: ...Protocol Control System Users Manual 2 12 01 alarms active or acknowledged Active Alarms show only active alarms or Events show all events for the unit Figure 122 Supervisory Alarms Screen Page 52 ...

Page 53: ...a daisy chain Use Beldon 8641 or equivalent Maximum Length of daisy chain 3200 Ft Do not splice in middle of daisy chain Do not run network cable near power cables Protocol Unit Install 120 ohm terminating resistor RX TX RX TX GND RS485 Network RS485 Adapter Shield Black Install Terminating Resistor betwen RX TX and RX TX Resistor Black ShieldWhite 1 2 3 RS485 Card installed on Protocol Controller...

Page 54: ...d Temperature probe reads 623F or a very low value Probe is open Temperature probe reads 687 or a very high value Probe is shorted Pressure probe bad Bad offset value Check to insure that there is no offset entered for the probe Reads 90 lbs Probe is open Reads 400 or 401 lbs Hardware failure 12 2 Supervisory System Troubleshooting Below are some typical problems that may be encountered in the ins...

Reviews: