background image

Accessories

ACCESSORIES

There is a complete line of accessory equipment available from our dealers/distributors.

Care should be taken that these accessories are properly installed by trained technicians and that they are used in the
manner for which they were designed.

See following WARNING and CAUTION.

WARNING

• Custom cab assemblies, canopy tops, weatherproof enclosures, and windshields will not protect

occupants from flying objects.

ELECTRIC WINCH ACCESSORY

If your vehicle is equipped with an electric winch, read and follow all manufacturer safety warnings and instructions in
the winch operator manual, as well as the following WARNING and CAUTION statements. Make sure a winch warning
decal is affixed to the vehicle on the seat support panel next to the receptacle for the remote operation switch.

The winch kit available includes a remote operation switch, which enables the operator to move away from the vehicle
and cable.

See following WARNING and CAUTION.

WARNING

• Before beginning a winch operation:

– Turn key switch to the OFF position, put Forward/Reverse handle in the NEUTRAL position, and

engage the park brake.

– Do not use winch while persons are seated on the vehicle.

• Stand to the side and away from the vehicle to operate winch.

CAUTION

• Use of the winch for an extended period of time could discharge the battery. Keep winch operations

as short as possible, and drive the vehicle for several minutes after the winch operation to recharge
the battery.

MUD TIRE OPTION

4x4 vehicles equipped with optional mud tires are intended only for off-road operation; they are not designed for use
on paved surfaces such as asphalt and concrete. Frequent driving on paved surfaces will significantly decrease the
life of the mud tires. Vehicle performance will also be reduced when driving on paved surfaces.

See following

WARNING and CAUTION.

WARNING

• To avoid the risk of rollover when operating a vehicle equipped with mud tires on a paved surface:

reduce speed, use extreme caution, and drive slowly in turns.

• The diameter of all tires on the vehicle must be equal; otherwise the four-wheel drive system will not

operate as intended and could result in severe personal injury or death. Never install tires of different
diameters on the vehicle.

2009 HUV 4214, HUV 4414, andHUV 4414-XP Owner’s Manual

Page 47

Summary of Contents for 2009 HUV 4214

Page 1: ...2009 HUV 4214 HUV 4414 and HUV 4414 XP Owner s Manual Gasoline Utility Vehicles ...

Page 2: ......

Page 3: ...ation that is protected by copyright All rights are reserved No part of this manual may be photocopied reproduced or translated to another language without the written consent of Husqvarna Inc The information contained in this document is subject to change without notice Husqvarna reserves the right to make design changes to vehicles without obligation to make these changes on units previously sol...

Page 4: ...designed to offer you fast courteous service In the event that your Husqvarna vehicle needs repairs or service we recommend that your local authorized Husqvarna representative perform them For the name and address of the Husqvarna representative nearest you logon to our web site at www usa husqvarna com If you would prefer to write to us direct your letter to Husqvarna Attention Marketing Services...

Page 5: ...t 20 Driving Instructions 21 Bed Latch 24 Bed Locking Pin 25 Rear Shock Absorbers 25 Loading and Unloading Cargo 26 Vehicle Load Capacities 26 Towing with the Vehicle 27 Transporting on a Trailer 28 Storage 28 Maintenance 30 Periodic Service Schedule 31 Periodic Lubrication Schedule 33 Brake Fluid Reservoir 34 Engine Oil 35 Gearcase Lubrication 40 Air Intake System 42 Fueling Instructions 43 Batte...

Page 6: ...Subsequent Owner Registration 48 Vehicle Specifications 48 Warranties 50 Emissions Control 53 Page 4 2009 HUV 4214 HUV 4414 andHUV 4414 XP Owner s Manual ...

Page 7: ...ND FEATURE IDENTIFICATION The following pages contain safety decal and feature identification information For detailed information on specific features read the appropriate section in this manual 2009 HUV 4214 HUV 4414 andHUV 4414 XP Owner s Manual Page 5 ...

Page 8: ...pes and unstable surfaces CCI 102961201 WARNING 3 6 2 4 1 5 1 101609401 Decal Crush Area Warning behind seat near cargo bed driver and passenger side 6 103619901 Decal Cab CO Warning with cab door kit accessory 2 102459401 Decal Young Driver Warning on ROPS 3 102961201 Decal ROPS Warning on ROPS 4 103526501 Decal Bed Latch Operation on bed latch 5 103532701 Decal DOT 5 Brake Fluid inside front car...

Page 9: ...901 Decal Hot Parts Warning on frame driver side 8 103596501 Decal Ground Warning on vehicle frame near battery 3 102460201 Decal Rotating Parts Warning on frame driver and passenger side 4 103500701 Decal Operating Instructions on instrument panel 5 103526201 Decal Vehicle Loading Instructions on seat support 6 103579901 Decal Fuel Loading Warning on fender above fuel cap 2009 HUV 4214 HUV 4414 a...

Page 10: ...in this manual Understand and become familiar with the DANGER WARNING and CAUTION statements and procedures it contains along with the safety decals that are affixed to your vehicle Take time to understand the language of safety It is a language that can save your life PROPOSITION 65 STATE OF CALIFORNIA WARNING This product contains or emits chemicals or substances that have been determined by the...

Page 11: ...llowed If any of the operation or warning decals on the vehicle become damaged have been removed or cannot be easily read they should be replaced immediately to avoid possible property damage personal injury or death Contact your dealer DANGER A DANGER indicates an immediate hazard that will result in severe personal injury or death WARNING A WARNING indicates an immediate hazard that could result...

Page 12: ...vice area Ventilate when charging or operating vehicle in an enclosed area Wear a full face shield and rubber gloves when working on or near batteries Gasoline Flammable Explosive Do not smoke Keep sparks and flames away from the vehicle and service area Service only in a well ventilated area Do not operate gasoline vehicle in an enclosed area without proper ventilation The engine produces carbon ...

Page 13: ...Never install tires of different diameters on the vehicle Check the vehicle for proper location of all vehicle safety and operation decals and make sure they are in place and are easy to read For vehicles with cargo beds remove all cargo before raising the bed or servicing the vehicle If the vehicle is equipped with a prop rod ensure that it is securely engaged while bed is raised Do not close bed...

Page 14: ...vicing are identical unless otherwise noted MODEL IDENTIFICATION The serial number of each vehicle is printed on a bar code decal mounted on the frame below the steering wheel Example RC0601 123456 Figure 4 There is also a second serial number decal mounted on the rear body frame above the engine See following NOTE NOTE Have the vehicle serial number available when ordering parts or making inquiri...

Page 15: ...t shift the Forward Reverse handle while the vehicle is in motion Engine must be at idle before shifting the Forward Reverse handle Failure to do so may result in injury to inattentive passengers and or damage to the vehicle To avoid unintentionally starting or rolling the vehicle set the park brake place the Forward Reverse handle in the NEUTRAL position turn the key switch to the OFF position an...

Page 16: ...15 seconds release the key and repeat the procedure Once the engine starts release the key and it will return to the ON position The engine will idle in neutral The engine will continue to idle until the key is turned to the OFF position See following WARNING CAUTION and NOTE WARNING Moving parts Keep clear of the engine compartment while the engine is running CAUTION Do not shift the Forward Reve...

Page 17: ...rward Reverse handle in the FORWARD or REVERSE position vehicle speed will increase as the accelerator pedal is pressed When the accelerator pedal is released it will return to the original position and the engine will idle See preceding WARNINGS and CAUTION BRAKE PEDAL The brake pedal 2 is located to the immediate left of the accelerator pedal Figure 5 To slow or stop the vehicle press the brake ...

Page 18: ...ge the front wheel drive unit or push the handle down to disengage the unit The engagement lever was designed to be shifted while the vehicle is in motion so momentum is not lost while operating on slippery terrain The lever should also be disengaged while the vehicle is in motion WARNING Do not operate the vehicle on improved surfaces concrete asphalt etc in 4X4 mode Doing so increases steering e...

Page 19: ...light remains lit have a trained technician check the vehicle See following CAUTION CAUTION Failure to add oil immediately when the low oil warning light stays on may result in permanent engine damage FUEL GAUGE HOUR METER The fuel gauge and hour meter 8 are housed together on the right side of the instrument panel Figure 5 The fuel gauge operates when the key switch is in the ON position and allo...

Page 20: ...e tab locks into the buckle Position the lap belt as low as possible on the hips not on the waist The retractor will lock the belt during a sudden stop A slow easy motion will allow the belt to extend and the occupant can move freely If the seat belt cannot be pulled out of the retractor firmly pull the belt and release it It should then pull smoothly out of the retractor To release the seat belt ...

Page 21: ...hile the vehicle is moving This vehicle is not designed to meet child seat compatibility requirements Children requiring a child safety seat must not ride on the vehicle Comply with state and local laws pertaining to child safety CAUTION Be careful not to damage the seat belt webbing or hardware Inspect the seat belt system periodically Check for cuts fraying and loose parts Damaged parts should b...

Page 22: ...ne Oil on page 35 Check air filter and replace if necessary Fuel Check fuel level See Fueling Instructions on page 43 Check fuel tank lines fuel cap pump and fuel filters for fuel leakage Exhaust system Check for leaks Hydraulic brakes Check fluid level Fill with DOT 5 brake fluid only See Brake Fluid Reservoir on page 34 Wear in the brakes before initial vehicle operation On a flat open surface a...

Page 23: ...mance Have a dealer or a trained technician investigate anything unusual DRIVING INSTRUCTIONS WARNING Only licensed drivers should be allowed to drive the vehicle Before allowing anyone to drive the vehicle make sure the driver is familiar with all controls and operating procedures No one under the age of 16 years should be allowed to drive the vehicle No more than two persons per bench seat at on...

Page 24: ...d drive the vehicle without first being instructed in the proper operation and use of vehicle controls An experienced operator should accompany each first time driver on a test drive before allowing the driver to operate the vehicle alone To ensure safe operation of the vehicle follow exactly and in order all of the following procedures Read and understand all instructions before driving the vehic...

Page 25: ...le the front differential may also be engaged to provide additional traction in slippery conditions See following WARNING WARNING When servicing the vehicle with part of the vehicle on jack stands do not operate the engine with the Forward Reverse handle in either the FORWARD or REVERSE position The four wheel drive system may engage any wheel s front or rear depending on the mode selected See Fig...

Page 26: ...the bed gently lower the bed until the latch engages and secures the bed in the down locked position DO NOT drop the bed See following DANGER and WARNING DANGER Use caution when working under bed Be sure cargo bed is secure Otherwise the bed will fall resulting in severe personal injury or death WARNING Remove all cargo before raising the bed or servicing the vehicle Ensure that cargo bed is secur...

Page 27: ... injury or death WARNING For vehicles with cargo beds remove all cargo before raising the bed or servicing the vehicle If the vehicle is equipped with a locking pin ensure that it is securely installed Do not lower bed until all persons are clear of cargo bed area Keep hands clear of all crush areas Do not drop cargo bed lower gently and keep entire body clear Failure to heed this warning could re...

Page 28: ...ailure to do so may cause the vehicle to overturn or flip over backwards Maximum cargo load must be reduced by the weight of optional equipment Center and secure cargo as far forward as possible in the cargo bed Do not overload the vehicle See Vehicle Load Capacities on page 26 for vehicle capacities VEHICLE LOAD CAPACITIES Maximum Occupant Capacity The maximum occupant capacity is the maximum all...

Page 29: ...e 10 Vehicle Load Capacity TOWING WITH THE VEHICLE WARNING Do not tow a vehicle or trailer on public streets or highways Normal vehicle operating speed should be reduced when towing Extreme caution should be used when towing Do not allow riders in the vehicle or trailer being towed Avoid sudden starts sudden stops and tight turns when towing Avoid stopping on a hill when towing If you must stop on...

Page 30: ...erse handle in the NEUTRAL position the key switch in the OFF position and the park brake firmly engaged Because of the added length of the trailer use caution when making turns Do not transport the vehicle on a trailer with a load in the vehicle cargo bed Remove the vehicle windshield and secure seats before transporting on a trailer If the vehicle must be transported over long distances or on pu...

Page 31: ...Check electrolyte level after charging and add distilled water if necessary 3 Make sure the key switch is in the OFF position and the Forward Reverse handle is in the NEUTRAL position Chock the wheels 4 Prepare the fuel tank 4 1 Fill the tank with fresh fuel 4 2 Following the manufacturer s directions add a commercially available fuel stabilizer such as Sta Bil Run the engine in a well ventilated ...

Page 32: ... Coat terminals with Battery Terminal Protector Spray P N 603 00 00 03 4 Completely open the fuel shut off valve Figure 11 Page 29 Ensure the valve is fully open A partially closed fuel shut off valve combined with the use of the choke can result in a fouled spark plug and engine failure 5 Place the Forward Reverse handle in the NEUTRAL position Crank the engine until fuel is pumped into the carbu...

Page 33: ...urn fuel shut off valve to the closed OFF position Figure 11 To avoid unintentionally starting the vehicle Disconnect battery cables negative cable first Figure 2 Gasoline vehicles only Disconnect the spark plug wires from the spark plugs If wires are removed or replaced make sure wiring and wire harness are properly routed and secured Failure to properly route and secure wiring could result in ve...

Page 34: ... 40 Monthly service by owner or trained technician General vehicle Wash engine compartment and underside of vehicle Do not wash engine when hot Battery Clean terminals and wash dirt from casing check electrolyte level Add distilled water if necessary See page 44 Front wheel alignment and toe in Check and adjust if necessary See Steering and Front Suspension Section in the appropriate maintenance a...

Page 35: ...spection or service do not operate vehicle until repairs are made Failure to make necessary repairs could result in fire property damage severe personal injury or death PERIODIC LUBRICATION SCHEDULE PERIODIC LUBRICATION SCHEDULE REGULAR INTERVAL SERVICE LUBRICATION POINTS RECOMMENDED LUBRICANT First change 5 8 hours additional change every 100 hours of operation or annually whichever comes first C...

Page 36: ... 801 Figure 12 Lubrication Points BRAKE FLUID RESERVOIR 5 1 2 3 1 Full Level 2 Safe Level 3 Low Level 1297 Figure 13 Brake Fluid Access 803 Figure 14 Brake Fluid Reservoir Page 34 2009 HUV 4214 HUV 4414 andHUV 4414 XP Owner s Manual ...

Page 37: ...ot recommended ENGINE OIL Even though the low oil pressure warning light on the instrument panel should illuminate if the oil level becomes low the engine oil level should be checked daily The vehicle should be on a level surface when the oil is checked Do not overfill the engine with oil ENGINE OIL LEVEL CHECK 1 Remove the oil level dipstick from the oil filler tube and wipe oil from the dipstick...

Page 38: ...changes under the drain plug 6 From the underside of the vehicle use a socket or wrench to remove the drain plug 1 Figure 17 Turn the plug counterclockwise and drain the engine oil into the pan See following WARNING WARNING Do not attempt to change engine oil when the engine is hot or even warm Hot engine oil can burn skin Wear safety glasses or approved eye protection when servicing the vehicle W...

Page 39: ... or equivalent An oil drip guard can be used to prevent excess oil from dripping onto the engine base plate Figure 18 Use an empty quart one liter container and cut the bottom off at an angle then slide the open area of the container up and under the oil filter before removal Position the port of the plastic container so oil will be directed into the oil pan A drip guard can be made by folding a p...

Page 40: ...Corning BR2 Plus or equivalent or new engine oil to the rubber seal around the outside surface of the filter before attaching it to the oil filter port Figure 19 Install the new oil filter onto the engine oil filter port See following NOTE NOTE Use only engine compatible oil filters designed for your engine 6 Tighten the oil filter by hand 2 3 turn after gasket contact Do not use a band wrench or ...

Page 41: ...leaks If a leak is detected check the tightness of the oil filter and drain plug Tighten repair and or replace components as necessary See following NOTE NOTE Wait five minutes after turning off the engine before removing the dipstick 3 Remove the dipstick and check the engine oil as a final step Replace the dipstick OIL VISCOSITY Choose the viscosity according to the temperature as shown in the a...

Page 42: ...ered in the fluid or on the magnetic drain plug when changing the differential or transmission fluid These particles are normal and expected for the first few fluid changes This is a result of the gears being net forged meaning the gears are forged to a shape very close to the final gear size but the teeth are not finish machined prior to assembly The finish machining occurs when the gears make co...

Page 43: ...rough the fill plug dipstick hole 1 located on the top of the rear transaxle Figure 24 See Periodic Lubrication Schedule on page 33 Replace rear transaxle dipstick and tighten to 35 in lb 4 N m 2 1 808 Figure 23 Rear Transaxle Drain Plug 819 Figure 24 Rear Transaxle Check Fill Plug 2 3 2 1 1 Full Level 2 Safe Level 3 Low Level 820 Figure 25 Rear Transaxle Dipstick 824 Figure 26 Rear Transaxle Lubr...

Page 44: ... foam pre cleaner 3 and air filter cartridge 4 assembly to prevent debris from entering carburetor See following NOTE NOTE To clean foam pre cleaner separate it from cartridge and wash in liquid detergent and water Squeeze dry in a clean cloth The air filter cartridge and foam pre cleaner are specifically designed for this engine Use only engine compatible air filter cartridges and foam pre cleane...

Page 45: ...pump before and during the fueling operation To avoid the possibility of fire clean up any spilled fuel before operating the vehicle 1 Remove the fuel cap and fill the tank with fuel See preceding DANGER and following NOTE NOTE Use unleaded gasoline only Whenever possible avoid using oxygenated fuels and fuels that are blended with alcohol 2 Replace the fuel cap Ensure that the cap is tightened se...

Page 46: ...objects can cause sparks when shorted across a battery WARNING Wear safety glasses or approved eye protection when servicing the vehicle Follow all instructions carefully when working with batteries When jumping from a booster battery make final negative connection at engine frame Do not jump start or charge a frozen or damaged battery Unplug charger before connecting or disconnecting cables to th...

Page 47: ...rroded replace or clean them as necessary Failure to do so may cause them to overheat during operation and could result in a fire property damage or personal injury Be sure the battery hold down clamp is properly tightened Tighten to 71 in lb 8 N m A loose clamp may allow the battery to become damaged from vibration or jarring If battery appears weak have it charged by a trained technician The bat...

Page 48: ...le to Solenoid 948 Figure 32 Negative Cable to Negative Terminal of Weak Battery CLEANING THE VEHICLE Each vehicle is equipped with hand washable front and rear bodies The vehicle has a powder coated steel cargo bed Use commercial automotive cleaning solutions with a sponge or soft cloth for normal cleaning A garden hose at normal residential water pressure is adequate The manufacturer does not re...

Page 49: ...Forward Reverse handle in the NEUTRAL position and engage the park brake Do not use winch while persons are seated on the vehicle Stand to the side and away from the vehicle to operate winch CAUTION Use of the winch for an extended period of time could discharge the battery Keep winch operations as short as possible and drive the vehicle for several minutes after the winch operation to recharge th...

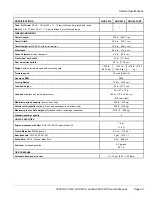
Page 50: ...imum HP 3600 RPM per SAE J 1940 1349 twin cylinder air cooled with pressure lubrication system Fuel system Down draft carburetor with float bowl fixed jets fuel filters and impulse fuel pump Governor Internal to engine centrifugal Ignition Transistorized magneto Transmission Forward and reverse with neutral 18 19 1 forward 34 37 1 reverse Electrical system 12 volt starting battery 525 cca at 0 F 1...

Page 51: ... h Governed RPM 3950 Turning Radius 139 in 354 cm Load bed height 32 in 81 3 cm Load bed size box bed inside dimensions 34 x 47 x 10 in 86 4 x 119 4 x 25 4 cm 9 25 cubic feet Maximum payload capacity level surface only 425 lb 193 kg Vehicle rated capacity payload driver and passenger level surface only 925 lb 420 kg Maximum gross vehicle weight fully loaded vehicle including accessories 2135 lb 96...

Page 52: ...belts brushes bushings drive buttons engine mounts mats and pads maintenance adjustments cosmetic deterioration and items which deteriorate or fail due to exposure or ordinary wear and tear Batteries battery charger onboard computer and solid state speed controller are covered under separate Husqvarna warranties Also excluded from any Husqvarna warranty is damage to a vehicle or component resultin...

Page 53: ...lusions or limitation of incidental or consequential damages Therefore the above limitations or exclusions may not apply to you This warranty gives you specific legal rights and you may also have other rights which vary from state to state 8 INFORMATION For further information contact WARRANTY SERVICES HUSQVARNA PROFESSIONAL PRODUCTS INC 7349 STATESVILLE ROAD CHARLOTTE NC 28269 OR CALL 1 800 487 5...

Page 54: ...iod stated above Any such part repaired or replaced under warranty will be warranted for the remaining original warranty period 3 Any warranted part that is scheduled for replacement as required maintenance in the written instructions supplied is warranted for the period of time before the first scheduled replacement date for that part If the part fails before the first scheduled replacement the p...

Page 55: ...ke a warranty claim under this limited warranty you must present the vehicle or defective component to an authorized HUSQVARNA dealer or send the defective component freight prepaid to WARRANTY SERVICES Husqvarna Professional Products Inc 7349 STATESVILLE ROAD CHARLOTTE NC 28269 EMISSIONS CONTROL LOOK FOR RELEVANT EMISSIONS DURABILITY PERIOD AND AIR INDEX INFORMATION ON YOUR ENGINE EMISSIONS LABEL...

Page 56: ... C 125 hours Category B 250 hours Category A 500 hours For engines of 225 cc or more displacement Category C 250 hours Category B 500 hours Category A 1000 hours Portions of this publication are subject to copyright of Briggs Stratton Corporation Content on this page has been reproduced with the written permission of Briggs and Stratton Corporation Page 54 2009 HUV 4214 HUV 4414 andHUV 4414 XP Own...

Page 57: ...Publication Part Number 103472540 Edition Code 0109A00000 103472540 ...

Reviews: