Coupled
S
and
Heavy Duty+
Manual Clutch Installation
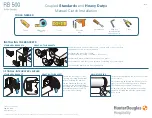
Mount into wood or metal studs or into concrete with concrete anchors.
Drywall anchors are not recommended.
Determine the mounting location.
a) surface/wall b) ceiling c) on frame d) in recess
Measure and mark the bracket locations with a pencil.
Mount brackets with the screws provided. Pre-drilling is recommended.
Check that the brackets are level and aligned.
S BRACKETS
S BRACKET
HEAVY DUTY+ BRACKET
HEAVY DUTY+ BRACKETS
© 2018 Hunter Douglas. All rights reserved. All trademarks used herein are the property of Hunter Douglas or their respective owners.
Las Vegas • Chicago
800.229.5300
HDhospitality.com
1 of 4
a
c
b
d
a
c
b
d
Insert the provided Allen key into the set screw
of the leveler.
Adjust skewing by turning the Allen key left or
right to move the shade up or down. Support
the shade with your hand if necessary.
All adjustments can be made after the shade
has been installed and after the operation has
been tested.
OPTIONAL: INTEGRATED LEVELER
ADJUST LEVELER
TOOLS NEEDED
INSTALLING THE BRACKETS
Pencil
Level
Measuring
Tape
Drill with
bits
Allen Key
(provided with
optional Leveler)
Screwdriver
Pliers
Ensure the leveling set screw
opening is pointing downwards
before installing the bracket.
On the S Bracket, the
orientation can be changed by
loosening the two screws (M3x6)
and turning the leveler 90°. Fix
the screws after turning.


