background image

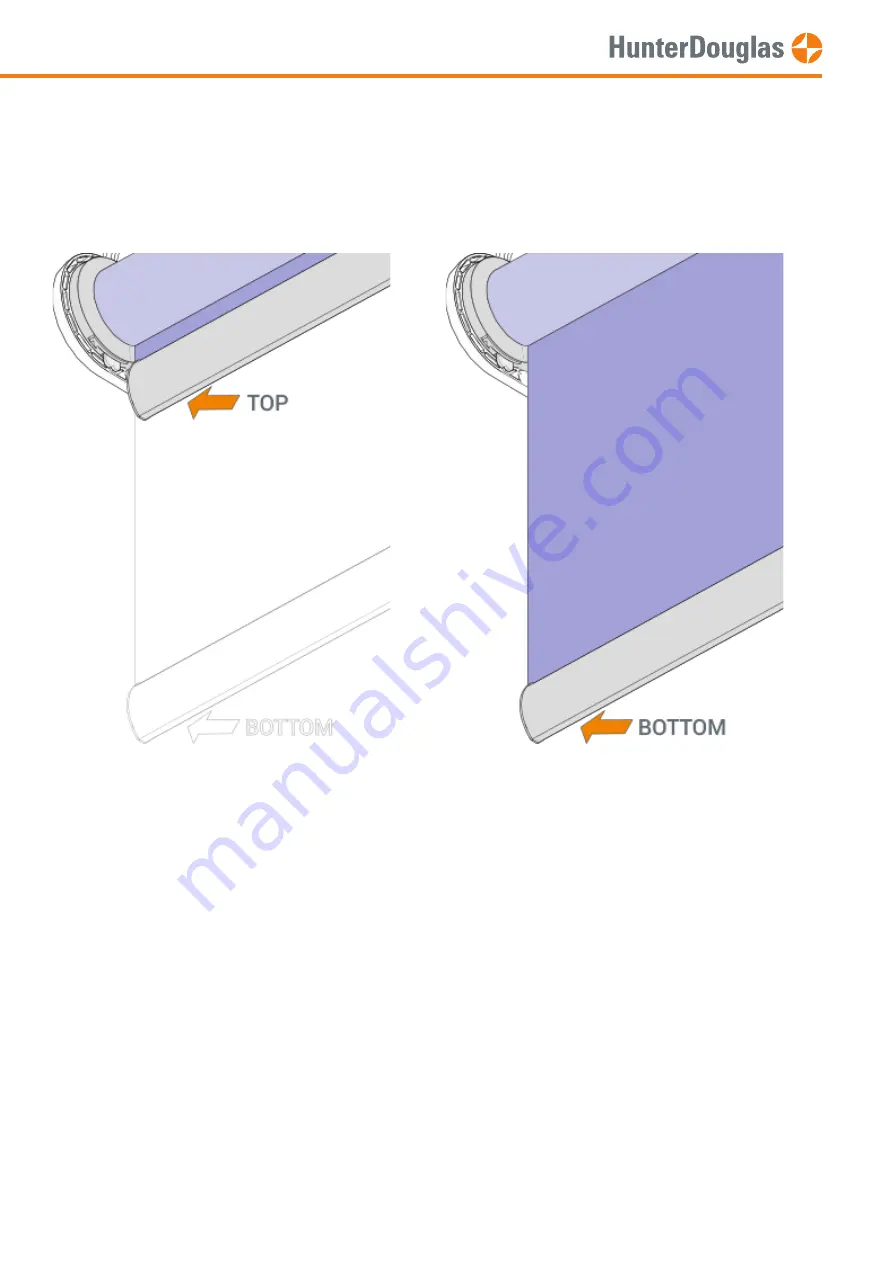
1.2. End limits factory set


2. Special to the Integrated Rechargeable Battery motor

2.1 First Use

When you will 

fi

rst use your motorized blind with integrated battery we advise to always 

fi

rst charge your blind. However

when you receive your blind, it is in a so called hibernation status. To wake it up and make it functional you will need to

plug in and pull out a USB type C charging connector into the charging port of your blind. from this point the motor will

start up and become useable in a few seconds.

The top limit is set to the maximum roll-up

position

The bottom limit is set to the ordered

product height

MANUAL

Page 2 of 23

version: 1.0

Summary of Contents for Luxaflex PowerView

Page 1: ...flex PowerView Roller blind This guide helps you get started with your Roller blind powered by an integrated Li ion battery 1 Delivery condition 1 1 Pebble or wand remote Scene controller or Hub are p...

Page 2: ...you receive your blind it is in a so called hibernation status To wake it up and make it functional you will need to plug in and pull out a USB type C charging connector into the charging port of your...

Page 3: ...harging your blind the blind motor needs to be in an awake state To wake up the blind please perform the following 1 Manual motor Button 2 USB Type C Charging port 3 LED status indicator MANUAL Page 3...

Page 4: ...t use 2 2 2 Re insert the USB Type C connector to start charging 2 2 3 The motor LED indicator will start blinking RED signaling the charging process is activated 2 2 4 When the LED turns green the in...

Page 5: ...below assign the blind to group 1 blinking CHARGE normal constant Fully Charged flashing CHARGE not allowed temperature to high Alternately CHARGE NTC ERROR open short circuit 3 1 Locate the manual c...

Page 6: ...IMPORTANT Watch out to perform steps 2 4 and 2 5 within 3 seconds 3 4 Press and hold the manual control button 3 5 Press the open button The blind will jog 1x 3 6 Release the manual control button MAN...

Page 7: ...7 Press and hold the stop button for 6 seconds The remote will exit programming mode automatically after 20 seconds Keep pressing until the remote lights stop blinking Select 1 blind only Select 2 or...

Page 8: ...4 2 Open close a blind Select all blinds A Select blind group B Press open button MANUAL Page 8 of 23 version 1 0...

Page 9: ...4 3 Move a blind to a favourite position C Press close button A Select blind group B Press favourite button MANUAL Page 9 of 23 version 1 0...

Page 10: ...e desired favourite position Use the arrow up and arrow down buttons to fine tune 5 3 Press and hold the stop button for 6 seconds DO NOT select a group on the remote Keep pressing until the remote li...

Page 11: ...anual control button 5 5 Press the favourite button The blind will jog 1x to acknowledge the favourite position is set 5 6 Release the manual control button 5 7 The favourite position is set MANUAL Pa...

Page 12: ...ld the manual control button 6 1 2 Press the open button Make sure group1 on the remote is selected The blind will jog 1x 6 1 3 Release the manual control button The motor LED turns red to acknowledge...

Page 13: ...wn buttons to fine tune 6 1 5 Press and hold the stop button for 6 seconds DO NOT select a group on the remote Keep pressing until the remote lights start blinking IMPORTANT Watch out to perform steps...

Page 14: ...t is set 6 1 8 Release the manual control button The motor LED turns off 6 1 9 Press and hold the stop button for 6 seconds The remote will exit programming mode automatically after 20 seconds Keep pr...

Page 15: ...m limit 6 1 10 The new top limit is set 6 2 1 Press and hold the manual control button 6 2 2 Press the close button Make sure group1 on the remote is selected The blind will jog 1x MANUAL Page 15 of 2...

Page 16: ...tons to move the blind to the new bottom position Use the arrow up and arrow down buttons to fine tune 6 2 5 Press and hold the stop button for 6 seconds DO NOT select a group on the remote Keep press...

Page 17: ...to acknowledge the new bottom limit is set 6 2 8 Release the manual control button The motor LED turns off 6 2 9 Press and hold the stop button for 6 seconds The remote will exit programming mode aut...

Page 18: ...It will not clear the Network ID and Group assignments 6 2 10 The new bottom limit is set Note This procedure can be skipped for a fresh out of the box motor The motor will jog 2x when receiving any P...

Page 19: ...7 1 1 Remove battery power from the motor by inserting the USB C connector into the motor head 7 1 2 Press and hold the manual control button on the motor MANUAL Page 19 of 23 version 1 0...

Page 20: ...werView remote or App from operating the window covering until it is reprogrammed 7 1 3 Apply power to the motor by disconnecting the USB C connector while press and hold the manual control button the...

Page 21: ...inations 7 2 1 Press and hold the manual control button on the motor for 12 seconds The blind will jog 1x at 6 seconds and a second time at 12 seconds 7 2 2 Release the manual control button after the...

Page 22: ...button release see chapter 7 2 Blind type Roller blind Network reset on manual control button release see chapter 7 2 Blind type Twist Roller Blind Others The maximum motor current has been reached E...

Page 23: ...to use such products or services or a warranty or endorsement thereof Use of such information may require a license from a third party under the patents or other intellectual property of the third par...

Reviews: