


12
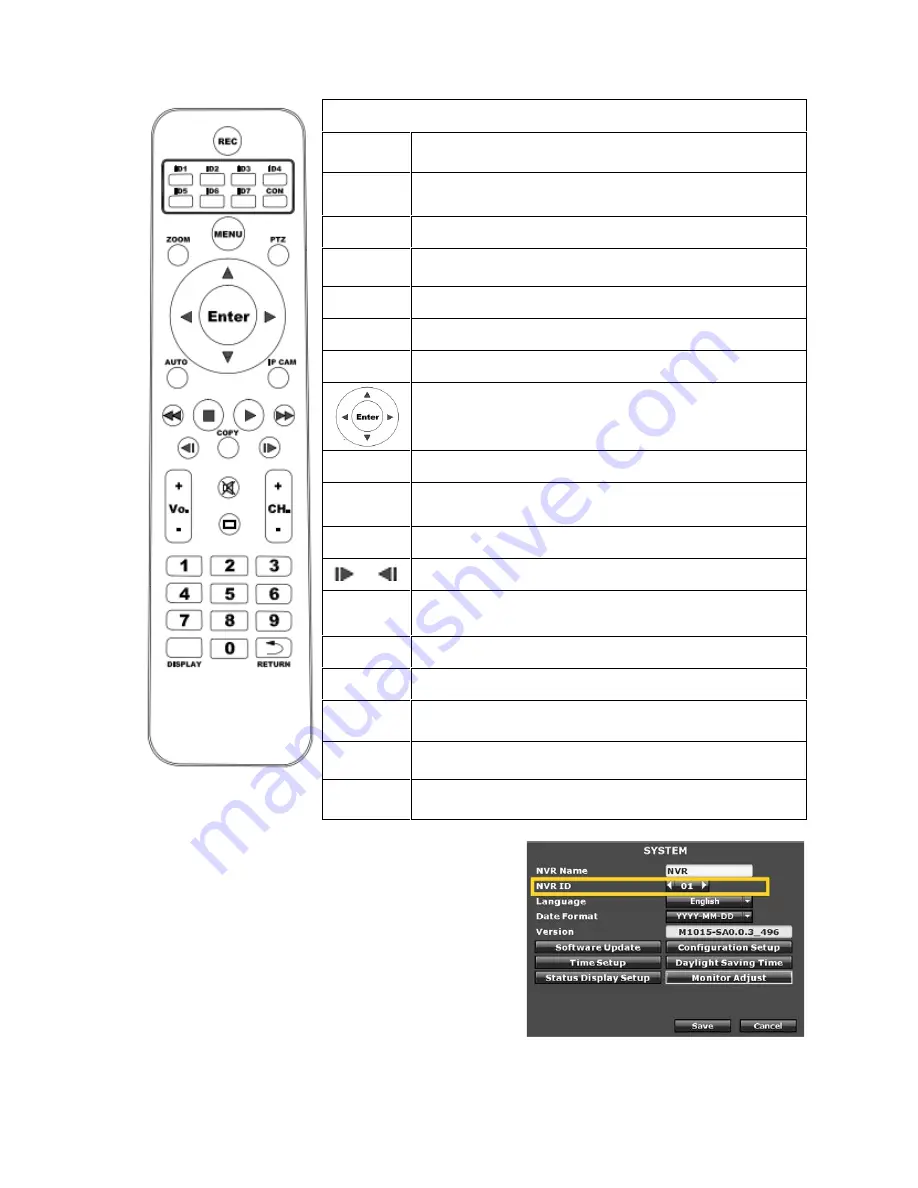
2.4 IR REMOTE CONTROL
ITEM
REC
Start recording on live view.
ID1~8
ID (corresponding with NVR ID)
**
MENU
Call out/ close main menu.
ZOOM
2X Zoom in/ back to original size on single channel
view.
PTZ
Call out/ close PTZ panel.
AUTO
Start/ end auto swap.
IPCAM
Call out/ close quick setup menu.
In any menu, use▲►▼◄ to switch the selected item
or adjust value, and use “enter” to enter.
►
Call out/ close playback menu on live view.
Stop playback and call out playback panel under
playback mode.
►►/◄◄
Fast forward/ Fast backward under playback mode.
/
Play/Playback frame by frame under playback mode.
COPY
Start recording the playback video to USB under
playback mode.
Vol +/-
Adjust the audio volume.
CH +/-
Jump to next channel/ previous channel.
0~9
Press the number to jump to corresponding channel.
(Ex. Press 1 and 6 to jump to CH.16)
DISPLAY
Display/ hide the channel number and IP address on
live view.
RETURN
Jump to the channel users view before the current
channel.
**
Each NVR can setup its own ID number. The user
can control NVR via remote controller by pressing ID
button to change to the same ID mode with NVR.
For example, if NVR ID is set as 1, users are only
allowed to execute operations via remote controller
after he press “ID1” button. Remote controller stays
on current mode until users change it, so It’s no need
to press the ID button every time users do operations.
If the user press different ID number button from
NVR, the remote controller cannot control NVR.
If you own several NVRs of the same model, use ID to make a distinction.
Summary of Contents for HDR-04FE
Page 1: ...USER MANUAL 4 9 16 CHANNEL NETWORK VIDEO RECORDER...
Page 14: ...15 E AUTHORITY SETUP F DISK MANAGEMENT G SYSTEM SETUP H EXIT...
Page 41: ...42 F Format HDD Insert the user name and password while performing HDD format function...
Page 61: ...62 OPTION 2 ADD TO TRUSTED SITES IE Tools Internet Options Security Trusted sites Sites...
Page 78: ...79 K 1 CAMERA Setting Please refer to Chapter3 3 Camera Setup...
Page 80: ...81 K 5 SYSTEM SETTING Please refer to Chapter3 9 System Setup...


