background image

51

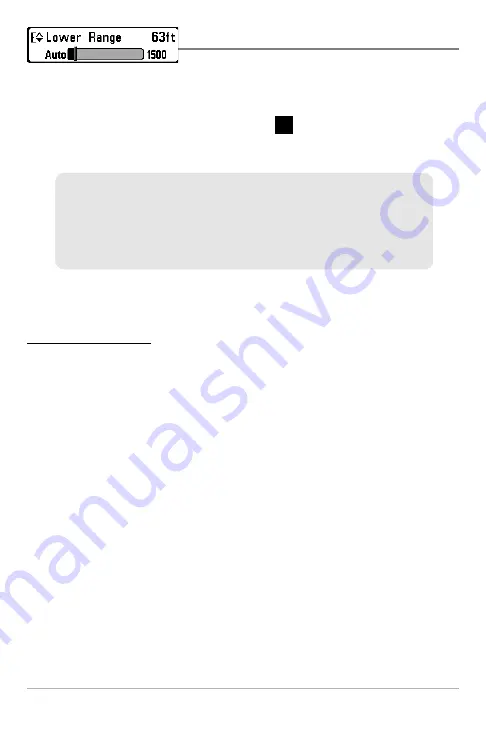
Lower Range

Lower Range

sets the deepest depth range that will be

displayed. Automatic is the default setting. When in automatic mode, the lower range will be
adjusted by the unit to follow the bottom. Selecting a specific setting locks the depth range
into Manual mode. Use both Upper and Lower Range together to view a specific depth range
manually when looking for fish or bottom structure.  

will be displayed in the lower right

corner of the screen when you start manually adjusting the Lower Range to indicate that you
are in Manual mode.

NOTE: 

A minimum distance of 10 feet will be maintained between the Upper and Lower Range

regardless of the manual settings entered.

To adjust the Lower Range:

1.  Highlight Lower Range on the Sonar X-Press

TM

Menu.

2.  Use the LEFT or RIGHT 4-WAY Cursor Control keys to increase or decrease the Lower

Range setting. (AUTO, 10 to 1500 feet, 3 to 500 meters

[International Models only]

,

Default = AUTO) 

For example, if you are fishing in 60 feet of water but are only interested in

the first 30 feet (surface to a depth of 30 feet) you should set the Lower Depth
Range limit to 30.  The display will show the 0 to 30 foot range, allowing you
to see a more detailed view than you would see if the display went all the way
to the bottom.

M

Summary of Contents for 737 GPS

Page 1: ...737 GPS Chartplotter Operations Manual 531592 1_A 737 GPS Chartplotter Operations Manual...

Page 2: ...ce should not be used as a navigational aid to prevent collision grounding boatdamage orpersonalinjury Whentheboatismoving waterdepthmaychangetooquickly toallowtimeforyoutoreact Alwaysoperatetheboatat...

Page 3: ...ng Sonar History 11 Real Time Sonar RTS Window 11 Freeze Frame 11 Bottom Presentation 12 Sonar Zoom View 14 200 83 kHz Split Sonar View 15 Big Digits View 16 Circular Flasher View 16 Snapshot and Reco...

Page 4: ...Waypoint Target or Trolling Grid 33 Save Edit or Delete a Route 33 Save or Clear a Current Track 34 Edit Delete or Hide Saved Tracks 34 Man Overboard MOB Navigation 35 Key Functions 37 POWER LIGHT Key...

Page 5: ...t Speed 52 Quad Layout 53 Bottom View 53 Bottom Range Sonar Zoom view only when Bottom Lock is On 54 Bottom Lock Sonar Zoom view only 54 Cancel Navigation only when navigating 54 Navigation X Press Me...

Page 6: ...RecordingViewonly 64 DeleteAllRecordings optional purchaseMMC SDCard SnapshotandRecordingViewonly 64 PingsPerSecond optional purchaseMMC SDCard SnapshotandRecordingViewonly 65 PlaybackSpeed optional p...

Page 7: ...Nav Data Advanced 83 Delete All Nav Data Advanced 84 Continuous Navigation Mode 84 Chart Menu Tab with optional purchase GPS receiver 85 Chart Detail Level 85 Map Borders 85 Lat Lon Grid 86 Spot Soun...

Page 8: ...Restore Defaults 98 Select Readouts Advanced Sonar view only 99 Depth Offset Advanced 101 Aux Temp Offset Advanced 101 Temp Offset Advanced 102 Speed Calibration Advanced with Temp Speed only 102 Loc...

Page 9: ...thorized International Distributors To obtain a list of authorized International Distributors please visit our website at www humminbird com or contact our Customer Resource Center at 1 800 633 1468 t...

Page 10: ...fast A sound wave can travel from the surface to a depth of 240 ft 70 m and back again in less than 1 4 of a second It is unlikely that your boat can outrun this sonar signal SONAR is an acronym for S...

Page 11: ...frequencies 83kHz are typically used to achieve greater depth capability The power output is the amount of energy generated by the sonar transmitter It is commonly measured using two methods Root Mea...

Page 12: ...tly beneath your boat DualBeam PLUS Sonar Your 700 Series Fishing System uses a 200 83 kHz DualBeam PLUS sonar system with a wide 60 area of coverage DualBeamPLUS sonarhasanarrowlyfocused20 centerbeam...

Page 13: ...455 kHz with a 16 area of coverage The side looking elements can be used independently or togethertolocatetargetsnearthesurfaceofthewater on either side of your boat Universal Sonar 2 Your 700 Series...

Page 14: ...ellation of 24 satellites that continually send radiosignalstotheearth Yourpresentpositionisdetermined by receiving signals from up to 16 satellites and measuring the distance from the satellites All...

Page 15: ...hing System will retrieve that chart and display it automatically Use the illustration to locate the position of the MMC SD slot cover remove the MMC SD slot cover then insert the MMC SD into the slot...

Page 16: ...p Speed accessory or GPS Receiver is attached the 700 Series can display the speed of the boat and can keep a Triplogofnauticalorstatutemilestraveled Second Sonar Return when the sonar signal bounces...

Page 17: ...ine typically appears as a continuous band of many gray levels moving across the display at the same depth Structure where fish may be hiding Fish fish are displayed as arches and or fish icons and th...

Page 18: ...itispossibletoquickly alternate between the two viewing methods NOTE WideSide View requires the purchase of the WideSide transducer You can visit our website at www humminbird com to order accessories...

Page 19: ...depth range sufficient to show the bottom Depth Range is automatically selected to keep the bottom visible on the display although you can adjust it manually as well see Sonar X PressTM Menu Six addit...

Page 20: ...any arrow on the 4 WAY Cursor Control key will freeze the screen and a cursor will be displayed on the screen The cursor can be positioned on the display using the 4 WAY Cursor Control key to determi...

Page 21: ...neacrossthedisplay A Soft Bottom such as mud or sand appears as a thicker line across the display Rocky Bottoms have a broken random appearance The sonar returns from the bottom structure and fish can...

Page 22: ...ng returns will be clearly visible on the display WhiteLine highlights the strongest sonar returns in white resulting in a distinctive outline This has the benefit of clearly defining the bottom on th...

Page 23: ...agnified image of the bottom The Zoom Preview Box shows where the zoomed view is in relation to the full range view The Zoom Level or magnification is displayed in the lower left corner and can be cha...

Page 24: ...upper left hand corner You can use the Split Sonar View to make side by side comparisons between the sonar returns from the 83 kHz wide beam and the 200 kHz narrow beam ThedigitalreadoutsintheSplitSon...

Page 25: ...astreset ThedigitalreadoutsintheBigDigitsView cannot be customized Circular Flasher View CircularFlasherViewdisplaysRealTimeSonar RTS datainthetraditionalflasherformat Depth and temperature are always...

Page 26: ...f thumbnails and or icons in this view The selected thumbnail or icon will be highlighted with arrows NOTE The speed of the screen capture or of the recording depends on the type of card you use in ge...

Page 27: ...menu Working with screen snapshots is a four step process 1 Enabling Screen Snapshot from the Accessories Menu 2 Making a Screen Snapshot using the MARK key 3 Viewing a Screen Snapshot using the Snap...

Page 28: ...mum ping rate for the recording using the Snapshot and Recording X Press menu optional 4 Stopping a recording using the Snapshot and Recording X Press menu 5 Playing back a recording using the Snapsho...

Page 29: ...even reverse playback using the Playback Speed X Press menu item and stop the playback using the Stop Playback X Press menu item these items are added to the X Press menus in all views during playbac...

Page 30: ...apshot and Recording X Press menu Recording Playback Amount of Time Already Played Name of recording Time and Date recording started Position when recording started Current Ping Rate Average Ping Rate...

Page 31: ...following three layouts Default Classic and Slanted Default layout The top portion of the display presents a historical log of sonar returns from the 200 kHz down looking sonar beam New information in...

Page 32: ...he bottom portion of the display presents a historical log of sonar returns from the 455 kHz right and left looking sonar beams New information appears at the top and scrolls down the display Side Bea...

Page 33: ...e side looking beams reveals bottom contour structure and fish similar to the down looking beam but the area covered is to the left and right of the area shown in the down looking portion so you actua...

Page 34: ...ews are available Left Right and Both The default view is Both Information fromboththeleftandrightbeamsaredisplayedsimultaneously Thedepthofthewaterbeneath theboatisalwaysdisplayed Abottomcontourmaybe...

Page 35: ...tionoftheeyepointwillshift Thisallowsyoutomoveandturntheeyepointsothatyoucanlookofftothesides orevenbehind theboat PressingtheRIGHTorLEFTarrowkeysonthe4 WAYCursorkeyturnstheeyepointright or left while...

Page 36: ...t You can use the 4 WAY Cursor Control key to shift panthecharttoanotherarea YoucanusetheZOOM keystozoominandout Youcan use the INFO key to get information on the chart objects near the cursor Chart V...

Page 37: ...tion is selected True North is shown at the top of the display In other words objects located to the north of the boat aredrawnabovetheboat WhenCourse Uporientationisselected thedirectionofmotionofthe...

Page 38: ...orisnotactive the Chart Info menu will appear You can select the nearest port the nearest tide station or the nearest current station to see information about any of these objects NOTE Thebuilt inWorl...

Page 39: ...have purchased and connected a GPS receiver use the 700 Series Fishing System to establish waypoints at areas of interest and to navigate to those waypoints via a savable route representing the short...

Page 40: ...nt to save as a waypoint Then press the MARK key to save the marked position as a waypoint Saveapositionfromthesonarhistory OnanySonarview usetheCursorkeytopointtoafeature inthesonarhistory alsocalled...

Page 41: ...nfirm deletion before the waypoint is actually deleted Navigate to a Waypoint or Position with optional purchase GPS receiver Navigate to the cursor position From the Chart or Combo view use the Curso...

Page 42: ...from the Navigation Main menu To remove the trolling grid choose Remove Grid from the Navigation X Press menu NOTE Only one waypoint can have either a target or a grid at one time If you apply a targ...

Page 43: ...e route for which you want information and press the RIGHT Cursor key The list of waypoints in the route will be shown with the distance and bearing from each waypoint to the next as well as the dista...

Page 44: ...hould activate MOB navigation to maximize chances for a successful rescue MOB navigation allows you create an MOB waypoint to locate the point at which your man went overboard and the relation of the...

Page 45: ...ing MOB navigation removes the route and any waypoints created using the GOTO key but does not remove any saved routes from memory MOB Navigation Target surrounding MOB waypoint Map Scale MOB waypoint...

Page 46: ...htorContrastandthenusetheLEFTorRIGHTCursorkeytochangethesettings PressEXIT to exit the Light and Contrast menu Press and hold the POWER LIGHT key for 3 seconds to turn the unit off A message will appe...

Page 47: ...vigate through the whole menusystem WhentheX PressTM Menuisdisplayed youcanusetheUPorDOWNCursorkeysto move to a particular menu choice As soon as you alter a parameter using the RIGHT or LEFT Cursorke...

Page 48: ...o control the speed of playback MARK Key Press the MARK key while in any view to mark the position of a waypoint either at the current boat location or if the Cursor is active at the current Cursor lo...

Page 49: ...the Chart View automatically when MOB is activated and it is not possible to activate MOB or modify the current route without first canceling MOB navigation Any press of the GOTO key or selection of a...

Page 50: ...ab and 700 Series Fishing System Accessories in this manual as well as your accessory s Operations Manual for additional details NOTE Accessories to enable WeatherSense GPS Functionality and the Smart...

Page 51: ...UP or DOWN Cursor keys to reactivate the X PressTM Menu NOTE The X PressTM Menu choices will vary depending on which view is active when you press the MENU key as well as whether you are in Normal or...

Page 52: ...Advanced An Advanced Mode is provided for users who desire the highest level of control over the Fishing System and Normal Mode for users who desire greater simplicity and fewer menu choices Additiona...

Page 53: ...your 700 Series Fishing System uses advanced transducer detection methods to determine if a transducer is connected If a functioning transducer is connected Normal operation will be selected automati...

Page 54: ...ayperiodicallytoremindyouthatyouareusingtheSimulator Exit the Simulator by powering your Fishing System off System Status Use System Status to view system connections and to conduct a unit self test T...

Page 55: ...satellite is being monitored but is not yet being used NOTE The GPS Diagnostic View only appears if the optional purchase GPS Receiver is connected Thisviewalsoreportsthecurrentposition localtimeandda...

Page 56: ...use of the PC Connect Cable Complete instructions are included with the PC Connect Cable accessory NOTE The PC Connect Cable requires a separate purchase For more information visit our website at www...

Page 57: ...eries Fishing System The Side menu choice is available when Transducer Select is set to WideSide see Sonar Menu Tab Transducer Select and can only be accessed from the Sonar X PressTM menu when you ar...

Page 58: ...y or muddy water If Sensitivity is adjusted too low the display may not show many sonar returns that could be fish NOTE The Sensitivity setting is a global setting and will adjust the sensitivity of a...

Page 59: ...n the Upper and Lower Range regardless of the manual settings entered To adjust the Upper Range 1 Make sure you are in Advanced Mode then highlight Upper Range on the Sonar X PressTM Menu 2 UsetheLEFT...

Page 60: ...in Manual mode NOTE A minimum distance of 10 feet will be maintained between the Upper and Lower Range regardless of the manual settings entered To adjust the Lower Range 1 Highlight Lower Range on th...

Page 61: ...de Transducer Mode and that a WideSide transducer is connected then highlight Side Beam Range on the Sonar X PressTM menu 2 Use the LEFT or RIGHT 4 WAY Cursor Control keys to increase or decrease the...

Page 62: ...rns as lighter pixels This has the benefit of ensuring that weak signals will be clearly visible on the display Structure ID represents weak returns as light pixels and strong returns as dark pixels T...

Page 63: ...ntinuouslygraphsthebottomataconstantpointonthedisplayregardlessofchangesindepth This flattens out the bottom contour but is effective at showing fish on or near the bottom To turn on Bottom Lock 1 In...

Page 64: ...key once while in the Bird s Eye View the Chart or the Combo View to access the Navigation X PressTM menu NOTE Menu choices will vary depending on system settings such as whether you are currently na...

Page 65: ...menu 3 Use the RIGHT 4 Way Cursor Control key to view the Waypoints submenu which contains the following menu choices The Waypoint Submenu contains the following menu choices EditallowsyoutoedittheNam...

Page 66: ...ck being displayed After the current track is saved a new current track is started To Save Current Track 1 Highlight Save Current Track on the Navigation X PressTM menu 2 Use the RIGHT 4 WAY Cursor Co...

Page 67: ...Navigation X PressTM menu 2 Use the RIGHT 4 WAY Cursor Control key to initiate skipping the next waypoint 3 The Confirm dialog box will appear To skip the next waypoint press the RIGHT Cursor key onc...

Page 68: ...ursor key Remove Target only if a Target is Active RemoveTargetremovesthewaypoint targetfromthedisplay Thismenuchoicewillonlyappear when a target has already been applied to a waypoint NOTE See Add a...

Page 69: ...Waypoint Name Submenu 1 MovethecursortothedesiredpositionandpresstheMARKkeyoncetosaveawaypoint 2 Highlight Waypoint Name on the Navigation X PressTM menu 3 Use the RIGHT 4 Way Cursor Control key to v...

Page 70: ...ing X Press menu provides access to the image management and sonar recording functions Press the MENU key once while in the Snapshot and Recording View to access the Snapshot and Recording X Press men...

Page 71: ...d Recording View To start sonar recording 1 Highlight Start Recording on the Snapshot and Recording X Press menu and press the RIGHT 4 Way Cursor key to start recording Stop Recording optional purchas...

Page 72: ...Press the RIGHT 4 Way Cursor key to initiate this procedure 4 A Confirm Dialog box will appear Select Yes to delete the image or No to cancel the operation Delete All Images optional purchase MMC SD C...

Page 73: ...key to initiate this procedure 4 A Confirm Dialog box will appear Select Yes to delete the recording or No to cancel the operation Delete All Recordings optional purchase MMC SD Card Snapshot and Reco...

Page 74: ...you to specify the playback speed for a sonar recording from the Snapshot and Recording View This menu option is only available when you have an optional purchase MMC SD card installed and you are pl...

Page 75: ...ck of a recording 1 Highlight Stop Playback on any X Press menu 2 Press the RIGHT 4 Way Cursor key to initiate this procedure NOTE Duringplayback theamountoftime memorylefttoplayisindicatedbythestatus...

Page 76: ...esstheMainMenuSystemand then press the RIGHT Cursor key to select the Sonar tab NOTE Menu choices will vary depending on system settings such as whether the unit is set for Advanced User mode or what...

Page 77: ...y the returns from the 200 kHz narrow beam will be displayed in the Sonar View the Sonar Zoom View the Big Digits View and the Circular Flasher View The Split Sonar View will continue to display retur...

Page 78: ...is turned off the Fishing System shows only the raw sonar returns on the display These returns will often result in arches forming on the display indicating potential targets Duetothetransducerbeamang...

Page 79: ...as fish To change the Fish ID Sensitivity setting 1 Highlight Fish ID Sensitivity on the Sonar main menu 2 UsetheLEFTorRIGHT4 WAYCursorControlkeystochangetheFishIDSensitivitysetting Low 1 High 10 Def...

Page 80: ...gthe83kHzSensitivitywilldisplayfewerweak returns The 83 kHz Sensitivity menu choice is only available when User Mode is set to Advanced see Setup Menu Tab User Mode NOTE 83 kHz Sensitivity is particul...

Page 81: ...y adjusts the sensitivity of the WideSide beam Increasing the sensitivity will display additional weak returns and decreasing the sensitivity will display few weak returns A WideSide transducer must b...

Page 82: ...scale You can either turn Depth LinesOnorOff TheDepthLinesmenuchoiceisavailablewhenUserModeissettoAdvanced see Setup Menu Tab User Mode To change the Depth Lines setting 1 Make sure you are in Advance...

Page 83: ...splayed TheSurfaceCluttermenuchoiceis available when User Mode is set to Advanced see Setup Menu Tab User Mode To change the Surface Clutter setting 1 Make sure you are in Advanced User Mode then high...

Page 84: ...pth Advanced Max Depth adjusts the maximum depth of operation The performance of your Fishing System can be tuned to the maximum depth you will be fishing in by setting the Max Depth When a maximum de...

Page 85: ...the accuracy of deep water depth readings To change the Water Type setting 1 Make sure you are in Advanced User Mode then highlight Water Type on the Sonar main menu 2 Use the LEFT or RIGHT 4 WAY Cur...

Page 86: ...key twice to access the Main Menu System then press the RIGHT cursor key to select the Navigation tab NOTE The Navigation menu tab will only appear if you have an optional purchase GPS receiver connec...

Page 87: ...umb Trail Dashed Line or Solid Line and if a line the color of the line from light to dark gray to black Saved Tracks Saved Tracks allows you to view the Saved Tracks submenu To view the Saved Tracks...

Page 88: ...ged Edit allows you to choose from a list of previously saved waypoints then edit the Name Position Latitude and Longitude and select the Icon that will be used to represent the waypoint in the Chart...

Page 89: ...oselectapreviously savedroutetouseasthecurrentroute thismenusetting also begins navigation on this route Routes can be traveled in either the forward or reverse direction Info displays information abo...

Page 90: ...keys to change the Grid Rotation setting 0 to 89 Default 0 Trackpoint Interval Trackpoint Interval allows you to select the time period between trackpoints The current track can only contain up to 20...

Page 91: ...FT or RIGHT 4 WAY Cursor Control keys to change the Track Min Distance setting 1 to 300 feet or 1 to 100 meters International Units only Default 16 ft 5 m NOTE Duringslowtravelordrift settingbothTrack...

Page 92: ...Export All Nav Data allows you to export all saved Tracks Waypoints and Routes to an MMC SD card The Export All Nav Data menu choice is only available when User Mode is set to Advanced see Setup Menu...

Page 93: ...r Mode then highlight Delete All Nav Data on the Navigation main menu 2 Use the RIGHT 4 WAY Cursor Control key to delete all navigation data Continuous Navigation Mode Continuous Navigation Mode allow...

Page 94: ...ion shows navaids landmarks ferryways and navigation routes in addition to the Basic information Underwater shows depth contours fishing areas underwater wrecks tides and currents in addition to the B...

Page 95: ...Grid on the Chart main menu 2 Use the LEFT or RIGHT 4 WAY Cursor Control keys to change the Lat Lon Grid setting Hidden Visible Default Hidden Spot Soundings Spot Soundings allows you to display or hi...

Page 96: ...ows you to set the position of the boat used in the Simulator The Set Simulation Position menu choice is only available when User Mode is set to Advanced see Setup Menu Tab User Mode To set the Simula...

Page 97: ...to work 2 Make sure you are in Advanced User Mode then highlight Set Map Offset on the Chart main menu 3 UsetheRIGHT4 WAYCursorControlkeytosettheMapOffset Aconfirmationdialogbox willappeartoallowyouto...

Page 98: ...ection NOTE When an alarm is triggered you can silence it by pressing any key The alarm will be silenced and will not be triggered again until a new instance of the alarm condition is detected NOTE Of...

Page 99: ...F Fish ID Alarm Fish ID Alarm sounds when the Fishing System detects fish that correspond to the alarm setting Fish ID Alarm will only sound if Fish ID TM is on To change the Fish ID Alarm setting 1 H...

Page 100: ...WAY Cursor Control keys to change the Low Battery Alarm setting Off 8 5V 13 5V Default Off Aux Temp Alarm withoptional purchasetemp probeorTemp Speedonly Aux Temp Alarm sounds when the water temperatu...

Page 101: ...menu 2 Use the LEFT or RIGHT 4 Way Cursor Control keys to change the Temp Alarm setting Off 33 120 Fahrenheit 0 50 Celsius Default Off Off Course Alarm with optional purchase GPS receiver Off Course A...

Page 102: ...Alarm setting Off 25to3000feet 10to1000meters InternationalModelsonly Default 150ft 50m Drift Alarm with optional purchase GPS receiver Drift Alarm sounds when the boat has exceeded the distance from...

Page 103: ...oduced as you adjust the Alarm Tone so that you can select the tone that you can hear best To change the Alarm Tone setting 1 Highlight Alarm Tone on the Alarms main menu 2 Use the LEFT or RIGHT 4 WAY...

Page 104: ...ccess the tabbed Main Menu System then press the RIGHT cursor key until the Setup tab is selected NOTE Menuchoiceswillvarydependingonsystemsettingssuchas whether the unit is set for Advanced User mode...

Page 105: ...2 Use the LEFT or RIGHT 4 WAY Cursor Control keys to change the Units Temp setting Celsius Fahrenheit Default Celsius Units Distance with Temp Speed or optional purchase GPS receiver Units Distance se...

Page 106: ...ernational models and mph for Domestic models User Mode User Mode sets the menu system to either Normal or Advanced When set to Normal default setting only the basic menu options are shown When set to...

Page 107: ...the screen To Reset Triplog 1 Highlight Reset Triplog on the Setup menu 2 Use the RIGHT 4 WAY Cursor Control key to initiate Triplog Reset 3 TheConfirmdialogboxwillappear ToresettheTriplog presstheRIG...

Page 108: ...m edges of the Sonar View screen or whether a particular window will be turned off displaying nothing in that area you can access this menu choice only when in Advanced User Mode see Setup Menu Tab Us...

Page 109: ...te this procedure 3 The Select Readouts submenu will appear showing a list of all Readouts Use the UP or DOWN Cursor keys to select a particular Readout position then use the RIGHT or LEFT Cursor keys...

Page 110: ...ontheSetupmenu 2 Use the LEFT or RIGHT 4 WAY Cursor Control keys to change the Depth Offset setting 10 0 to 10 0 feet or 3 to 3 meters International Models only Default 0 Aux Temp Offset Advanced Aux...

Page 111: ...serMode To change the Speed Calibration setting 1 Make sure you are in Advanced User Mode then highlight Speed Calibration on the Setup menu 2 Use the LEFT or RIGHT 4 WAY Cursor Control keys to change...

Page 112: ...sition Format selects the format of the latitude and longitude position display This menu choice is available only when in Advanced User Mode see Setup Menu Tab User Mode and an optional purchase GPS...

Page 113: ...Date Format on the Setup menu 2 Use the LEFT or RIGHT 4 WAY Cursor Control keys to change the Date Format mm dd yy dd mm yy or yy mm dd Default mm dd yy Digits Format Advanced Digits Format allows you...

Page 114: ...and Date Whennavigating thefollowingNMEAsentencesarealsooutputwhenNMEAOutputisturnedOn APB Autopilot Sentence B BWR Bearing and Distance to Waypoint RMB Recommended Minimum Navigation Info To turn NME...

Page 115: ...PS receiver WideSide View with optional purchase WideSide transducer SideBeamView Sonar View Sonar Zoom View 200 83 kHz Split Sonar View Big Digits View Circular Flasher View Snapshot and Recording Vi...

Page 116: ...ontact our Customer Resource Center at 1 800 633 1468 for additional details Using Screen Snapshot Screen Snapshot activates the screen snapshot function When Screen Snapshot is enabled pressing the M...

Page 117: ...w 3 The Screen Snapshot View displays up to three thumbnails of these screen captures at a time You can scroll through the whole list of thumbnails of screen captures in this view using the 4 WAY Curs...

Page 118: ...ovingcorrosionfromthebatteryterminalsorwiring or actually replacing the battery if necessary 700 Series Defaults to Simulator with a Transducer Attached A connected and functioning transducer will cau...

Page 119: ...ed A mix of air and water flowing around the transducer cavitation may be interfering with the interpretation of sonar data See your Installation Guide for suggestions on adjusting the transducer posi...

Page 120: ...e re appears To determine whether the boat s engine is the source of the noise increase the RPMs while the boat is in neutral and stationary to see if the noise increases proportionately if noise appe...

Page 121: ...16 GPS Receivers purchase and connect the GR16 GPS Receiver to your 700 Series Fishing System to access advanced FishingGPS trackplotter and navigation capabilities built in to your Fishing System GPS...

Page 122: ...ents from the helm while your mate rigs the lines and brings in the fish With the new InterLink Network Connection you can now share GPS position waypoints routes and your current track between two Hu...

Page 123: ...rage Two 45 Beams 10 dB in 455 kHz Target Separation 2 1 2 Inches 63 5 mm Power Requirement 10 20 VDC LCD Matrix 640 V x 320 H Transducer XNT 9 QB 90 T Transducer Cable Length 20 ft 6 m NOTE Humminbir...

Page 124: ...ntrast and easy readability even though it can obscure bottom hardness information Bottom Contour Bottom Contour is the profile of the bottom graphed to the display as the depth changes Bottom Hardnes...

Page 125: ...simultaneously and combines the information from both beams into one view by overlapping the data on screen or shows each beam individually side by side or permits each beam to be viewed individually...

Page 126: ...ppear bolder Inverse grayscale works well in very clear water Debris laden water often appears as a lot of clutter on the screen Instant Image Update Instant Image Update is a Humminbird feature that...

Page 127: ...horizontalaxiscanvarygreatly depending on boat speed and the Chart Speed setting A greater number of horizontal pixels show more sonar history that the boat has passed through On many models Humminbir...

Page 128: ...lected again Second returns are more common in shallow water and over hard bottoms it is actually possible to see athirdsonarreturnundersomecircumstances Thesecondreturnprovidesusefulinformationto hel...

Page 129: ...ide range of other potential objects sunken boats reefs Humminbird units excel at showing structure with great detail over a wider area due to unique sonar configurations developed for the angler Stru...

Page 130: ...ceiver are matched parts of the sonar system that send transmit and listen to receive the sonar signals and work in conjunction with the transducer Humminbird transmitters have an extremely fast cycli...

Page 131: ...e right and the zoomed view on the left Humminbird offers One Touch Zoom which allows the zoom feature to be easily accessed from the regular sonar view with just one key press eliminating the need to...

Page 132: ...k Error XTE Cross Track Error is the straight line distance of the boat from the intended Track XTE measures how far the boat is off course and also triggers the Off Course Alarm See Track Differentia...

Page 133: ...Datum setting in your fishfinder when comparing GPS position to a paper chart to avoid slight positioninaccuracies AlmostallelectronicchartsusetheWGS84MapDatumandtherefore they do not require setting...

Page 134: ...rGroundisthemeasurementoftheboat sprogressacross a given distance and is the speed measurement provided by GPS An alternate Speed Through Water is provided by a speed paddlewheel and is the measuremen...

Page 135: ...y to GPS that provides enhanced accuracy through correction signals broadcast from FederalAviationAdministrationWAASsatellitesstationedovertheUSA Thesesecondarysignals are automatically received by th...

Page 136: ...127 Notes...

Page 137: ...128 Notes...

Page 138: ...ays By Telephone Monday Friday 8 00 a m to 4 30 p m Central Standard Time 1 800 633 1468 By e mail typically we respond to your e mail within three business days custserv johnsonoutdoors com For direc...

Reviews: