background image

10

Adjustments and Troubleshooting

Your monitor should move up and down easily and stay in position.
If the monitor sinks from the desired position, or is hard to lift, you should 

INCREASE


the counterbalance force. 
If the monitor lifts from the desired position you should 

DECREASE

 the 

counterbalance force.     

Raise the monitor all the way and select the next switch in 
numerical order. Press it all the way until it clicks. Test the 
adjustments by moving the monitor up and down a few times. 
Repeat if necessary.

Raise the monitor all the way and select the highest number 
switch currently engaged. Pull to release the switch. Test 
the adjustments by moving the monitor up and down a few 
times. Repeat if necessary.

If the switches do not engage or disengage properly, try 
removing the monitor and UFEA from the arm before 
making the adjustments.

Difficult to raise monitor or the monitor sinks 
from desired position.

Difficult to lower monitor or the monitor lifts 
from desired position.

Summary of Contents for UFEA

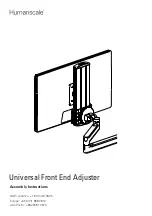
Page 1: ...Assembly Instructions North America 1 800 400 0625 Europe 353 0 1 858 0910 Asia Pacific 8522581 0570 Universal Front End Adjuster ...

Page 2: ...2 DESIGNING HEALTHIER WORKPLACES ...

Page 3: ...unting Points Track Assembly Back View Track Assembly Front View Track Carriage Plate Spring Switches StandardTilt Kit Fixed Mount Kit LegacyTilt Kit Standard Tilt Adapter 4 M4 x 6mm Flat Head Screws Adapter Plate 4 M4 x 8mm Flat Head Screws 4mm Hex Key 3 M6 x 12mm Flat Head Screws Legacy Adapter 5 M4 x 6mm Flat Head Screws ...

Page 4: ...install the 4 M4 8 mm flat head screws to attach the Fixed Mount Adapter to the UFEA Fig 4 Assembly Instructions Attach Adapter to the Universal Front End Adjuster UFEA StandardTilt Adapter Fixed Mount Adapter 1 1 2 2 3 Align the 4 screw holes on the Adapter Fig 1 with the 4 uppermost mounting points on the Carriage Plate Using the 4 mm hex key install the 3 M6 12 mm flat head screws to attach the...

Page 5: ...ews to attach the VESA bracket to the monitor The VESA bracket features a 75 mm and 100 mm hole pattern You may also use the VESA screws provided with the monitor Attach VESA Bracket to Monitor LegacyTilt Adapter 1 1 2 2 Align the 5 screw holes on the Adapter with the 5 mounting points on the Carriage plate Position the VESA bracket over the mounting points on the back of the monitor Fig 6 ...

Page 6: ...5 165 mm 2 5 65 mm Position 3 5 130 mm 4 100 mm Recommended Position 4 3 5 90 mm 5 5 140 mm 9 230 mm Fig 8 Fig 7 Insert the screw heads into the keyhole and slide the UFEA track so the screw heads seat in the narrower end of the keyhole Fig 7 Using the 2 5 mm hex key tighten the 4 screws on the VESA bracket Attach UFEA to Monitor 1 2 3 Align the 4 screws on the VESA bracket with the appropriate ke...

Page 7: ...s switches 1 and 2 in sequence until they click With the monitor raised all the way press switch 1 until it clicks With the monitor raised all the way Press switches 1 2 and 3 in sequence until they click NOTE While the UFEA supports monitors up to 30 lbs 13 6 kg your monitor arm may not Never exceed the weight capacities listed for your specific monitor arm model Calibrate the UFEA Less than 7 lb...

Page 8: ...button and lift upwards To remove the monitor lift the Quick Release Tab and pull the bottom of the monitor away from the arm then lift free of the hook 1 1 2 2 3 Hold the monitor at an angle and lower it onto the arm Fit the hook at the top of the arm into the D shaped cutout in the Adapter Fig 9 Insert the stem of the Fixed Mount into the end of the arm until the release button C locks in place ...

Page 9: ...D To remove pull Quick Release Tab away from the UFEA and slide the monitor up and away from the arm 1 2 Slide the Adapter into the arm mount until the Quick Release Tab D clicks Fig 12 LegacyTilt Fig 12 ...

Page 10: ... it all the way until it clicks Test the adjustments by moving the monitor up and down a few times Repeat if necessary Raise the monitor all the way and select the highest number switch currently engaged Pull to release the switch Test the adjustments by moving the monitor up and down a few times Repeat if necessary If the switches do not engage or disengage properly try removing the monitor and U...

Page 11: ...11 ...

Page 12: ...manscale com about legal information terms conditions cfm 2021 Humanscale Corporation The text and artwork are copyrighted materials All rights reserved The Humanscale mark and logo are trademarks of Humanscale Corporation and are registered in the United States and certain other countries GT NPD AI 4642 001 R00 ...

Reviews: