10
●
If the camera is connected to a computer via the Micro-USB, the former must be powered on to copy
videos and pictures to the PC. If the camera is powered off, media cannot be transferred (only the battery
will charge).
●
If the camera’s USB connection to the aircraft is disconnected, any video recordings will be terminated.
Under any other conditions (i.e. when the camera is connected to the computer, or when the camera is
connected to the aircraft but not recording), the camera will simply power off.
●
The camera may also charge if it is connected to the aircraft.
Camera status indicator
Camera status
Solid blue (no red)
Camera is on standby mode
Solid blue with a red light flashing every second
Camera is recording video
Camera has encountered a failure or malfunction
Solid blue and solid red
Blue light (no red) flashing every second
Micro-SD is full/no card sensed in the camera/there is a
problem with the Micro-SD in use
Blue light (no red) flashing rapidly
Red light (no blue) flashing rapidly
Micro-SD is full
Low power (battery)
飞机底部的外挂接口
(详情见2.3.1)
Connects to the gimbal and camera interface on the belly of the aircraft (please see section 2.3.1 for more details)
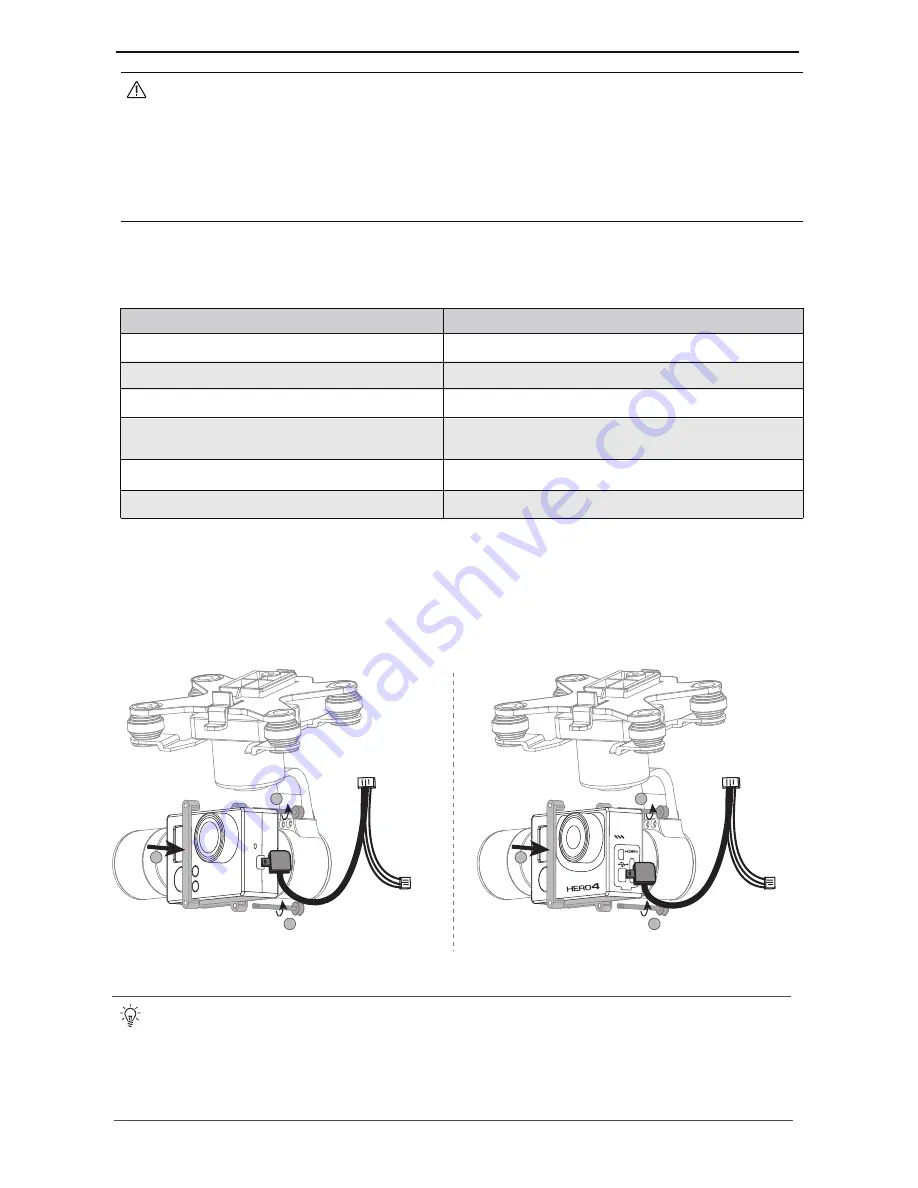
The X4 Pro is compatible with the GoPro 3 and 4 generations. Connect the GoPro to the aircraft and
gimbal with the above directions.
Use the supplied Hubsan cable to connect the camera and gimbal to the X4 Pro.
Notice: The H906A transmitter will not be able to control the GoPro’s video and photo functions. Users
will have to manually operate the GoPro.
EXTERNAL
INTERFACE
3-AXIS GIMBAL
2
1
USB
2
EXTERNAL
INTERFACE
3-AXIS GIMBAL
2
1
2
2.2.4 The Camera’s Status Indicator
When the camera is powered on, its status indicator will light up. Users may determine the camera’s status by
watching the indicator’s light patterns.
2.2.5 Installing the camera
1. Unscrew the camera fixture frame from its position on the camera gimbal.
2. Install the camera facing outwards and refasten the camera fixture frame with its provided screws.
3. Plug the FPV transmission cable’s Micro-USB end into the camera’s Micro-USB socket. Insert the cable’s other
end to the input board on the belly of the aircraft (please see section 2.3.1 for more details).


