background image

34

1

2

Caution

ȼɧɢɦɚɧɢɟ


1

c transmitter. Binding is pre-set from the factory. If you change transmitters or add a receiver, 

you must re-bind before operating your vehicle.

ɂɧɢɰɢɚɥɢɡɚɰɢɹɫɜɹɡɢɩɪɢɟɦɧɢɤɚɜɵɩɨɥɧɹɟɬɫɹɱɬɨɛɵɩɪɢɟɦɧɢɤɪɚɫɩɨɡɧɚɜɚɥɤɨɞɬɨɥɶɤɨɨɞɧɨɝɨɤɨɧɤɪɟɬɧɨɝɨɩɟɪɟɞɚɬɱɢɤɚɗɬɨɬɩɪɨɰɟɫɫ
ɭɠɟɜɵɩɨɥɧɟɧɧɚɡɚɜɨɞɟȿɫɥɢɜɵɡɚɦɟɧɢɬɟɩɟɪɟɞɚɬɱɢɤɢɥɢɩɪɢɟɦɧɢɤɜɵɞɨɥɠɧɵɩɨɜɬɨɪɧɨɜɵɩɨɥɧɢɬɶɩɪɨɰɟɞɭɪɭɢɧɢɰɢɚɥɢɡɚɰɢɢɫɜɹɡɢ

If you change transmitters or add a receiver, you must re-bind before operating your vehicle.

ȿɫɥɢɜɵɡɚɦɟɧɢɬɟɩɟɪɟɞɚɬɱɢɤɢɥɢɩɪɢɟɦɧɢɤɜɵɞɨɥɠɧɵɩɨɜɬɨɪɧɨɜɵɩɨɥɧɢɬɶɩɪɨɰɟɞɭɪɭ
ɢɧɢɰɢɚɥɢɡɚɰɢɢɫɜɹɡɢ

ɋɧɚɱɚɥɚɜɤɥɸɱɢɬɟɩɟɪɟɞɚɬɱɢɤɡɚɬɟɦɜɤɥɸɱɢɬɟɩɪɢɟɦɧɢɤ

Bring the transmitter and the receiver close to each other, within 0.5 meter.

Ɋɚɡɦɟɫɬɢɬɟɩɟɪɟɞɚɬɱɢɤɢɩɪɢɟɦɧɢɤɧɚɪɚɫɫɬɨɹɧɢɢɦɞɪɭɝɨɬɞɪɭɝɚ

20” / 50cm MAX

Ɇɚɤɫɢɦɭɦ


 (20”)

3

1

1

ON

ȼɄɅ

ON

ȼɄɅ

2

2

3

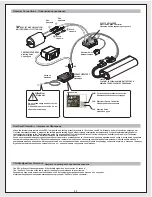
Binding and Fail Safe     

ɂɧɢɰɢɚɥɢɡɚɰɢɹɫɜɹɡɢɢ

 Fail-Safe     


Leave throttle trigger in neutral position, and press the setup
Once the receiver LED remains lit, then release the setup button on the receiver.

Ɉɫɬɚɜɶɬɟɤɭɪɨɤɝɚɡɚɜɧɟɣɬɪɚɥɶɧɨɦɩɨɥɨɠɟɧɢɟɢɧɚɠɦɢɬɟɤɧɨɩɤɭ6HWXSɧɚɫɬɪɨɣɤɚ
ɂɧɞɢɤɚɬɨɪɛɭɞɟɬɛɵɫɬɪɨɦɢɝɚɬɶɄɚɤɬɨɥɶɤɨɢɧɞɢɤɚɬɨɪɩɪɢɟɦɧɢɤɚɫɬɚɧɟɬɫɜɟɬɢɬɶɫɹ
ɩɨɫɬɨɹɧɧɨɨɬɩɭɫɬɢɬɟɤɧɨɩɤɭ6HWXSɧɚɫɬɪɨɣɤɚɧɚɩɪɢɟɦɧɢɤɟ


ɂɧɞɢɤɚɬɨɪ

ɂɧɞɢɤɚɬɨɪ

ɂɧɞɢɤɚɬɨɪ

Fail Safe Setup    

ɇɚɫɬɪɨɣɤɚ)

Stop (Neutral)

ɋɬɨɩɇɟɣɬɪɚɥɶ


Use a thin object such as a paperclip

ɂɫɩɨɥɶɡɭɣɬɟɬɨɧɤɢɣɩɪɟɞɦɟɬɧɚɩɪɢɦɟɪɫɤɪɟɩɤɭ

LED light turns off.

ɂɧɞɢɤɚɬɨɪɝɚɫɧɟɬ

LED continuously lit.

ɂɧɞɢɤɚɬɨɪɝɨɪɢɬɩɨɫɬɨɹɧɧɨ

After 1 Seconds

ɑɟɪɟɡɫɟɤɭɧɞɭ

ɪ

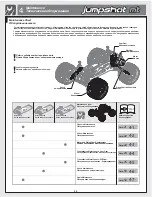
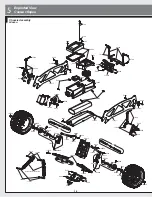
Remove body and tires before starting installation.

ɉɟɪɟɞɧɚɱɚɥɨɦɩɪɨɰɟɫɫɚɫɧɢɦɢɬɟɤɭɡɨɜɢɤɨɥɟɫɚ

OPEN

ɈɌɄɊɕɌɖ

Summary of Contents for jumpshot mt

Page 1: ...Instruction Manual En Fr Vol 1 115145 En Jp Fr RTR JUMPSHOT MT...

Page 2: ...ollow these instructions can cause injury to yourself or others You might also cause property damage or damage your kit Cautions Warnhinweise Failure to follow these instructions can damage your kit a...

Page 3: ...enance 20 4 1 Chassis Maintenance 21 4 2 Wheel Maintenance 22 4 3 Motor and Pinion Gear Replacement 22 4 4 Transmission Maintenance Spur Gear 24 4 5 Transmission Maintenance Di Gear 25 4 6 Shock Maint...

Page 4: ...rench 101939 US EU AA Alkaline Batteries 4pcs 4 4 101929 PLAZMA 7 2V 2000mAh NI MH BATTERY PACK NiMK 3 AZMA 7 2 7 1 Overview Components Equipment Needed Radio Control Car Transmitter Parts Bag Include...

Page 5: ...al Hydride batteries the batteries will be damaged Caution t t s Do not use Ni N N cke i i l Cadm d d ium battery charg r r er fo f f r Ni N N cke i i l Metal Hyd y y r d d id r r e d d batteri r r es...

Page 6: ...tion Reverse 6ZLtch SwitcK factory setting Battery Cover Note Direction OpeQ Eattery cover at the ERttom Rf transmitter QstaOO Eatteries ROORZ the GLrectLRQ Rf Eatteries GesignateG LQ the LQside of Ea...

Page 7: ...9 6203 6203 OFF 3 Battery LQstallatLRQ 5 14 PLAZMA 7 29 2000mAK NI MH BATTER 3ACK NiMK 3 AZMA 7 2...

Page 8: ...at 6 0V when battery cannot supply enough voltage Output reduces to 50 at 9 75V ESC cuts off at 9 0V when battery cannot supply enough voltage 3S LiPo Output reduces to 50 at 4 5V ESC cuts off at 4 0...

Page 9: ...e and check the operation before running IDLO VDIH IDLO VDIH IDLO VDIH Situation when the fail safe will operate fail safe When transmitter radio signal is cut off The fail safe can not completely pro...

Page 10: ...setup procedure IDLO VDIH Cautions he fail safe is working properly fail safe Center throttle trim 1 ON 2 3 4 ON 5 OFF OFF When fail safe is operatLQJ ED light will turn off fail safe Reference Secti...

Page 11: ...13 7 Z353 M3x10 7 7 mm 103729 M4 103729 M4 4 5 Allen Wrench 2 mm Z904 2 0 2 Z950 115305 115305...

Page 12: ...witch Put the car on a stand Do not touch throttle Stop Neutral Center throttle trim Good Batteries 1 ON 2 Low Batteries Light Blinks 1 short Beep The battery is NiMH NiCd L0 1L G 2 short Beeps The ba...

Page 13: ...not operate the model if there are any problems with the radio system If you switch on the R C car r Check Max Range 32 4 7 Steering Trim SetXS Front Turn steering trim to set tires in completely cent...

Page 14: ...op Neutral Forward Brake Reverse Throttle Trim Reverse operation A and B show the two ways to go in reverse A B 2 Reverse Reverse Forward 1st Time 1 Brake Stop Neutral Stop Neutral Arr t neutre Revers...

Page 15: ...ts t t s pers r r onal inju j j ri r r e i i s s and o r pro r r p o erty t dam d d age Fa F F hre r r n Sie i i n e iem i i als l l auf ffe f f ntl t t i l l c i i hen Stra r r en Die i i s ka k k nn...

Page 16: ...ater mud and dry the vehicle completely after driving Check the vehicle for trapped water in the tires transmission etc Some metal parts like bearings and hinge pins will need lubrication after drivin...

Page 17: ...ng immediately do not drive the car until the Speed Controller cools down No Control Install charged or fresh batteries Weak or no batteries in transmitter or model 7 2 1 8 2 2 33 4 7 Improper antenna...

Page 18: ...amage to the car and maintain its performance Look for any damaged parts Refer to sellable number to purchase parts Shock Wheel Drive Shaft Wheel Axle Motor Spur Gear Diff Gear Every Pack Every 10 Pac...

Page 19: ...ws 3 3 3 3 Chassis screws Needle Nosed Pliers Needle Nosed Pliers Side Cutters Brush Brush Rag Rag Z164 Grease Oil Spray W 0 Oil Spray W 0 9062 U6 EU 9063 JP Nitro Car Cleaner 9062 U6 EU 9063 JP Nitro...

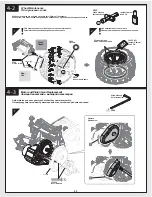
Page 20: ...ecessary Motor and Pinion Gear Replacement 4 3 Adjust pinion and spur gear mesh so that they operate smoothly Use small amount to secure tire This step is the same for front and rear shock maintenance...

Page 21: ...Jear mesK SOace a SLece Rf SapeU EetweeQ the Jears aQG tighteQ the motor mRXQW screws The sSXr Jear may Ee GamageG Lf the Jear mesK is Zrong Install 1146 FIREB2 7 157 MOTOR 540 7 3 REB2 7 157 19T 6919...

Page 22: ...1 2 100559 0 x 2 2 1 5 5 2 1 5 Z66 0 5 5 5 5 4 4 TransmissLRQ 0DinWHnance 6SXr ear 115306 Remove Z950 Cross rench AlleQ rencK Z904 Z901 115318 115318 115318 115318 115318 115316 115319 1153 3 5 53 5...

Page 23: ...lutch Characteristics Adjust the Slipper Clutch in 1 8 turn increments If the Slipper is too loose it can damage the Drive Gear 1 8 After running if slipper clutch is too loose tighten 1 4 turn Inspec...

Page 24: ...26 2 2 2 Z354 M3x12 Z354 M3x12 115301 5x8x0 3 115301 5x8x0 3 B022 5x11x4 Z264 2x10 Replace Axle when worn 115311 115311 115294 115294 115295 53 5 5 5 5 115301 115308...

Page 25: ...27 3 4 2 2 Z354 M3x12 Z354 03 Z353 M3x1 Z353 03 2 2 Z087 M3x20 2 100559 0 x 2 115310 115310 115322 115306 Red Red Black Black...

Page 26: ...onse Loosen Tighten Slippery High Grip Track Condition Slipper Clutch Characteristics Adjust the Slipper Clutch in 1 8 turn increments If the Slipper is too loose it can damage the Drive Gear 1 8 Afte...

Page 27: ...2 B017 4x8x3 B022 5x11x4 B030 10x15x4 10 1 Z259 2 5x15 114761 M2 5x6 1 5 Installation is reverse of removal Replace Axle when worn 115299 115299 115296 115299 115307 115292 115291 115292 115292 11529...

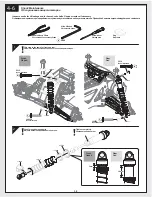
Page 28: ...amaged parts Inspect shocks for oil leakage and for bent shock shafts Repair or replace if necessary Rear Rear Front Front 106719 1 This step is the same for front and rear Rag Screwdriver 115311 1153...

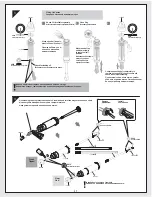
Page 29: ...Oil Shocks Check for leaking oil Stock shock oil is equiv alent to 50wt silicone oil Installation is reverse of removal If shock shaft is bent replace shock shaft and silicone O rings 6819 P3 Install...

Page 30: ...ge Batteries When the battery level indicator LED blinks in red replace the batteries with new ones immediately OFF ON Throttle Trigger To be used for throttle operation Throttle Trim To be used for C...

Page 31: ...er to cool down for 15 minutes The Overheat Protection function will turn off and you can drive the R C car again The ESC will cut off the output power if the throttle signal has been lost for 0 1 sec...

Page 32: ...nsmitter and the receiver close to each other within 0 5 meter 20 50cm MAX F 20 3 1 1 ON ON 2 2 3 Binding and Fail Safe Fail Safe Leave throttle trigger in neutral position and press the setup Once th...

Page 33: ...properly RX GR Qot need to repeat this procedure every time you run DLO 6DIH DLO 6DIH When fail safe is operatLQJ ED light will turn off fail safe When fail safe is operating Fail Safe Reference Secti...

Page 34: ...53 Z353 103729 103729 Z264 B022 Z353 Z353 Z353 Z353 Z353 115305 115313 115305 Z353 Z354 Z354 Z354 115317 115317 B022 B022 115293 115300 115300 115303 115311 115311 115311 Z354 Z354 115303 86896 115304...

Page 35: ...01 115301 115318 115322 115322 115321 115321 115306 115319 115316 100559 115319 Z663 115295 115294 Z216 115307 115298 115297 115299 115307 115322 115310 115296 Z084 Z353 Z353 Z353 Z353 Z087 B022 B017...

Page 36: ...Post Camber Link Set Front Rear 115303 Camber Link 4Pcs 115304 Steering Block Set 115305 Battery Esc Receiver Box Set 115306 Spur Gear Cover 115307 Gear Box Set 115308 12Mm Wheel Hex Hub Set 4Pcs 1153...

Page 37: ...95 2 115296 5X23 115297 115298 27 115299 22 115300 2 115301 2 115302 115303 4 115304 115305 115306 115307 115308 12 4 115309 115310 115311 10 115312 115313 115314 115315 Jump T2 8M 4 115316 90 48 1153...

Page 38: ...TE 2pcs 6 MT 2 107244 HPI HB HAULER BAG 5 DRAWERS PI HB 5 101895 PRO SERIES TOOLS 7 0MM BOX WRENCH 0MM PRO SERIE 101890 PRO SERIES TOOLS 1 5MM ALLEN DRIVER 5MM PRO SERIE 101891 PRO SERIES TOOLS 2 0MM...

Page 39: ...WP 12 6 0 101289 PLAZMA POUCH LIPO SAFE BAG 18x22cm 3O 18x22c 101941 PLAZMA 7 4V 4000mAh 20C LIPO BATTERY PACK LIPO 3LAZMA 7 4 4000 20C 74151 HPI RACING TEMP GUN HPI RACING 7 HPI RACING 101914 PRO SER...

Page 40: ...44 1...

Page 41: ...45 1 o j x J J1P...

Page 42: ...46 1 t t t t 6 3 55 XXX IQJSBDJOH DPN 1 1 1 1 t t t...

Page 43: ...47 o 1 1 XXX IQJSBDJOH DPN SFHJTUFS...

Page 44: ...com HPI Europe 19 William Nadin Way Swadlincote Derbyshire DE11 0BB UK 44 1283 229400 www hpiracing co jp HPI Japan 105 1 Shimoiidacho Minami ku Hamamatsu shi Shizuoka ken 435 0028 JAPAN 053 589 3770...

Reviews: