


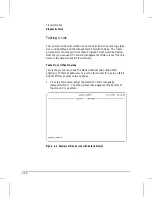


Testing a Transceiver on an Ethernet/802.3 Port
N o t e :
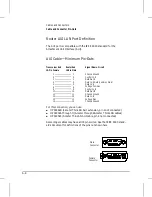
This test verifies that data written out is identical to data received and
that no collisions are detected. This test can be done with transceivers
(sometimes termed
MAUs
) such as the HP 28685B EtherTwist
Transceiver, the HP 28641B ThinLAN Transceiver, and the HP 28683A
Fiber-Optic Transceiver. (Some transceivers have a loopback test
switch that must be set to correspond to these requirements.)
1. Set the XCVR Signal Polling parameter to the default ‘‘Active’’ for the
circuit on the LAN port to be tested. To access this parameter, use
the Configuration Editor from the console, select item 4 (‘‘Circuits’’)
select the desired LAN port, and specify the Circuit Type parameter.
The console then displays the XCVR Signal Polling parameter. (For
information on the XCVR Signal Polling parameter, refer to the
Operator’s Reference
.).
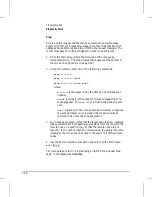
2. Detach the router’s power cord.
3. Attach the transceiver to the LAN port, and attach the required type
of loopback connector to the transceiver. If the transceiver has a
loopback test switch, enable it for the test.
4. Reattach the router’s power cord.
5. If the Net Fail LED for the tested LAN port remains unlit when
self-test completes after about one to three minutes, the transceiver
is OK and this procedure is finished. If the Net Fail LED for a tested
LAN port lights, then proceed to the next step.
6. Detach the router’s power cord and detach the transceiver from the
router. Attach an AUI loopback connector to the LAN port in place
of the transceiver. Reattach the router’s power cord. If the Net Fail
LED for the tested LAN port remains unlit this time, the transceiver
is probably faulty. If the Net Fail LED for the tested port lights, the
router’s port is faulty.
T
r
o
u
b
le
s
h
o
o
ti
n
g
3
Troubleshooting
Diagnostic Tests
3-15
Summary of Contents for Series 200
Page 1: ...Installation Guide Series 200 Series 400 HP AdvanceStack Routers ...
Page 2: ...Installation Guide Hewlett Packard Series 200 Routers Hewlett Packard Series 400 Routers ...
Page 5: ...Installation Guide Preface 4 ...
Page 9: ...1 Installation and Initial Setup ...
Page 52: ...2 Features and General Hardware Operation ...
Page 71: ...3 Troubleshooting ...
Page 90: ...A Cables and Connectors ...
Page 111: ...B Modem Configuration ...
Page 114: ...C Specifications ...
Page 119: ...D FDDI Cable Attachment Configurations ...