


537494-001
— Removing and Replacing Memory
5
10
Disconnect the cables from the drive:
The plugs on the cables are keyed and can be
inserted only when aligned properly with the
connector on the drive.
In addition, some plugs have a latch that must be
pressed or squeezed to release the plug while pulling
it from the connector.
Plugs without a latch:
For a plug without a latch, pull the plug straight
out from the connector.
Plugs with a latch:
For a plug with a latch, press the latch in the
center of the plug, and then pull the plug from the
connector.
11
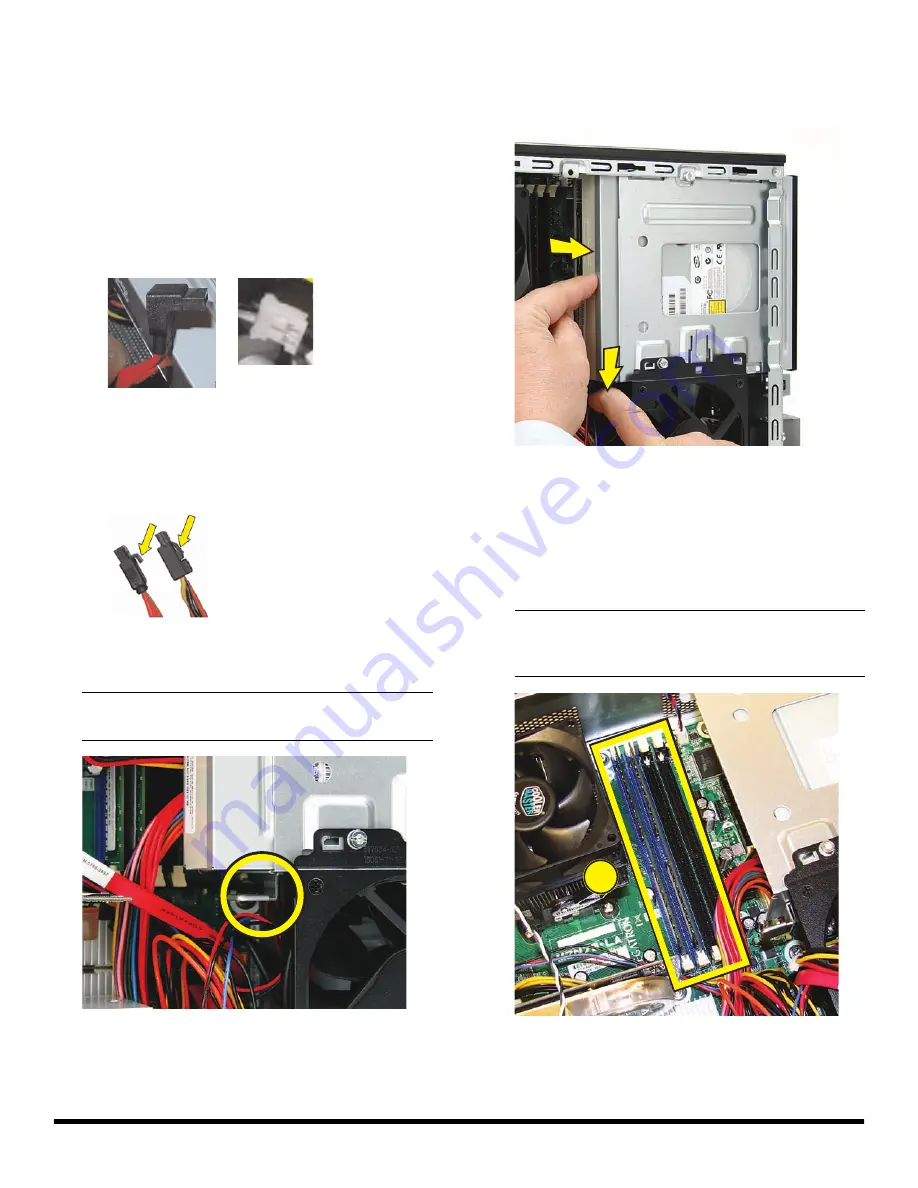
Locate the metal latch that secures the drive in
the cage.
12
Press the metal latch down while pushing the drive
partway out the front of the computer. Move the drive
far enough to have access to the memory modules.
13
Locate the memory sockets on your computer
motherboard. The memory sockets in the computer
may be paired sets, coded blue and black. The blue
sockets are filled first, starting with the largest
capacity module placed in the socket closest to the
processor (
1
) on the motherboard. This illustration
shows two memory modules installed in blue sockets.
NOTE:
The style of latch may vary by computer
model.
NOTE:
The location and number of memory sockets
may vary with the motherboard model in your
computer.
1
Summary of Contents for s5120f - Pavilion - Slimline
Page 1: ...Printed in Upgrading and Servicing Guide ...
Page 2: ......
Page 3: ...Removing and Replacing the Front Panel ...
Page 8: ...6 537498 001 Removing and Replacing the Front Panel ...
Page 9: ...Removing and Replacing the CD DVD Drive ...
Page 17: ...Removing and Replacing the Hard Disk Drive ...
Page 31: ...Removing and Replacing an Add in Card ...
Page 38: ...8 537497 001 Removing and Replacing an Add in Card ...
Page 39: ...Removing and Replacing the System Fan ...
Page 46: ...8 537499 001 Removing and Replacing the System Fan ...
Page 47: ...Removing and Replacing Memory ...